You’ll spend a lot on supplies, but you may still save money by DIYing.
Need professional help with your project?
Get quotes from top-rated pros.
What you'll need:
TOOLS
Utility knife
Measuring tape
Pry bar
Shop-Vac
4-foot level
Orbital sander (optional)
Undercut door jamb saw (optional)
Circular saw (optional)
Aviation snips (optional)
Rubber mallet or tapping block
Hand roller
Floor roller
SUPPLIES
Vinyl planks
Adhesive (optional)
Self-leveling skim coat (optional)
Resin or joint compound (optional)
Spacers (optional)
Whether you’re a pet parent, have little ones running around, or are looking for a low-maintenance option, vinyl plank flooring may be the solution for you. This type of flooring comes in different varieties, allowing you to pick the installation method you’re most comfortable with. What’s more, they resemble authentic wood flooring at a fraction of the price and can be installed over your existing floors. Use this guide to learn how to install vinyl plank flooring yourself to update the look of the entire room.
How to Install Vinyl Plank Flooring
Vinyl plank flooring, not to be confused with vinyl sheet flooring made from PVC, comes in individual pieces that can either stick to the floor using an adhesive or lock into place. Read on to learn the steps and give your floors an affordable and polished update.
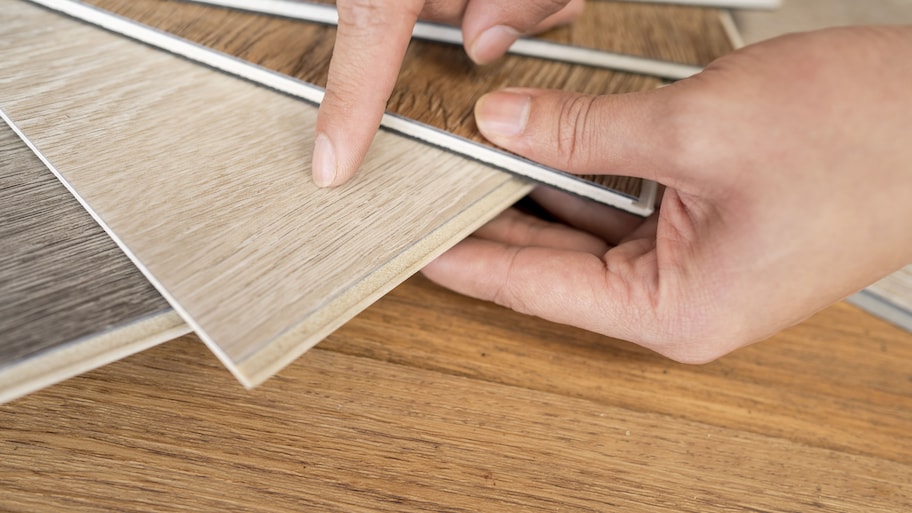
Choose the Type of Vinyl
Photo: appleyayee / Adobe Stock
There are different types of vinyl plank flooring available, so weigh the pros and cons of each to find the one that works best for you before you begin the flooring installation.
Interlocking: Interlocking vinyl planks, also known as click planks or luxury vinyl plank flooring (LVP), don’t use an adhesive and instead, connect with a tongue-and-groove system. This creates a floating floor that covers your existing floors. This type of vinyl can be completely waterproof, making it suitable for rooms prone to moisture, such as basements, bathrooms, or mudrooms.
GlueStrip: GlueStrip flooring is a type of vinyl that connects the planks together using an adhesive strip. Like interlocking vinyl planks, GlueStrip doesn’t adhere to the existing floor and instead creates a floating surface. This type of vinyl is more forgiving than interlocking planks if you have uneven floors. However, it is often water-resistant, so would not completely protect your subfloors in the event of a flood.
Glue down: Glue down flooring uses a tape or liquid glue adhesive to attach the planks to the existing flooring. They can also be found in peel-and-stick versions, where the adhesive is already attached to the back. Similar to GlueStrip vinyl, glue down can better adjust to uneven surfaces and the materials are oftentimes less expensive. However, the glue can be messy and the planks are harder to replace than interlocking versions.
Measure the Room
Photo: Vadym / Adobe Stock
Once you have decided on the type of vinyl plank flooring you will be using, take measurements of the space so you know how much to purchase. Start by measuring the length of walls to determine the total square feet of the materials needed. Take measurements of any alcoves or bump outs to refer back to later. Whichever type you decide on, purchase 10 to 15% more materials to account for any errors when cutting the vinyl and any potential replacement pieces you may need in the future.
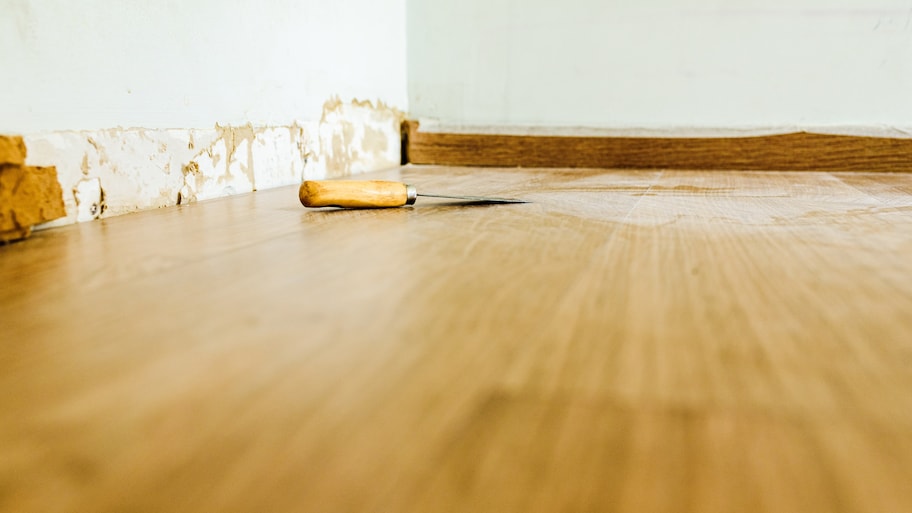
Prep the Area
Photo: Joaquin Corbalan / Adobe Stock
After you pick up the materials, be sure to bring them into the room you’ll be installing them in for 48 hours so they can adjust to their new environment.
Removing the baseboards is the next important step because it allows you to install the planks flush against the wall so they don’t lift. Take off any baseboards, shoe molding, and cap molding by pressing a utility knife into the seam of the boards and the wall to break the seal of the caulk.
Then, remove with a pry bar, taking extra care if you plan on reusing the boards. This is also a good time to install new baseboards if your existing ones are old or damaged.
Use a Shop-Vac to do a thorough vacuuming of the floor to remove any dust and dirt. This step is important, especially if you’re installing vinyl planks that have an adhesive component to ensure there isn’t any remaining debris. If the floors are particularly soiled, it’s helpful to mop and allow the floors to fully dry before moving on to the next steps.
If you are installing over a concrete floor, assess the space to ensure there aren’t any cracks in the surface. If you notice hairline cracks, seal them with an epoxy resin and opt for a patching compound for larger cracks.
Then, take a 4-foot level to the floor to make sure the floor is even. Sand down any high spots with an orbital sander and fill in low spots with a self-leveling skim coat.
Plan for Installation
Photo: Imgorthand / Getty Images
Removing the planks from the packaging and laying them out can help you visualize the space and identify pieces that may fit better together due to slight color and pattern changes during the manufacturing process.
Take this time to decide if you will run the boards horizontally or vertically. Run the boards horizontally along the most prominent wall in the room for cohesiveness within the space. If you are installing the planks in a hallway or bathroom, however, install them vertically to make the space appear bigger.
Locate any door jams in the room and undercut them using an undercut door jamb saw, so the planks lay seamlessly under the millwork.
The manufacturer of your planks will likely indicate the gap you need to leave between the walls and the new flooring to allow for expansion and contraction during weather fluctuations. You can mark the distance on the floors or use spacers for a uniform fit.
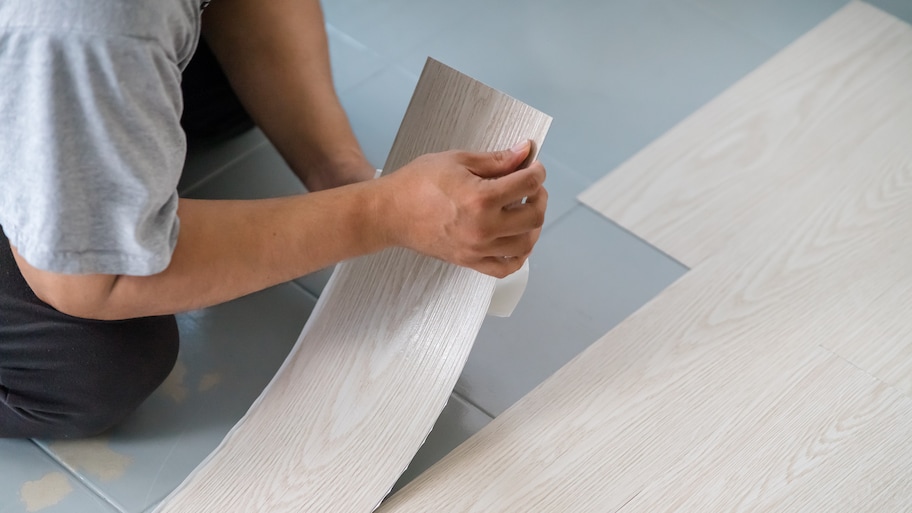
Install the First Row
Photo: appleyayee / Adobe Stock
Now, it’s time to install the first row. Depending on the type of vinyl planks you chose, the installation method will differ.
Interlocking: Start by cutting off the groove with a utility knife from the wall edge of the first plank. Lay down the plank at the appropriate spacing from the wall. Then, hold the next plank at an angle and lock it in by attaching the tongue edge into the installed plank’s grooved edge. Simply press the plank into place once the tongue and groove are locked. You can tap a rubber mallet or tapping block along the seam to fully secure them together.
GlueStrip: Lay down the first plank along the edge of the wall leaving the manufacturer’s recommended amount of space. Overlap the next strip with the exposed adhesive and press down on the top of the plank using a hand roller.
Glue down: Installing glue down strips differs from interlocking and GlueStrip a bit as you will start in the center of the room rather than against the wall. Mark the center of the room by dividing the space into quarters then create a guide line using chalk for reference. Using a trowel, apply the adhesive to the floor and allow it to set for as long as the manufacturer recommends (usually you will want a tacky consistency). Place the first strip hugging the chalk lines so it lays directly in the center. If you are using peel-and-stick, you can simply remove the adhesive backing and press the first plank firmly down in the center of the room.
Place Subsequent Rows and Finish
Photo: ellinnur / Adobe Stock
Once you have placed the first row, you can work around the rest of the room. As you work throughout the room, it’s important to stagger the planks with the previous row for natural-looking results. To stagger the flooring, start the next row by placing the plank’s seam in the middle of the seam of the previous plank. It can be helpful to cut a few boards ahead of time so you can lay the planks as you go.
Interlocking: Start on the next row by clicking in the tongue and groove to the edge of the previous row. Work around the room, trimming as needed, and tap the seams of the planks into place with a rubber mallet or tapping block. Once the flooring is installed, you can replace the baseboards.
GlueStrip: Install the next row by pressing the planks against the strips of the first row. Work around the room until all the planks have been installed. Go over the entire floor with a floor roller to ensure full adhesion of all strips. Then replace the baseboards to complete.
Glue down: After the center row has been installed, work in a parallel direction by applying the adhesive and then butting the boards up against the neighboring strip. Be careful not to apply too much adhesive so the glue doesn’t seep out from the seams. Once the entire floor has been installed, go over the strips with a floor roller for best results. Wipe away any excess adhesive then replace the baseboards.
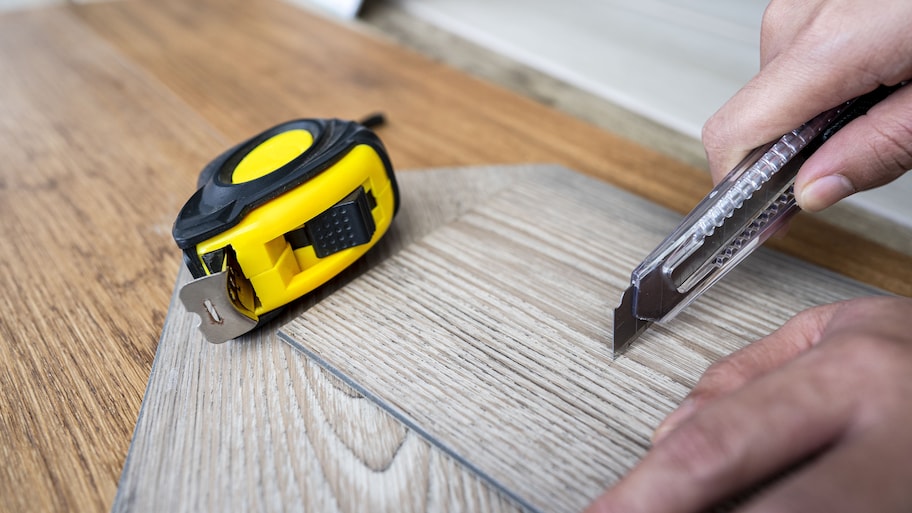
Make Special Cuts In the Planks (Optional)
Photo: appleyayee / Adobe Stock
When learning how to cut vinyl planks, it’s important to note that you will mostly be using a utility knife to score and then break at the seam to get a straight edge. This work is usually done while you’re installing the boards. However, some circumstances may require more specialized cuts and tools ahead of time, so it’s helpful to familiarize yourself with these methods for a smooth installation process.
Crosscuts: A crosscut is made by cutting the plank perpendicular to the length of the board. When cutting vinyl, make sure that the crosscut is straight so it snaps easier and seamlessly connects to the next piece. To make a crosscut, use a sharp utility knife and firmly press the blade into the plank to score it. Then, simply bend the board back and snap the plank to break it.
Long rip cuts: Sometimes, you may need to cut into the width of the plank if the board is too wide. These cuts are made parallel to the plank and can be done by scoring with a utility knife and then snapping off the piece. Because these cuts are longer, it can be more difficult to get a clean snap, especially if it’s a thin strip that needs to be cut. In this scenario, some may choose to cut the plank using a circular saw to ensure a perfect edge.
Cutting around curves: If you have a curved area in the room, you can either mark the boards or create a template using paper, then transfer it to the board to make your cuts. Score with a utility knife and snap off the rest, or you can use aviation snips for more curved spaces that are difficult to snap off.
Considerations When Choosing Vinyl Flooring
There’s a wide variety of vinyl flooring options available and between the different colors and installation methods, choosing the right one can be a bit overwhelming. Here are a few things to keep in mind when shopping around:
Amount of use the room gets: If you’re installing flooring in a highly-trafficked area, you will want to choose a more durable option. Look for waterproof vinyl for rooms like basements or bathrooms, which may be subject to more moisture.
Color: Pick colors that compliment your personal style as well as the overall aesthetic of the room. Keep in mind that darker colors are more likely to show scuffs and dirt and require more maintenance.
Wear layer: A “wear layer” is the topcoat and finish (usually urethane-based) that protects the vinyl planks, measured by its overall thickness (mils). A higher mil indicates a thicker and more durable vinyl but it will be less economical. The three main levels to look for are no-wax vinyl (stain-resistant but more prone to scuffs), urethane (stain and scuff resistant, which can help when cleaning vinyl plank flooring), and enhanced urethane (the most durable, stain and scuff resistant, easiest to clean).
Budget: The price of vinyl can vary so think about the use of the flooring when budgeting. You can find lower-priced vinyl, but keep in mind that it may not last as long in rooms that have a lot of daily use because of its thinner wear layer. There are plenty of warrantied options as well so you have added protection once the floors are installed.
Style: Some vinyl planks resemble natural hardwood by mimicking a wood grain, while others can look like stone or tile. What’s more, certain types of vinyl planks can be patterned or more decorative, and add character to the space.