How to Attach a Pergola to Your House in 7 Steps

Turn your patio into an outdoor oasis

Elisa Greenberg
Written by Elisa Greenberg
Updated August 29, 2022
A view of a pergola attached to a house
Photo: JRP Studio / Adobe Stock
Difficulty

Expert

This one takes some serious know-how.

Time to complete

48 hours

About a week, plus extra time for staining your wood.

Cost

$700–$1,000

Consider letting a pro with all the equipment handle this one.

Need professional help with your project?
Get quotes from top-rated pros.

What you'll need:

TOOLS

  • Drill
  • Miter saw
  • Jig saw
  • Circular saw
  • Hammer
  • Mallet
  • Ratchet
  • Ladder
  • 4-foot level
  • Measuring tape
  • Carpenter’s square
  • Nail gun (optional)
  • Paintbrush (optional)
  • Sprayer (optional)
  • Roller (optional)
  • Safety glasses
  • Gloves

SUPPLIES

  • 3 pieces of 4 x 4 beams
  • 14 pieces of 2 x 8 beams
  • 12 x 6 beam
  • Galvanized post bases
  • 1 box of galvanized nails
  • 1 box of lag screws
  • 1 pack of 1/ 4-inch concrete screws
  • 1 pack of expansion anchors
  • 48-inch carriage bolts
  • 1 gallon of exterior wood stain
  • Caulk
  • Flashing
  • Chalk

If you dream about dining al fresco under a trellis of beautiful climbing plants, you should consider attaching a pergola to your house. Pergolas enhance your outdoor space and provide a great place to entertain or relax. Our guide will show you how to attach a pergola to your house in seven steps.

Prepping to Attach a Pergola to Your House

A view of a wooden pergola
Photo: faithie / Adobe Stock

Before embarking on your attached pergola project, you’ll want to ensure that your space is ready and that you choose strong and long-lasting materials.

Ensure Your Space Is Ready

You’ll want to build your pergola on top of an existing patio, deck, or concrete slab. Before you create your pergola, it’s a good idea to get an inspection from a local deck and porch contractor—this way, you’ll be sure that your deck can withstand the weight of a pergola.

Design Your Dream Pergola

You’ll need to create a set of blueprints with dimensions, components, and costs. If you’re unsure whether your plans comply with local building codes, we recommend hiring a local building contractor to review or create plans for you. 

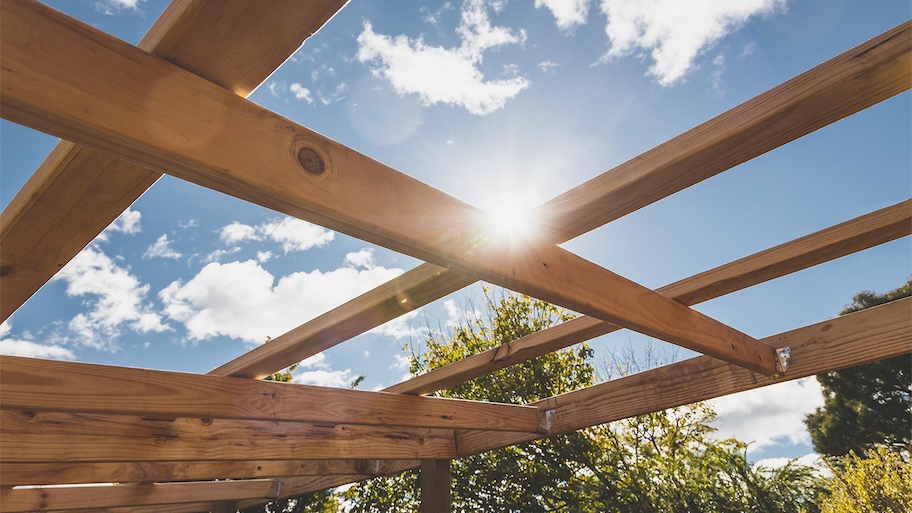
Choose the Right Material

Not only do you want your pergola to look stylish, but you also want to ensure it’s durable and long-lasting. The sturdiest material choices include:

  • Pressure-treated pine: This is a budget-friendly option that resists rot and mold—and keeps bugs away. Pressure-treated wood requires regular staining and painting to keep mold and fungus at bay.

  • Cedar: A robust, popular choice that stands up to rot, mold, and pests, cedar also has a beautiful sheen and scent. This wood is prone to fading over time, so you’ll need to reapply a stain every couple of years. 

  • Vinyl: For those seeking a non-wood option, vinyl provides ease of maintenance and durability. Vinyl is sturdy, long-lasting, and resistant to bugs and mold—but it also costs more than traditional wood.

How to Purchase Supplies

Experienced woodworking and homebuilding DIYers should have all the tools they need for this project. And you should have no problem selecting lumber and picking out the right supplies from your local hardware store.

You can also find pergolas in pre-fabricated kits. Many of these kits are custom-made to fit your deck’s dimensions, and best of all, they come with all the materials needed to complete your project (we’re talking pre-cut and pre-notched wood beams). Although, you’re still going to need power tools.

Finally, you can always hire a pergola builder near you—not only will pros come with all the necessary tools, but they will also purchase the supplies. Plus, you can check their references and see examples of their work, so you know you’re in good hands.

Pro tip: Building an attached pergola is a multi-person job. So you’ll need at least two people to complete this project.

  1. Mark Your Vertical Lines

    • Grab your level, and mark two vertical lines—running from your home’s soffits (your roof’s overhang) down to the patio. A typical pergola is at least 9 feet tall.

    • Space the two lines at your desired width, which is typically the same length as your patio.

    • Take a measuring tape and measure inside the two vertical lines. This measurement will give you the dimensions for your ledger.

  2. Attach the Ledger

    • Cut three 2 x 8 beams with a circular saw (one for your ledger and two for the first roof layer).

    • Hold the ledger against your house (one person holding each end) to measure notches where four of the second-layer beams will go.

    • Take the ledger down. Measure and mark the depth on the ledger with a straight piece of scrap wood (this is where the notches will go).

    • Cut out the four notches with a jigsaw.

    • Grab your level, drill pilot holes, and attach the ledger to the side of the house with eight lag screws.

    • Tighten the screws with a ratchet.

    • Add weatherproofing to the ledger—caulk or flashing to keep moisture out and prevent rotting.

  3. Install 2 Posts

    • Take two post brackets and line them up with your ledger on the opposite side of your patio.

    • Mark the centers of the brackets with chalk and pre-drill 1/2-inch holes at the marks.

    • Place expansion anchors in the holes and tighten them with a ratchet (you can also use concrete screws instead of expansion anchors).

    • Install a post support inside the bracket to keep the wood post from touching the concrete. This helps prevent rot.

    • Take your wood posts and vertically insert them into the post brackets.

    • Make sure the post is level before securing it with nails.

    • Take a hammer and secure the bracket to the post with heavy-gauge galvanized nails.

    • Grab a 2 x 6 beam, attach and screw in temporary stakes and braces to the posts. 

    • Clamp the braces to the post to keep the posts vertical for the remainder of the project.

    • Ensure both posts are level before proceeding.

  4. Install 2 End Beams

    • Take two 2 x 8 end beams and carve notch marks with a jigsaw to match the edge of the ledger beam.

    • Take an adjustable clamp and temporarily hold the end beams against the posts.

    • Take a drill and pre-drill holes. 

    • Take stainless steel screws (or lag screws) and drill them into the posts. Add carriage bolts for additional security.

    Optional: you can add two 45-degree braces to the inside corners between the posts and beams for added stability.

  5. Cut a Design in Your Second Layer Beams

    Before putting up six second-layer 2 x 8 beams, you may want to add a decorative curve on one end of the beam. This design choice elevates your space and provides visual interest, as the beam overhangs the length of your deck.

    • Hand-sketch a design on a piece of scrap wood.

    • Cut the design using a miter saw and sand the edges.

    • Trace your shape on the end of each of the six beams and cut the beam using a circular saw.

    • Cut eight notches using a jig saw on each beam.

    • Add the second layer cross beams perpendicular to the first layer, and interlock them.

  6. Add the Third Layer of Cross-Beams

    • Grab eight 2 x 8 beams for your third layer.

    • Measure and cut six notches using a jig saw. Make sure to cut these notches shallower so your third layer beams are raised above the rest.

    • Interlock each of the eight beams to the second layer and use a mallet to keep them securely in place.

    • Remove the temporary stakes and braces.

  7. Stain the Wood (Optional)

    Depending on your wood, you can add an exterior wood stain to your beams. Apply the stain to the wood with a sprayer, paintbrush, or roller and wipe the excess with a rag. Allow the stain to dry for 24 hours. Apply a second coat if necessary.

DIY vs. Hire a Pro

You can save $500 to $1,000 in labor costs if you attach a pergola to your house by yourself. You’ll have to factor in the costs for materials and any additional decorative elements. You can expect to pay between $1,000 to $5,000 for a pre-fabricated pergola kit. You’ll still need the necessary tools to ensure proper installation. You can expect to pay between $3,000 to $6,000 for a professionally–designed and built pergola. This option comes with peace of mind, and you’ll know that all of your design wishes will come true.

Frequently Asked Questions

Pergolas can last between five and 12 years as long, as you provide the proper upkeep. Make sure to clean, stain, and seal wood pergolas every two to three years. 

The only problems you may encounter for vinyl or aluminum are weather-related—heavy rain storms or snowfalls. Check the stability of your pergola every season. You may need to add new supports or replace broken beams.

Need professional help with your project?
Get quotes from top-rated pros.