Avoid hitting a wall with your DIY shower tile project with this comprehensive guide
Is there anything more exciting to an expert DIYer than the tile aisle of the hardware store? From delicate glass tiles to white-and-black subway tiles, shower tile ideas for your bathroom are truly endless. Tiling a shower wall by yourself can save you a couple of thousand dollars, but only if you're incredibly confident in your measuring, leveling, waterproofing, and wet saw skills. We'll walk you through how to prepare your shower wall and—fingers crossed—install wall tile that is even, sealed, and stunning.
Difficulty: 4/5: Big project; big rewards.
Time to complete: 3 to 4 days
Cost to DIY: Average of $800 for the tile plus the cost of tools and supplies
What You'll Need
Tools
Protective goggles, gloves, mask, and earplugs
Drill
Level (bubble or laser)
Chalk snap line
1/4-inch notched trowel
Wet tile saw
Jigsaw
Hole cutter drill bit
Tape measure
Caulk gun
Rubber grout float
Paint roller
Wooden story pole
Clean sponges
Protective floor tarp
Wet and dry vacuum cleaner
Supplies
Shower wall tile
Accent tiles
Cement backer board
Concrete screws
Cement board tape
Thinset mortar
Tile spacers
Liquid waterproofing membrane
Silicone grout
Grout sealant
Grout haze cleaner
Prepping Your Area
Tiling a shower wall comes with a hefty list of materials. And since time is of the essence—especially if you only have one bathroom—it's essential to gather all of your supplies before you begin.
Turn off the electricity behind your shower wall. You'll be securing the backer board into studs and don't want to risk hitting a live wire.
Unless you're adding tile to a brand-new bathroom, you’ll likely need to remove the old tiles or cut away the original plastic stall with a reciprocating saw. Clean up any debris as you go with a wet and dry vacuum cleaner to avoid slipping.
Ensure the wall behind the old drywall or backer board is clean and void of mold or water damage. This is just one reason why it's invaluable to have an alternate bathroom available during construction. If you find any issues behind the old tile, you'll need to call a local water damage restoration company before proceeding.
If all looks good, protect surfaces by laying down a cloth tarp on your floors and shower pan, and get ready to dive in.
7 Steps to Tile a Shower Wall
One last thing: we recommend setting aside an outdoor workstation before beginning. It's best to cut concrete backer boards outside to avoid breathing in silica dust. We also recommend designating a staging area for your tiles, so you know that everything fits and looks great before breaking out the thinset.
1. Choose Your Tiles

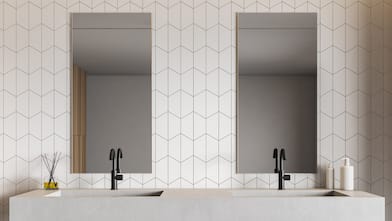
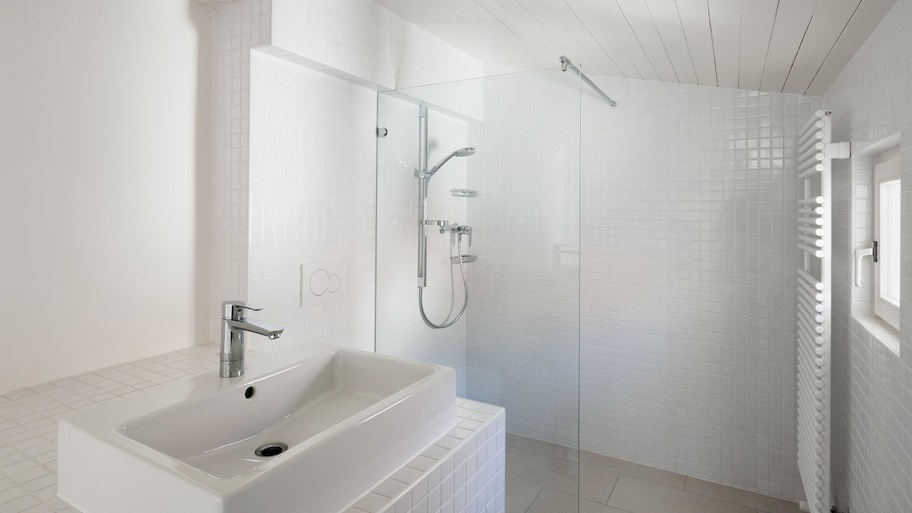
Let's start with the fun part and pick those tiles. Shower wall tiles come in a few common materials: porcelain, ceramic, glass, and travertine. You can also go out on a limb with unique spa-like materials, such as pebbles, granite, and slate. Each of these is waterproof enough to handle the shower water but varies in durability and price.
2. Stage Your Tile Layout
It should be easier to envision the ideal layout of your tiles once you have them in hand.
While a standard grid pattern is most traditional—and easiest for newbies—you can also opt for alternating brickwork or subway tile patterns, diamond shapes, or a combination of small and large tiles.
Choose your tile spacers in this stage as well, as these small separations will play a large role in your measurements.
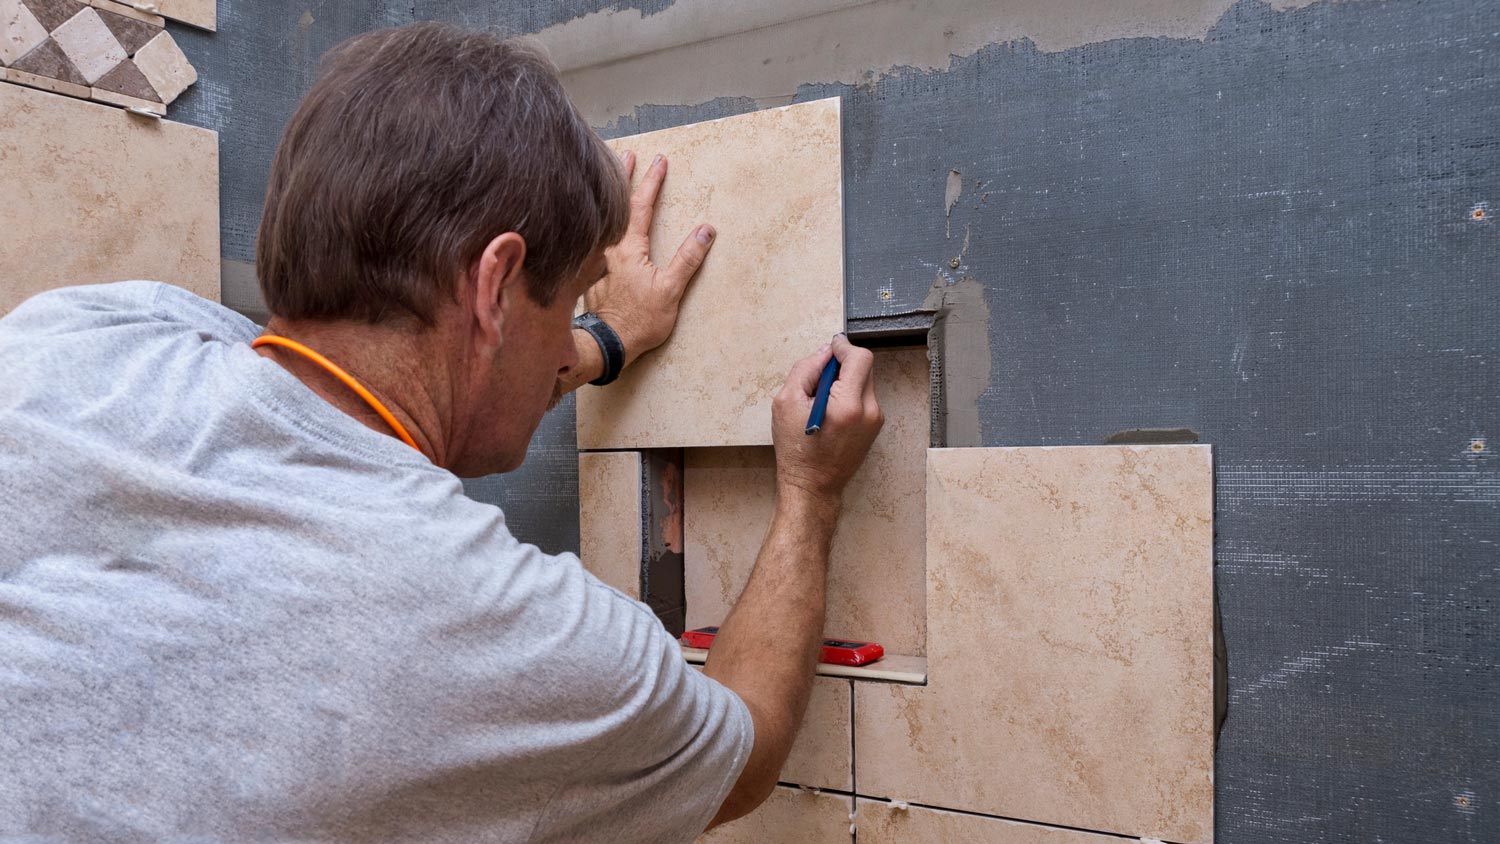
Measure the size of your shower wall and lay out your intended tile design on the floor to double-check your math. Also, since your tiles are unlikely to fit the exact measurements of your wall, you'll need to cut the tiles that butt up against any corners.
To ensure horizontal symmetry, split the difference between two tiles on either side of the wall instead of only cutting the last tile that meets one side of the wall. It's best to have full-sized tiles at the top of the wall and partial tiles at the bottom, so be sure to measure accordingly from the ceiling.
3. Waterproof the Wall
Measure the empty wall and cut your cement backer board to the proper shape. It's best to work with a thicker backer board—about half an inch is best. Due to its thickness, you'll need a jigsaw or table saw to cut through the cement and a hole saw to make way for the faucet and knobs.
Attach the backer board to your wall with concrete screws and a drill, applying screws every 4 inches along the seams and every 6 inches inside the board. Don't worry about the separation between the cement boards and your cutouts. Close up this area with cement board tape, and smooth it down with a small amount of thinset and the flat side of your trowel.
Last but not least, break out the paint roller to apply a layer of waterproof membrane according to the can's instructions. During the several-hour drying phase (this varies), take a well-earned break.
4. Prepare to Tile
Create what's known as a story pole to help transfer the tiles from the mock layout to your wall. Mark the standard distance between tiles and your tile spacers, so you don't have to measure every time.
When you add the tiles to the wall, start with the second row from the bottom. As we mentioned earlier, the very bottom row will likely include partial tiles precisely measured to fit that row, so add a piece of pre-measured scrap wood in place of this row for now.
Measure the top of the second row again and confirm with a spare tile. Using a level, mark the row with a snap chalk line.
5. Apply the Thinset
Mix the thinset according to the label's instructions, either by hand or with a mixing tool on your drill. Once the thinset matches the consistency of peanut butter, apply a thin layer to the area directly behind where the first two or three tiles will go. Thinset dries quickly, so only apply one layer of thinset and tiles at a time.
Most professionals recommend beginning at the center of your tile grid and working your way out to the edges and complete the trimmed tiles last. Smooth the thinset with the notched side of your trowel for texture.
6. Secure the Tiles
If you're working with larger tiles, add a small amount of leftover thinset from your trowel to the back of the tile as well—though this isn't necessary for small tiles. Press the tile firmly but gently enough to keep the cement from spreading too far. You can wiggle the tile slightly to ensure it’s connected. Remember to add tile spacers between each tile and its neighbors.
Add your rows upwards toward the top of the wall until you reach the ceiling, leaving space along the edge of the walls for any partial tiles. Remeasure the remaining spaces, and add the trimmed tiles to the bottom and side rows.
7. Grout the Tile Wall

After the thinset fully dries—which typically takes between 24 and 48 hours—prepare your grout and spread it with a rubber float across the new tile. Make sure it fills every tile joint. You'll need to wait an additional 24 to 72 hours for the grout to dry before you can use the grout sealant—an important step for waterproofing shower tile.
Clear away the remaining unwanted grout and sealant with a grout haze cleaner and a soft cloth.
DIY Tiling a Shower Wall vs. Hiring a Pro
Just a quick glance at the tools and supplies list is enough to show that this is no small DIY feat. However, if you already have most of the necessary power tools, you could save a good deal of money by doing it yourself. The average cost of pro bathroom tile installation is $2,000. But you can save between $600 and $800 on your overall budget by cutting out the cost of labor.
The final cost will also come down to the type of tile you choose, the cost of initial deconstruction, and whether you choose to bring in a local waterproofing expert to check your work.
Additional Questions
While every shower tiling project is a bit different, there are a few frequently asked questions from home DIYers.
Is there an ideal temperature for tiling a wall?
If your bathroom gets too hot or cold, the various adhesives will not secure as tightly. Before starting, be sure your bathroom temperature falls between 50 and 70 degrees Fahrenheit.
How much does it cost to repair wall tiles?
Replacing a section of shower wall tiles is a much smaller project than starting from scratch. You may not need to remove and replace the backer board or re-waterproof the area. A typical DIY tiling repair project costs about $22 per square foot, or between $280 and $340 if you hire a local tiling pro.
When should I call a professional?
Since tiling your shower wall is already a large undertaking, small details can push it from a DIY to a pro project. Mold, water damage, and structural changes—such as adding a shower niche—all require the eye of an expert. Also, if you need to adjust the plumbing or wiring surrounding the shower wall, you may need a permit and a licensed professional.