Lawnmower took your sewer pipe cap for a joy ride? Check out these tips to replace it and keep your sewage contained
Nothing’s worse than when you’re mowing your lawn and you hear an unexpected noise—that doesn’t sound like grass cutting—only to find out that you went too close to your sewer pipe cap, and now it’s broken.
But before you prepare to replace it, there are a few things you need to know to make the process easier and safer. In this guide, we’ll review some must-know tips for broken sewer pipe cap repair, plus why you should even care about it in the first place.
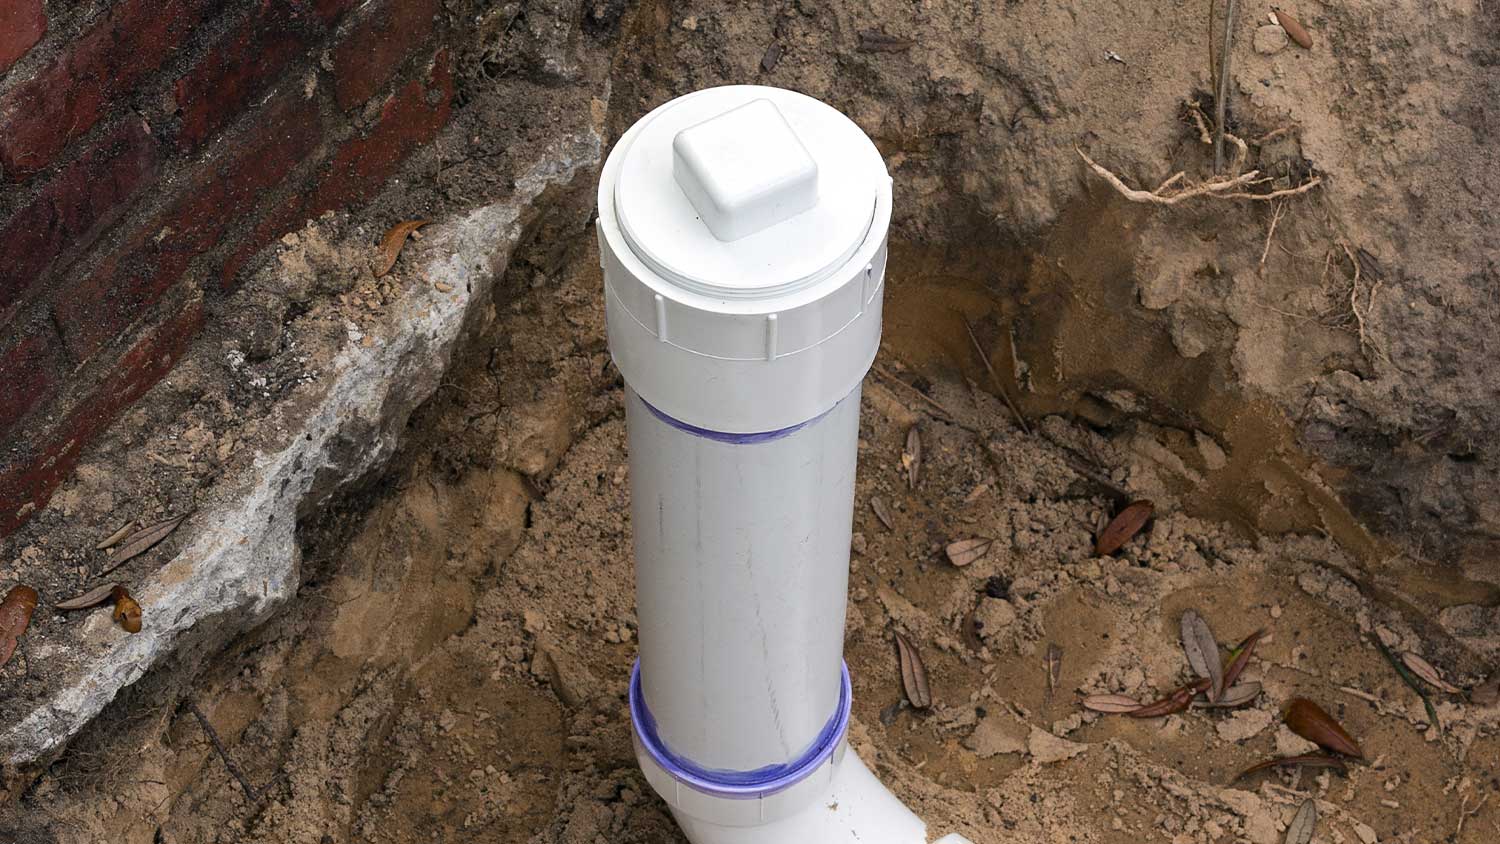
What Is a Sewer Pipe Cap?
A sewer pipe cap, also known as a sewer cleanout plug, is a removable cap that gives you or a licensed plumber access to your sewer line when it needs maintenance, like during a sewer backup.
But if it’s missing or broken, here are a few things that can happen to your sewer system if you don’t fix it:
Rainwater can enter it and cause rust and corrosion
Dirt and debris can lead to blockages
Small animals can get stuck inside and clog your sewer line or enter your home
Shorten the sewer system’s lifespan
Without a cap, nothing prevents toxic and non-toxic gases like methane and hydrogen sulfide from slowly escaping your sewer system and entering your home and the surrounding atmosphere, resulting in a foul odor.
For a plumber to fix any of these problems, they’ll need to use a sewer line camera to see what’s going on, which can cost $250 to $1,175. And to clean the sewer line to remove whatever’s in there can cost $100 to $600, depending on the method.
Needless to say, tackling this task before anything gets inside your sewer line can save you time and money.
Tips to Fix Your Sewer Pipe Cap
Before you replace your broken sewer pipe cap, keep these handy tips in mind to make the process go as smoothly as possible.
1. Purchase the Right Plug Size
To get a replacement plug, the first step is to make sure that you know what type of plug you need. So, start by measuring its size, which can range from one-half to four inches in length, because this isn’t something you want to eyeball. We recommend using a measuring tape to accurately assess the dimensions of the plug.
2. Identify the Material
Depending on how much of the sewer cap is left, you can identify what kind of material it’s made of before you purchase a new one. Most sewer caps are made from metal, ABS, or PVC material. In most cases, the sewer pipe cap is made from the same material as the sewer pipe itself. So, cross-check the pipe material to see what you need.
3. See If It’s Stuck
Some sewer cleanout caps are a cinch to remove—others, not so much. Over time, it’s common for some caps to become rusted and fused to the threads, making it a headache to replace. While this happens more frequently with cast-iron fittings, it’s also possible if you have a plastic one.
So, if your sewer cleanout plug is stuck, here are a few methods you can use to unscrew it:
Elbow grease: Sometimes, the only thing required is to apply a little extra strength to get the cap to come off. But be careful: If you feel like it’s taking too much force to remove it, stop and try something else.
Heat: Heat has always been an effective way to loosen up any stubborn material. For cast-iron fittings, use a propane torch to loosen the threads. If you have a plastic-fitting, a torch might melt it, so use a hairdryer instead. If you decide to use heat, use caution so you don’t burn yourself.
Penetrating catalyst lubricant: If rust is causing the threads and cap to be stuck together, you can also apply this type of lubricant to loosen the threads. However, never apply lubricant to a hot cleanout cap or pipe because lubricant is a flammable substance.
Hammer: Just a few taps from a framing hammer or sledgehammer should make it easier for you to unscrew the sewer cleanout cap.
Wrench: By placing a wrench on the plug’s nut and turning it counterclockwise, you might be able to loosen it up enough for the cap to come off.
If none of these methods help you remove your cap, then you might need to cut out the fitting to replace it. But if you’re not comfortable cutting it yourself, contact a sewer service to do it for you.
It’s also worth noting that your threads won’t hold a new sewer pipe cap if the previous one was stuck. So, you might need to use a rubber coupling to get the threads to seal correctly.
4. Fix the Issue Quickly
We get it, the cap broke, but as long as your sewer pipes are still functioning, then there’s really no rush, right? Unfortunately, if you discover that your cap is no longer protecting your sewer cleanout, then you need to grab the necessary materials and fix it immediately.
5. Be Careful When Removing Broken Cap
If there’s any blockage in your sewage system, you can potentially release pressure buildup and sewage water onto your property by removing the cleanout cap. But this depends on whether there’s any blockage present and how your cap broke. Just exercise caution when completing this task.