Setup guide for React Native development (macOS)  Edit
Edit
Are you interested in contributing to the native mobile editor? This
guide is a detailed walk through designed to get you up and running!
Note that the following instructions here are primarily focused on the
macOS environment. For other environments, the React Native quickstart documentation
has helpful pointers and steps for getting set up.
Install Xcode Install Xcode
Install Xcode via the app store. We’ll be using
the XCode to both compile the iOS app and use the phone simulator app.
Once it has been installed from the App Store, open it by visiting Applications > Xcode
After opening the application:
- Accept the license agreement.
- Verify that
Xcode > Preferences > Locations > Command Line Toolspoints at the current Xcode version.

Clone Gutenberg Clone Gutenberg
If Xcode was installed successfully, we’ll also have a version of git available. (It’s possible to
update this later if we want to use a more recent version).
In a terminal run:
git clone [email protected]:WordPress/gutenberg.git
Install node and npm Install node and npm
If you’re working in multiple JS projects, a node version manager may make sense. A manager will let you
switch between different node and npm versions of your choosing.
Some good options are nvm or volta.
Pick one and follow the install instructions noted on their website.
Then run:
nvm install lts/*
nvm alias default lts/* #sets this as the default when opening a new terminal
nvm use #switches to the project settings
Or
volta install node #defaults to installing lts
Then install dependencies from your Gutenberg checkout folder:
npm ci
Do you have an older existing Gutenberg checkout? Do you have an older existing Gutenberg checkout?
If you have an existing Gutenberg checkout be sure to fully clean node_modules and re-install dependencies.
This may help avoid errors in the future.
npm run distclean
npm ci
Unit Tests Unit Tests
Unit tests should work at this point.
npm run native test
iOS iOS
The easiest way to figure out what needs to be installed is using the
react native doctor. From your checkout, or
relative to /packages/react-native-editor folder, run:
npx @react-native-community/cli doctor

See if doctor can fix both “common” and “iOS” issues. (Don’t worry if “Android” still has ❌s at this stage, we’ll get to those later!)
Once all common and iOS issues are resolved, try:
npm run native start:reset #starts metro
In another terminal type:
npm run native ios
After waiting for everything to build we should see:

Android Android
To keep things simple, let’s use Android Studio for all JDK and SDK package management.
The first step is downloading Android Studio.
Next, open an existing project and select the gutenberg folder you cloned:
Click on the cube with the down arrow:
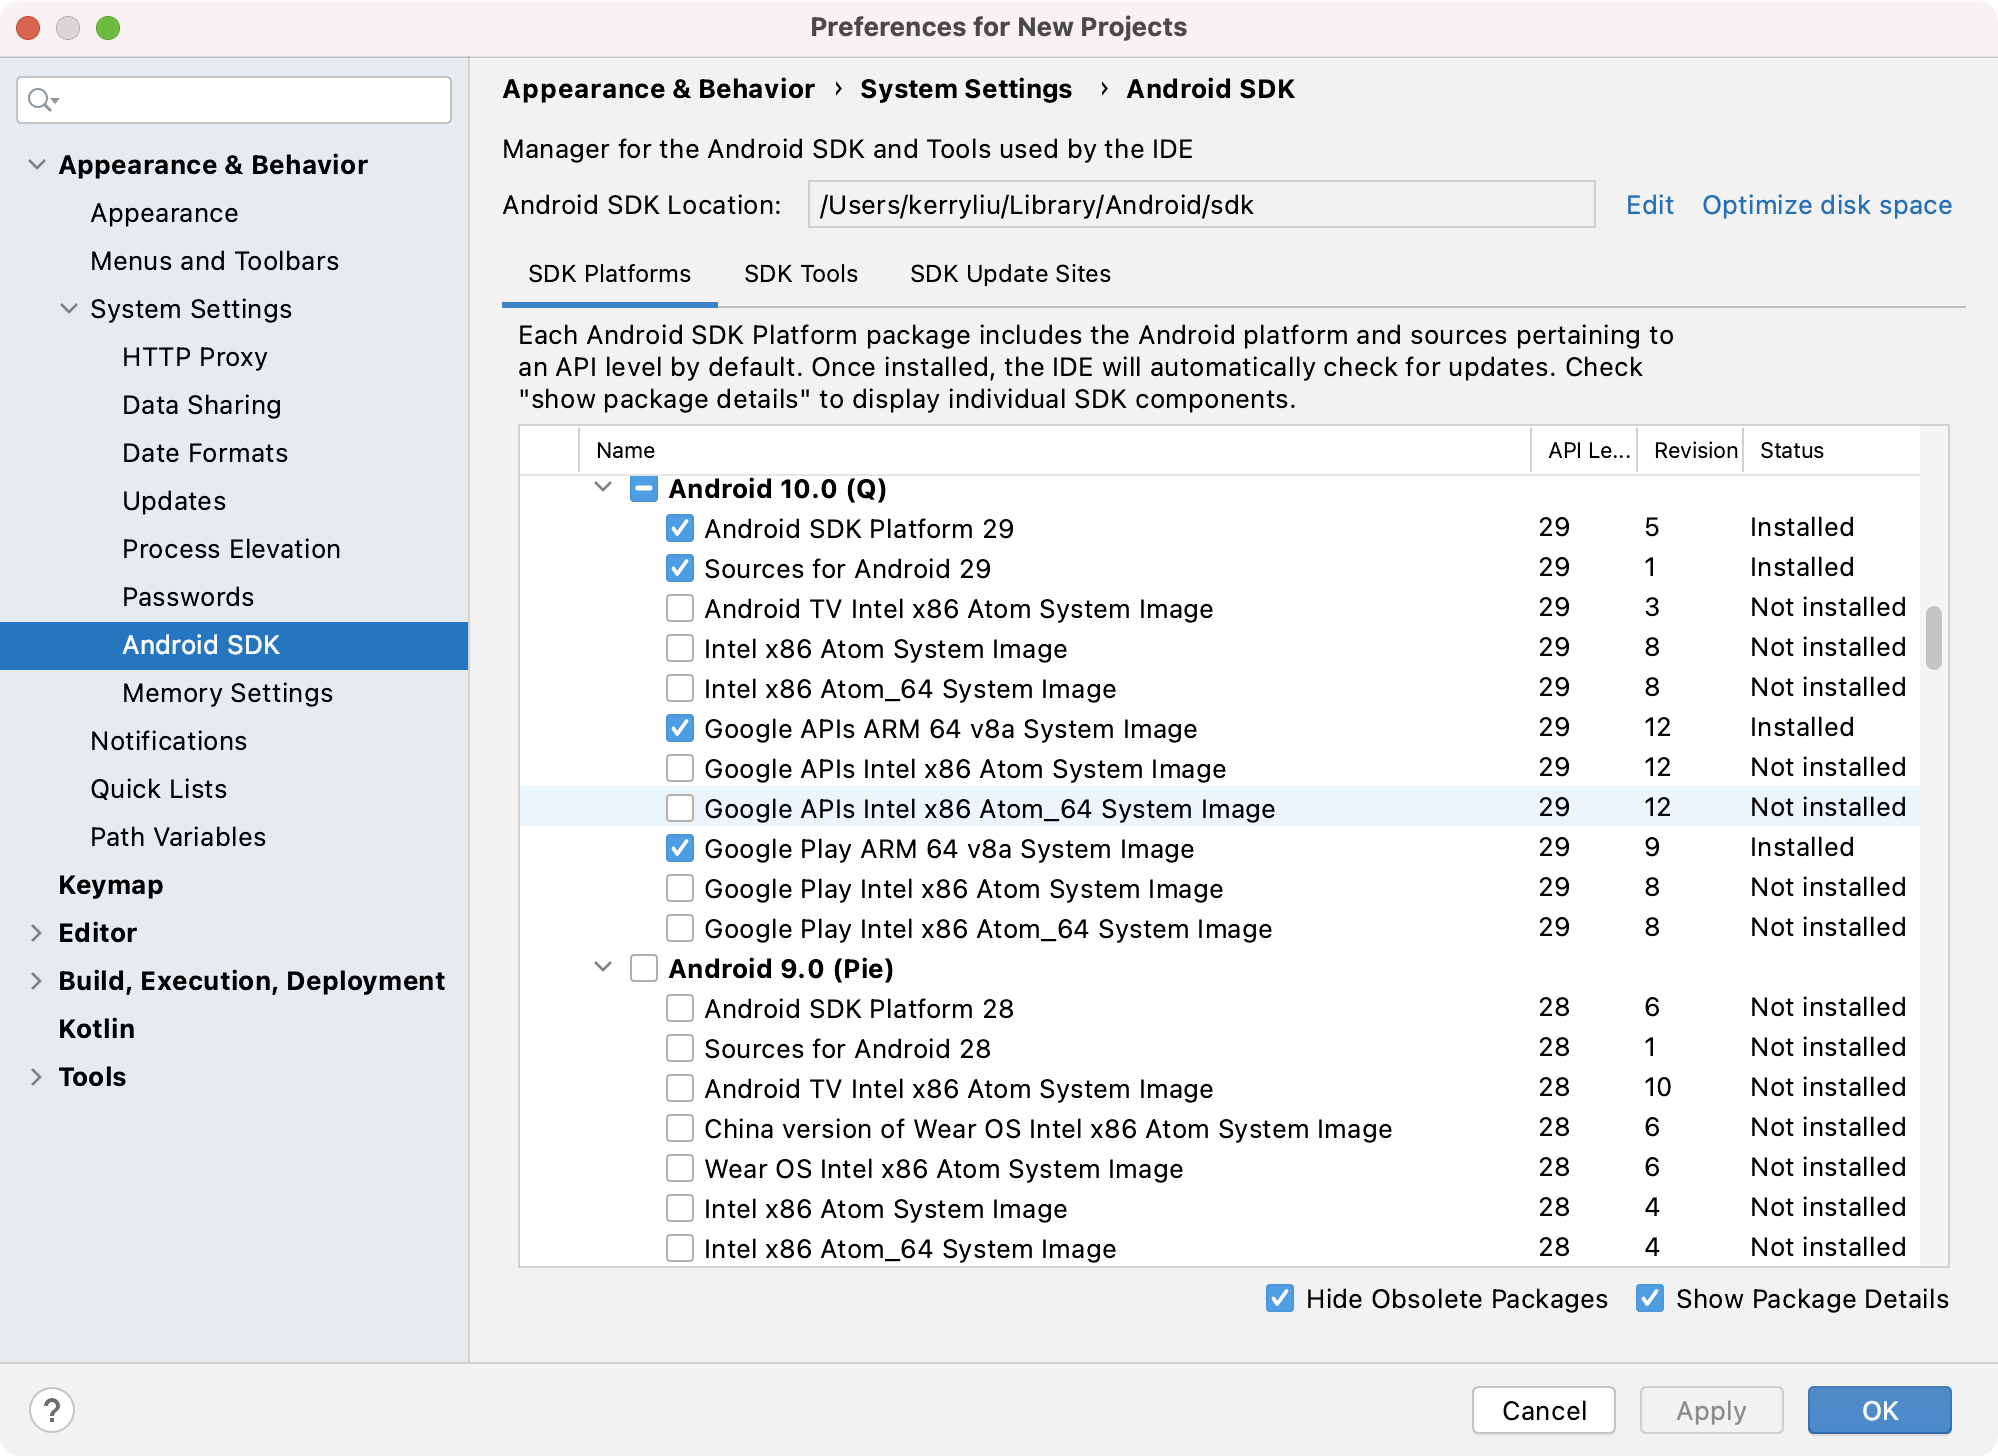
We can download SDK platforms, packages and other tools on this screen. Specific versions are
hidden behind the “Show package details” checkbox, check it, since our build requires specific versions for E2E and
development:
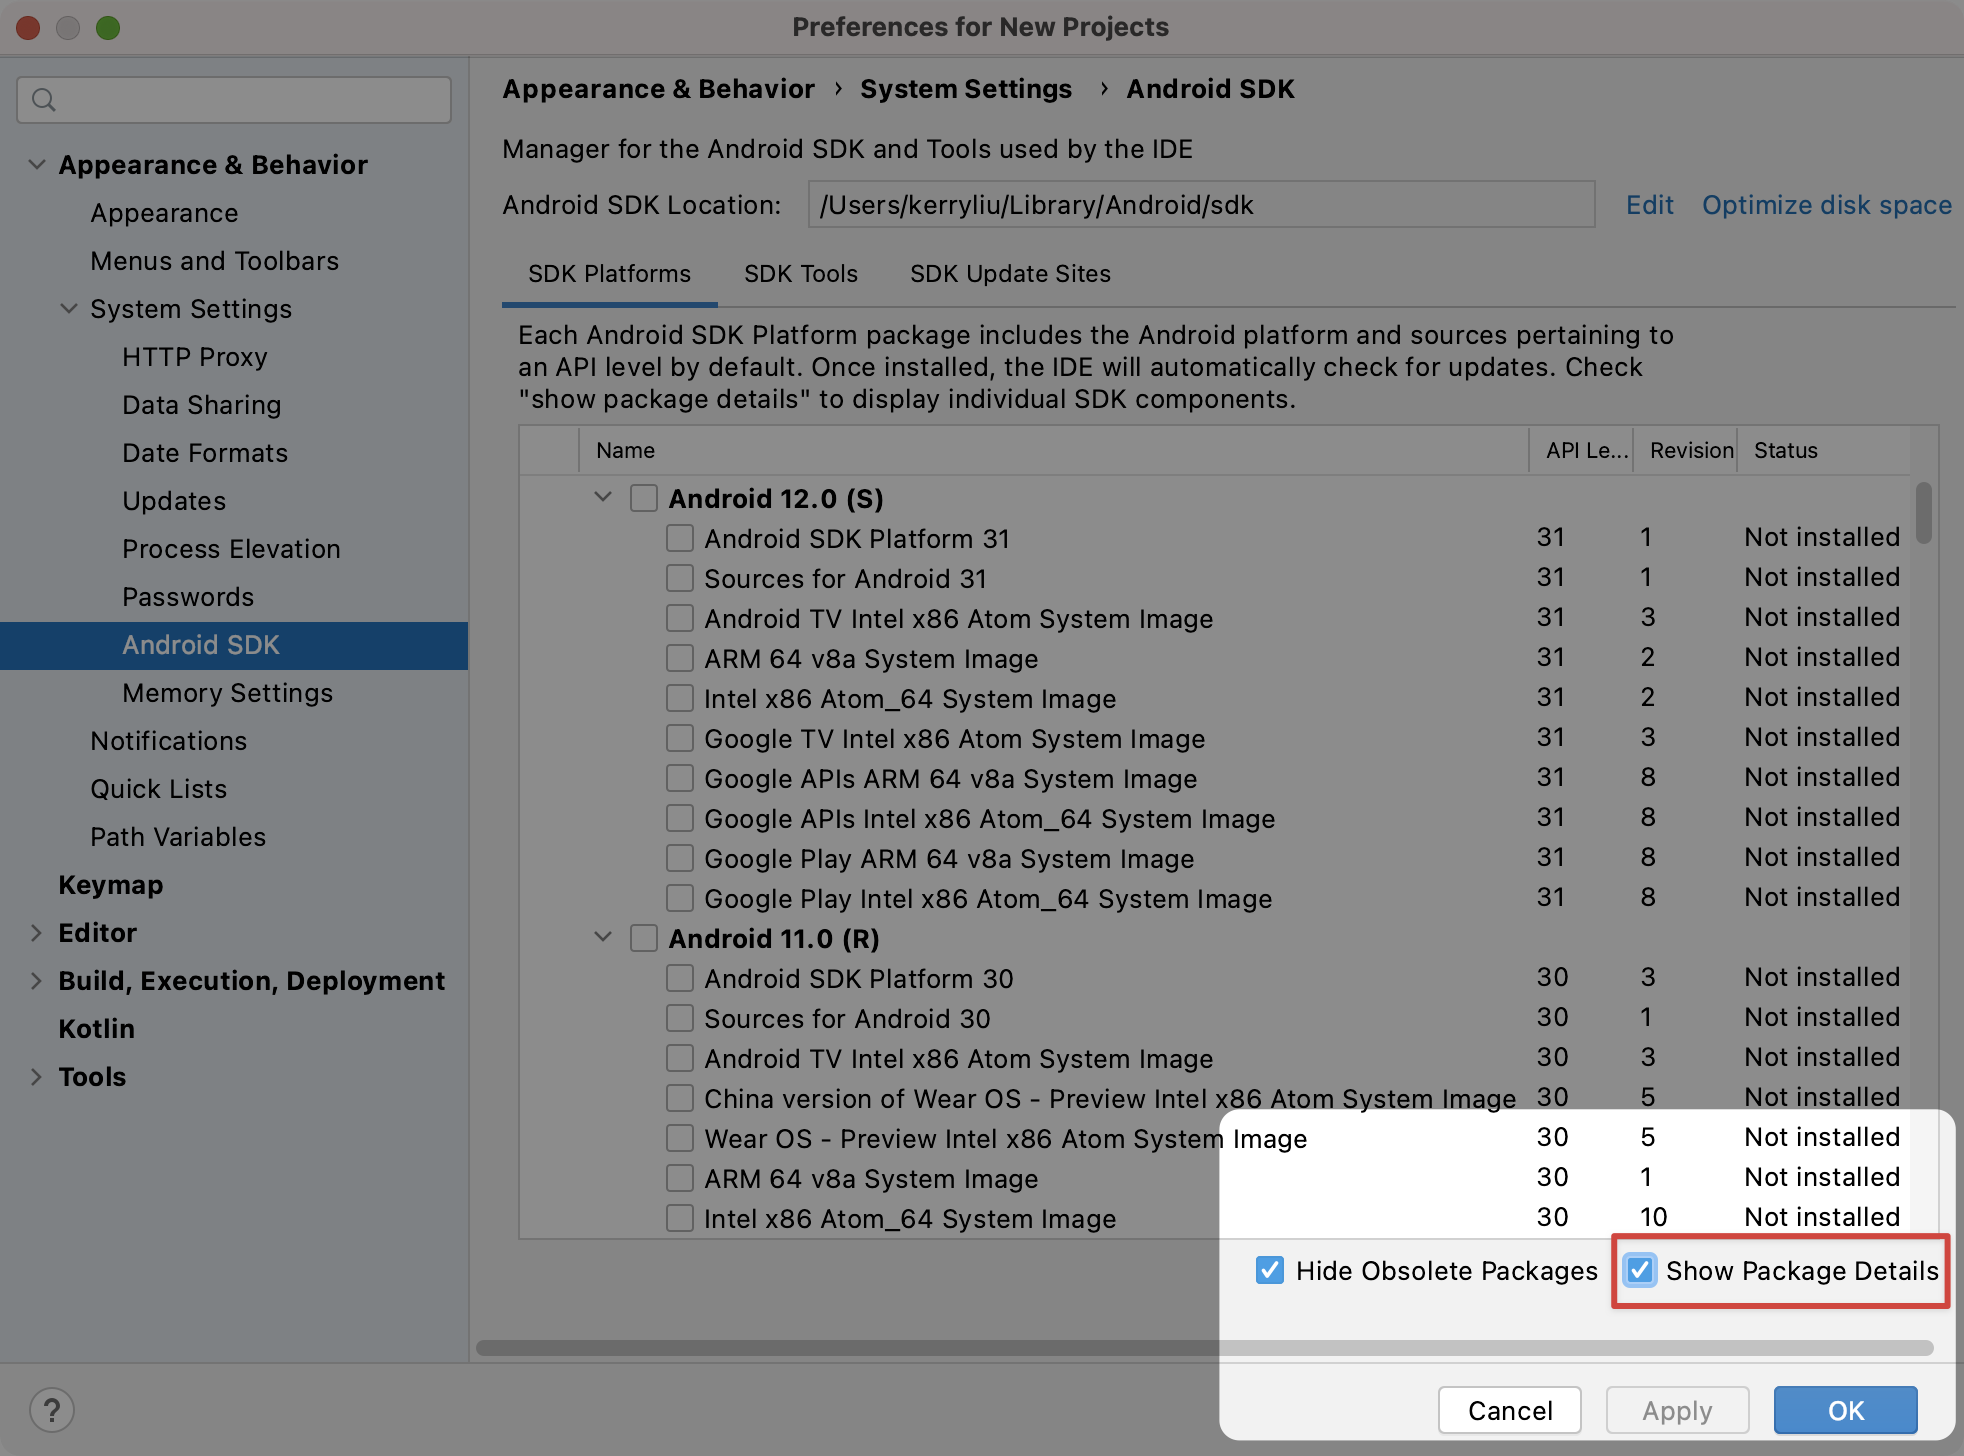
Check all related packages from build.gradle.
Then click on “Apply” to download items. There may be other related dependencies from build.gradle files in node_modules.
If you don’t want to dig through files, stack traces will complain of missing packages, but it does take quite a number
of tries if you go through this route.


Update Paths Update Paths
Export the following env variables and update $PATH. We can normally add this to our ~/.zshrc file if we’re using zsh
in our terminal, or ~/.bash_profile if the terminal is still using bash.
### Java that comes with Android Studio:
export JAVA_HOME=/Applications/Android\ Studio.app/Contents/jre/Contents/Home
### Android Home is configurable in Android Studio. Go to Preferences > System Settings > Android SDK
export ANDROID_HOME=$HOME/Library/Android/sdk
export PATH=$PATH:$ANDROID_HOME/emulator
export PATH=$PATH:$ANDROID_HOME/tools
export PATH=$PATH:$ANDROID_HOME/tools/bin
export PATH=$PATH:$ANDROID_HOME/platform-tools
Save then source, or open a new terminal to pick up changes.
source ~/.zshrc
or
source ~/.bash_profile
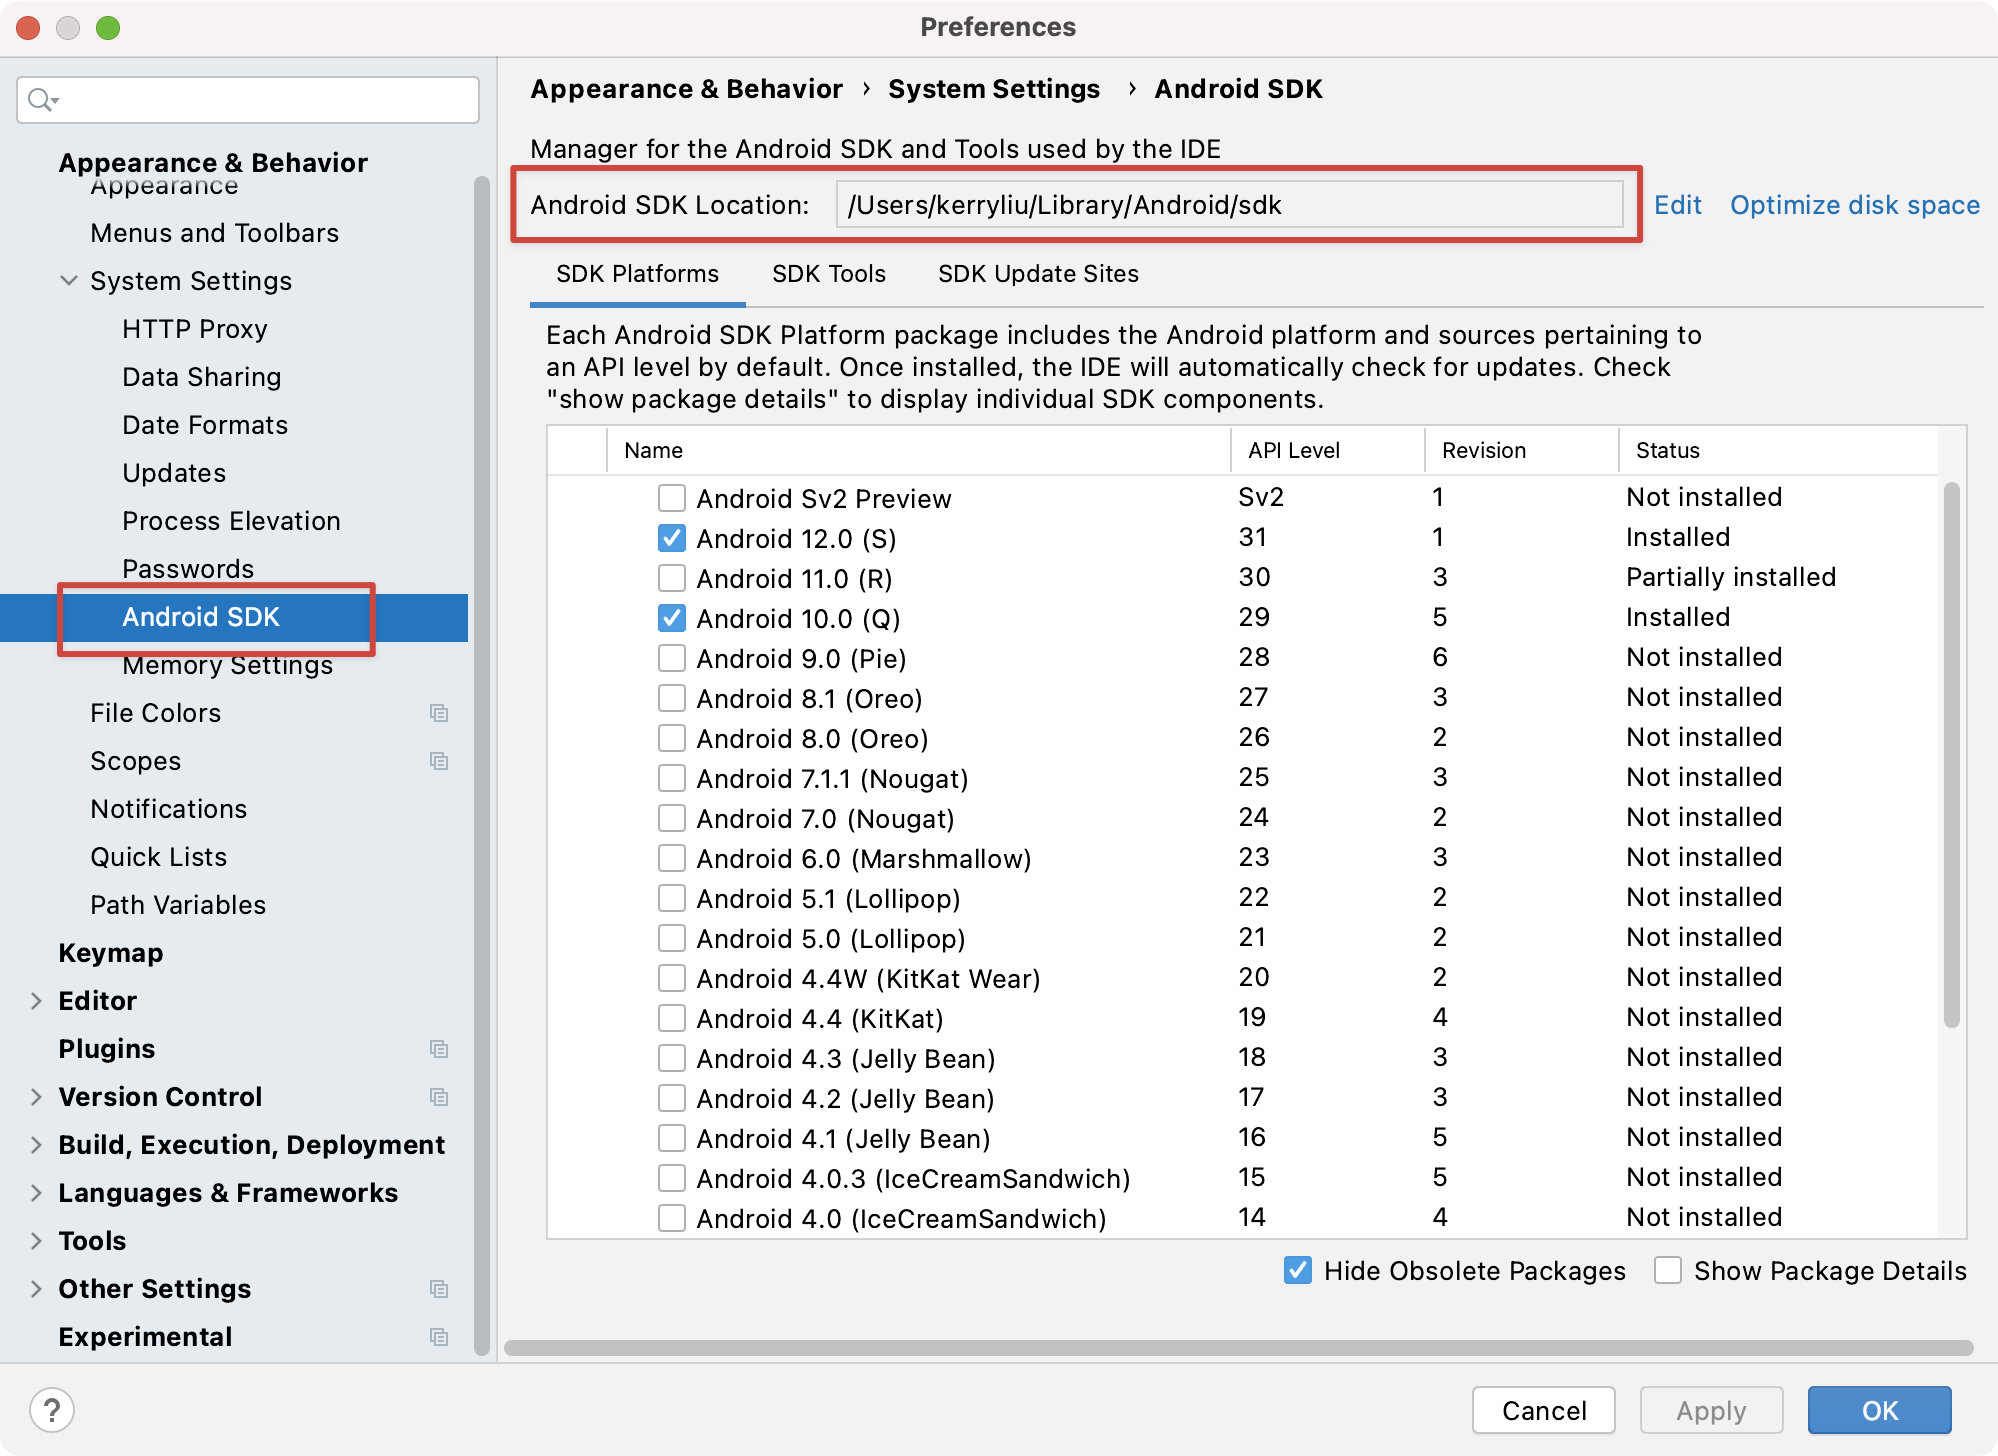
If the SDK path can’t be found, you can verify its location by visiting Android Studio > Preferences > System Settings > Android SDK
Create a new device image Create a new device image
Next, let’s create a virtual device image. Click on the phone icon with an android to the bottom-right.

This brings up the “Android Virtual Device Manager” or (AVD). Click on “Create Virtual Device”. Pick a phone type of your choice:

Pick the target SDK version. This is the targetSdkVersion set in the
build.gradle file.
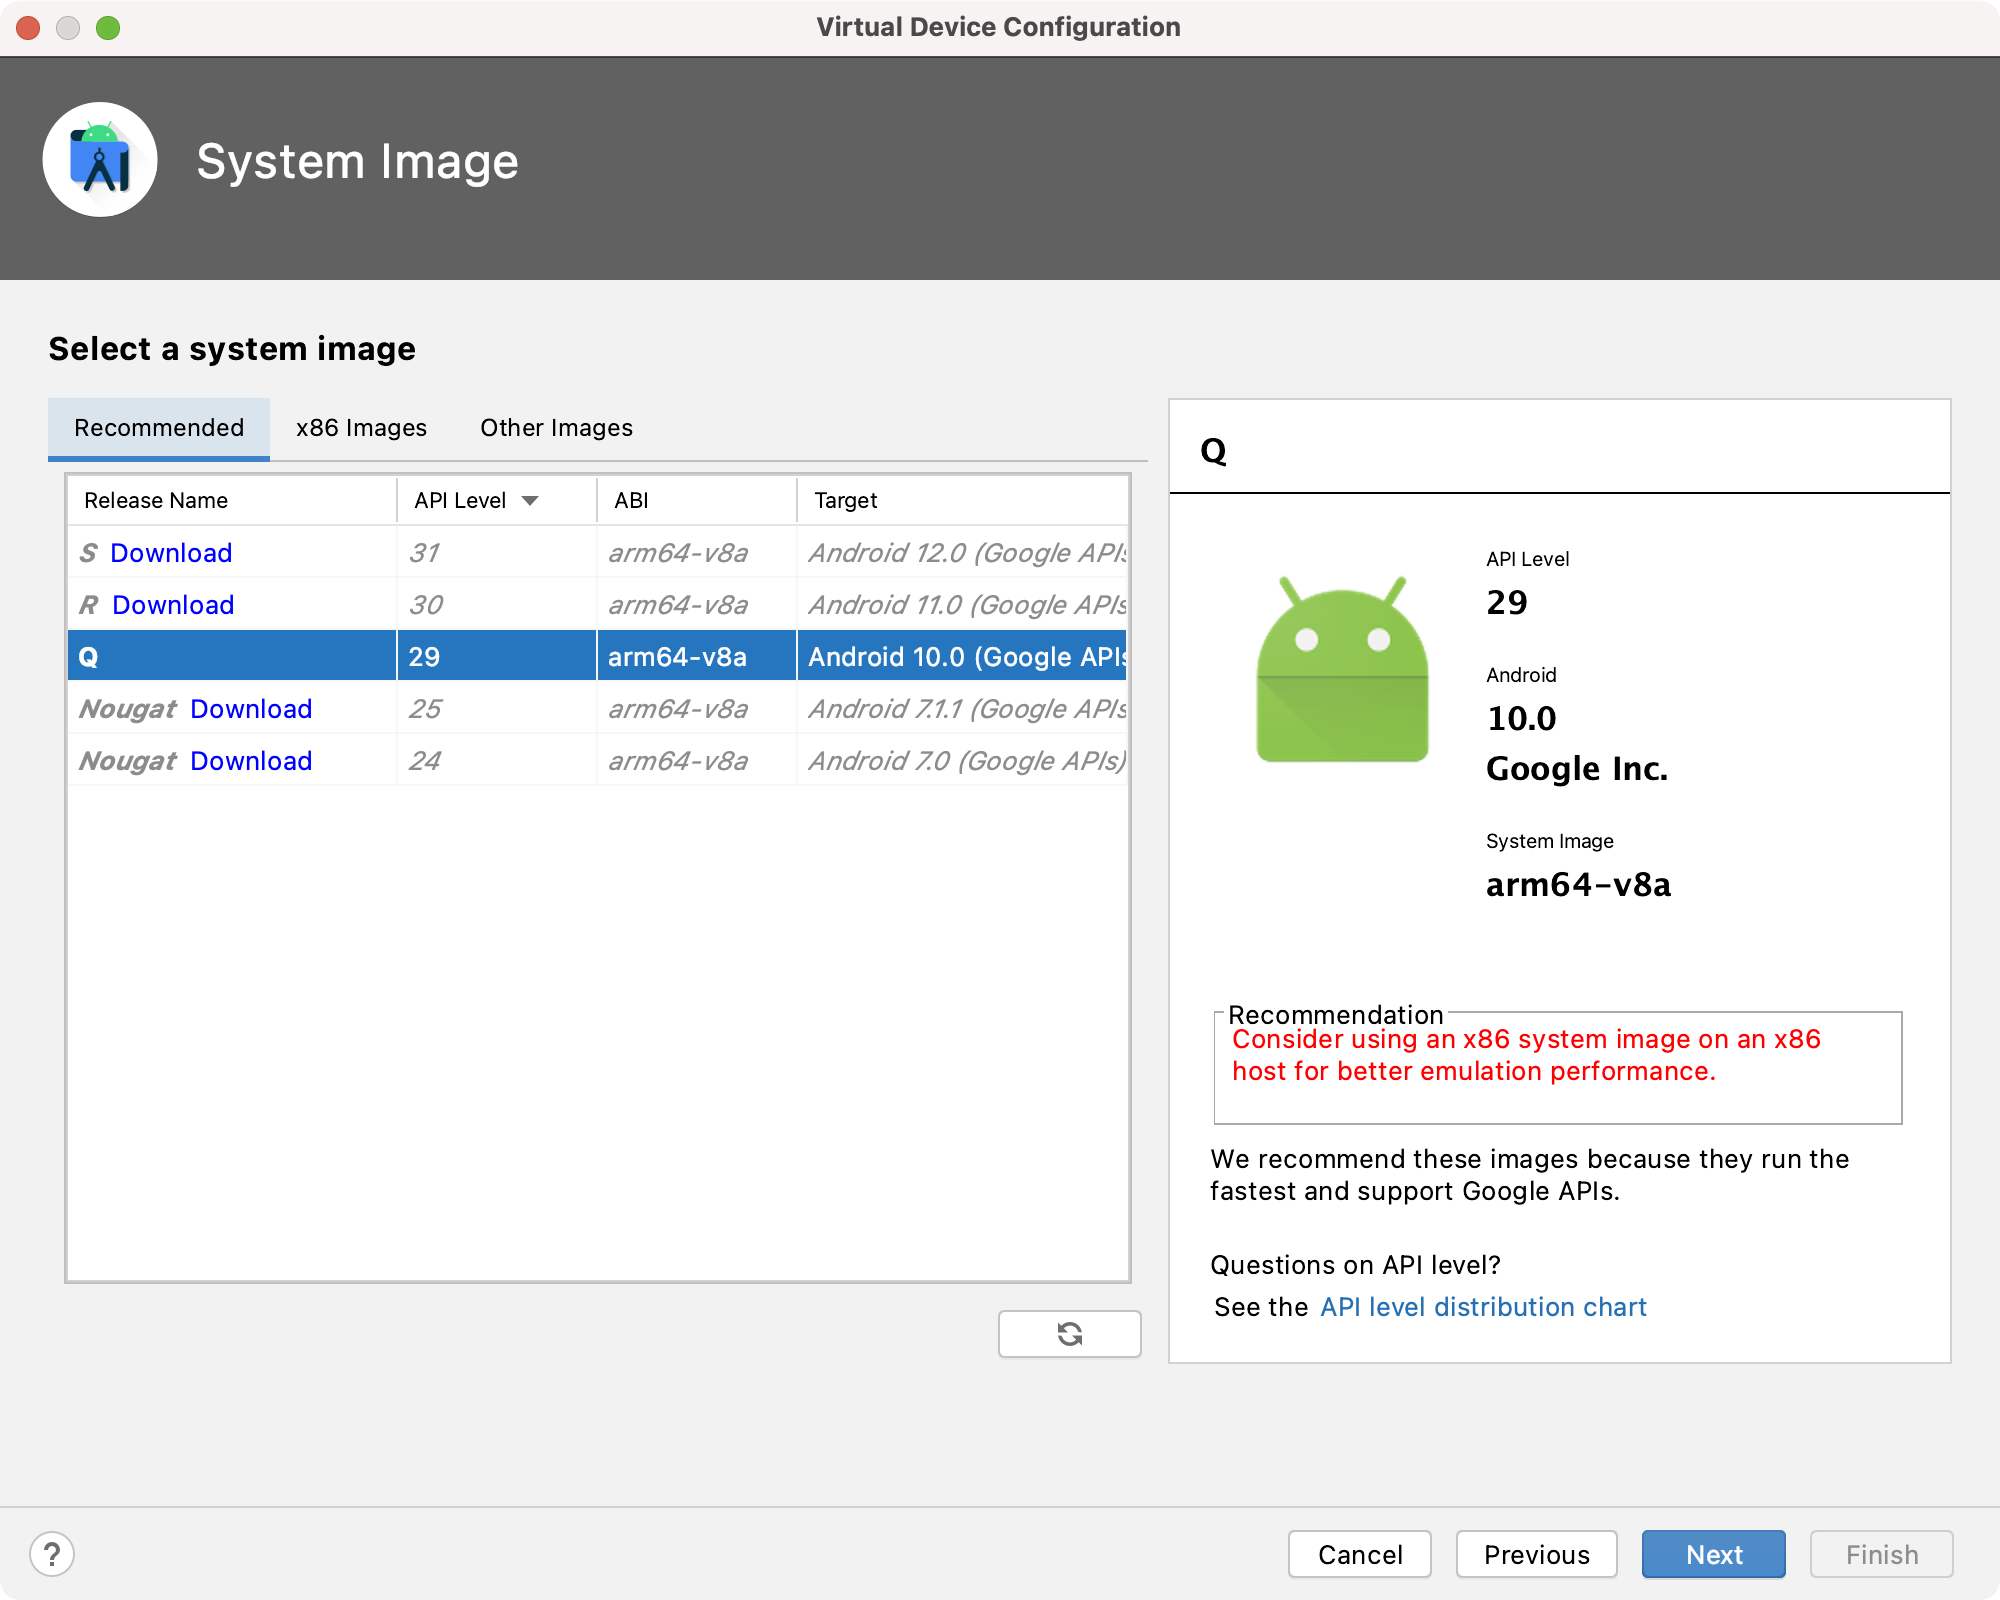
There are some advanced settings we can toggle, but these are optional. Click finish.
Putting it all together Putting it all together
Start metro:
npm run native start:reset
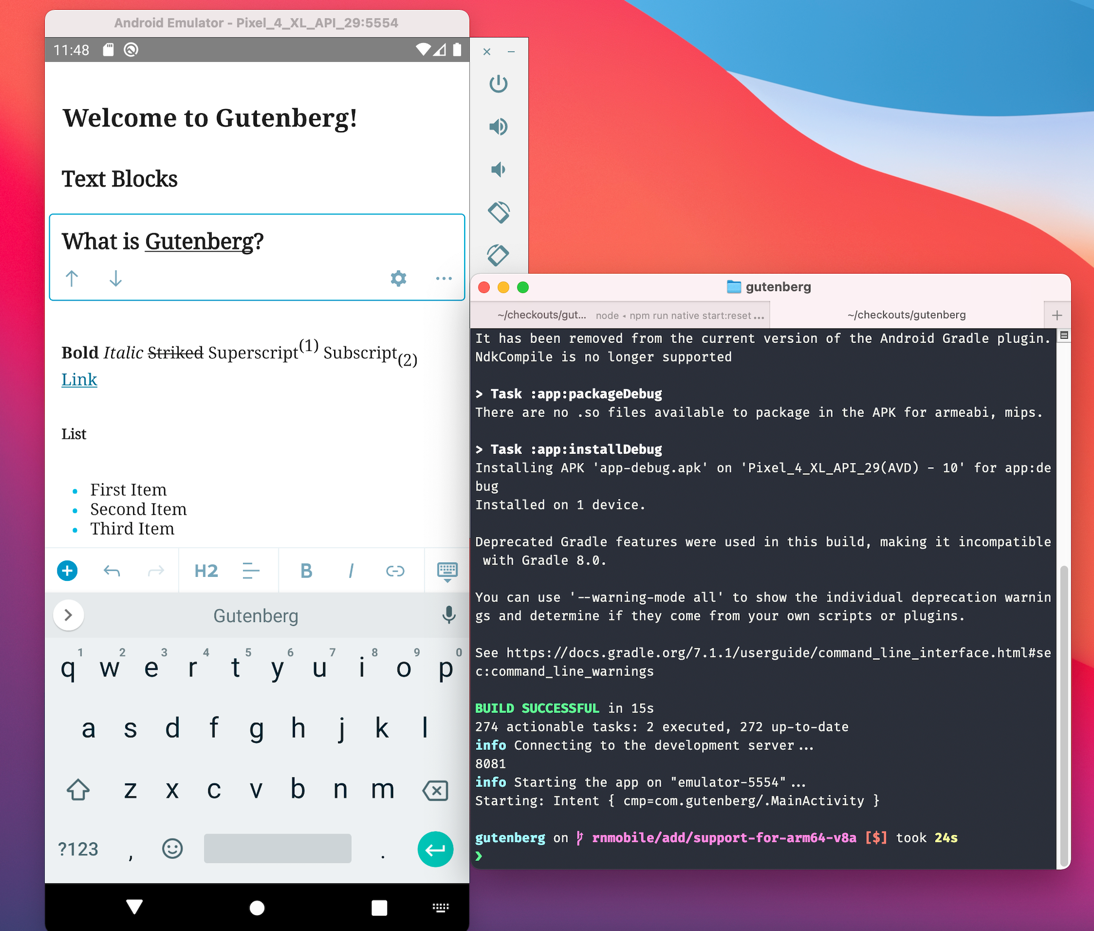
In another terminal run the following to launch the demo app in the Android emulator (if the emulator isn’t already running, it’ll also be launched as part of this command):
npm run native android
After a bit of a wait, we’ll see something like this:
Integration Tests Integration Tests
Appium has it own doctor tool. Run this with:
npx appium-doctor
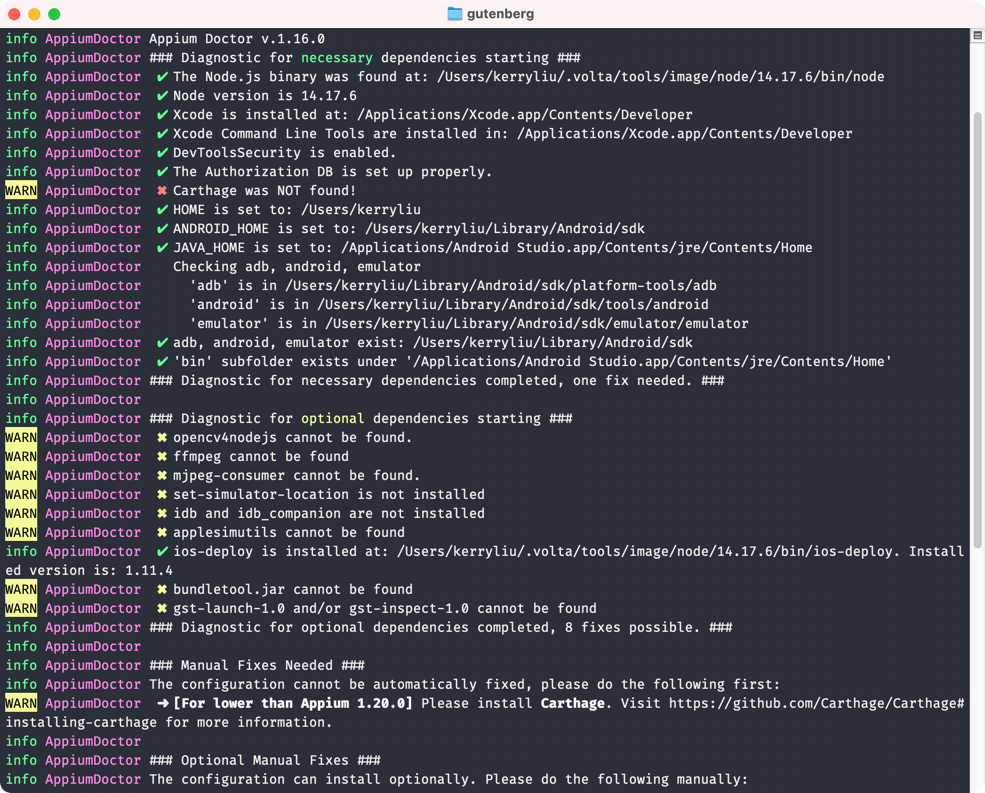
Resolve any required dependencies.
iOS Integration Tests iOS Integration Tests
If we know we can run the iOS local environment without issue, E2Es for iOS are straightforward. Stop any running metro processes.
This was launched previously with npm run native start:reset.
Then in terminal type:
npm run native test:e2e:ios:local
Passing a filename should also work to run a subset of tests:
npm run native test:e2e:ios:local gutenberg-editor-gallery.test.js
If all things go well, it should look like:
Android Integration Tests Android Integration Tests
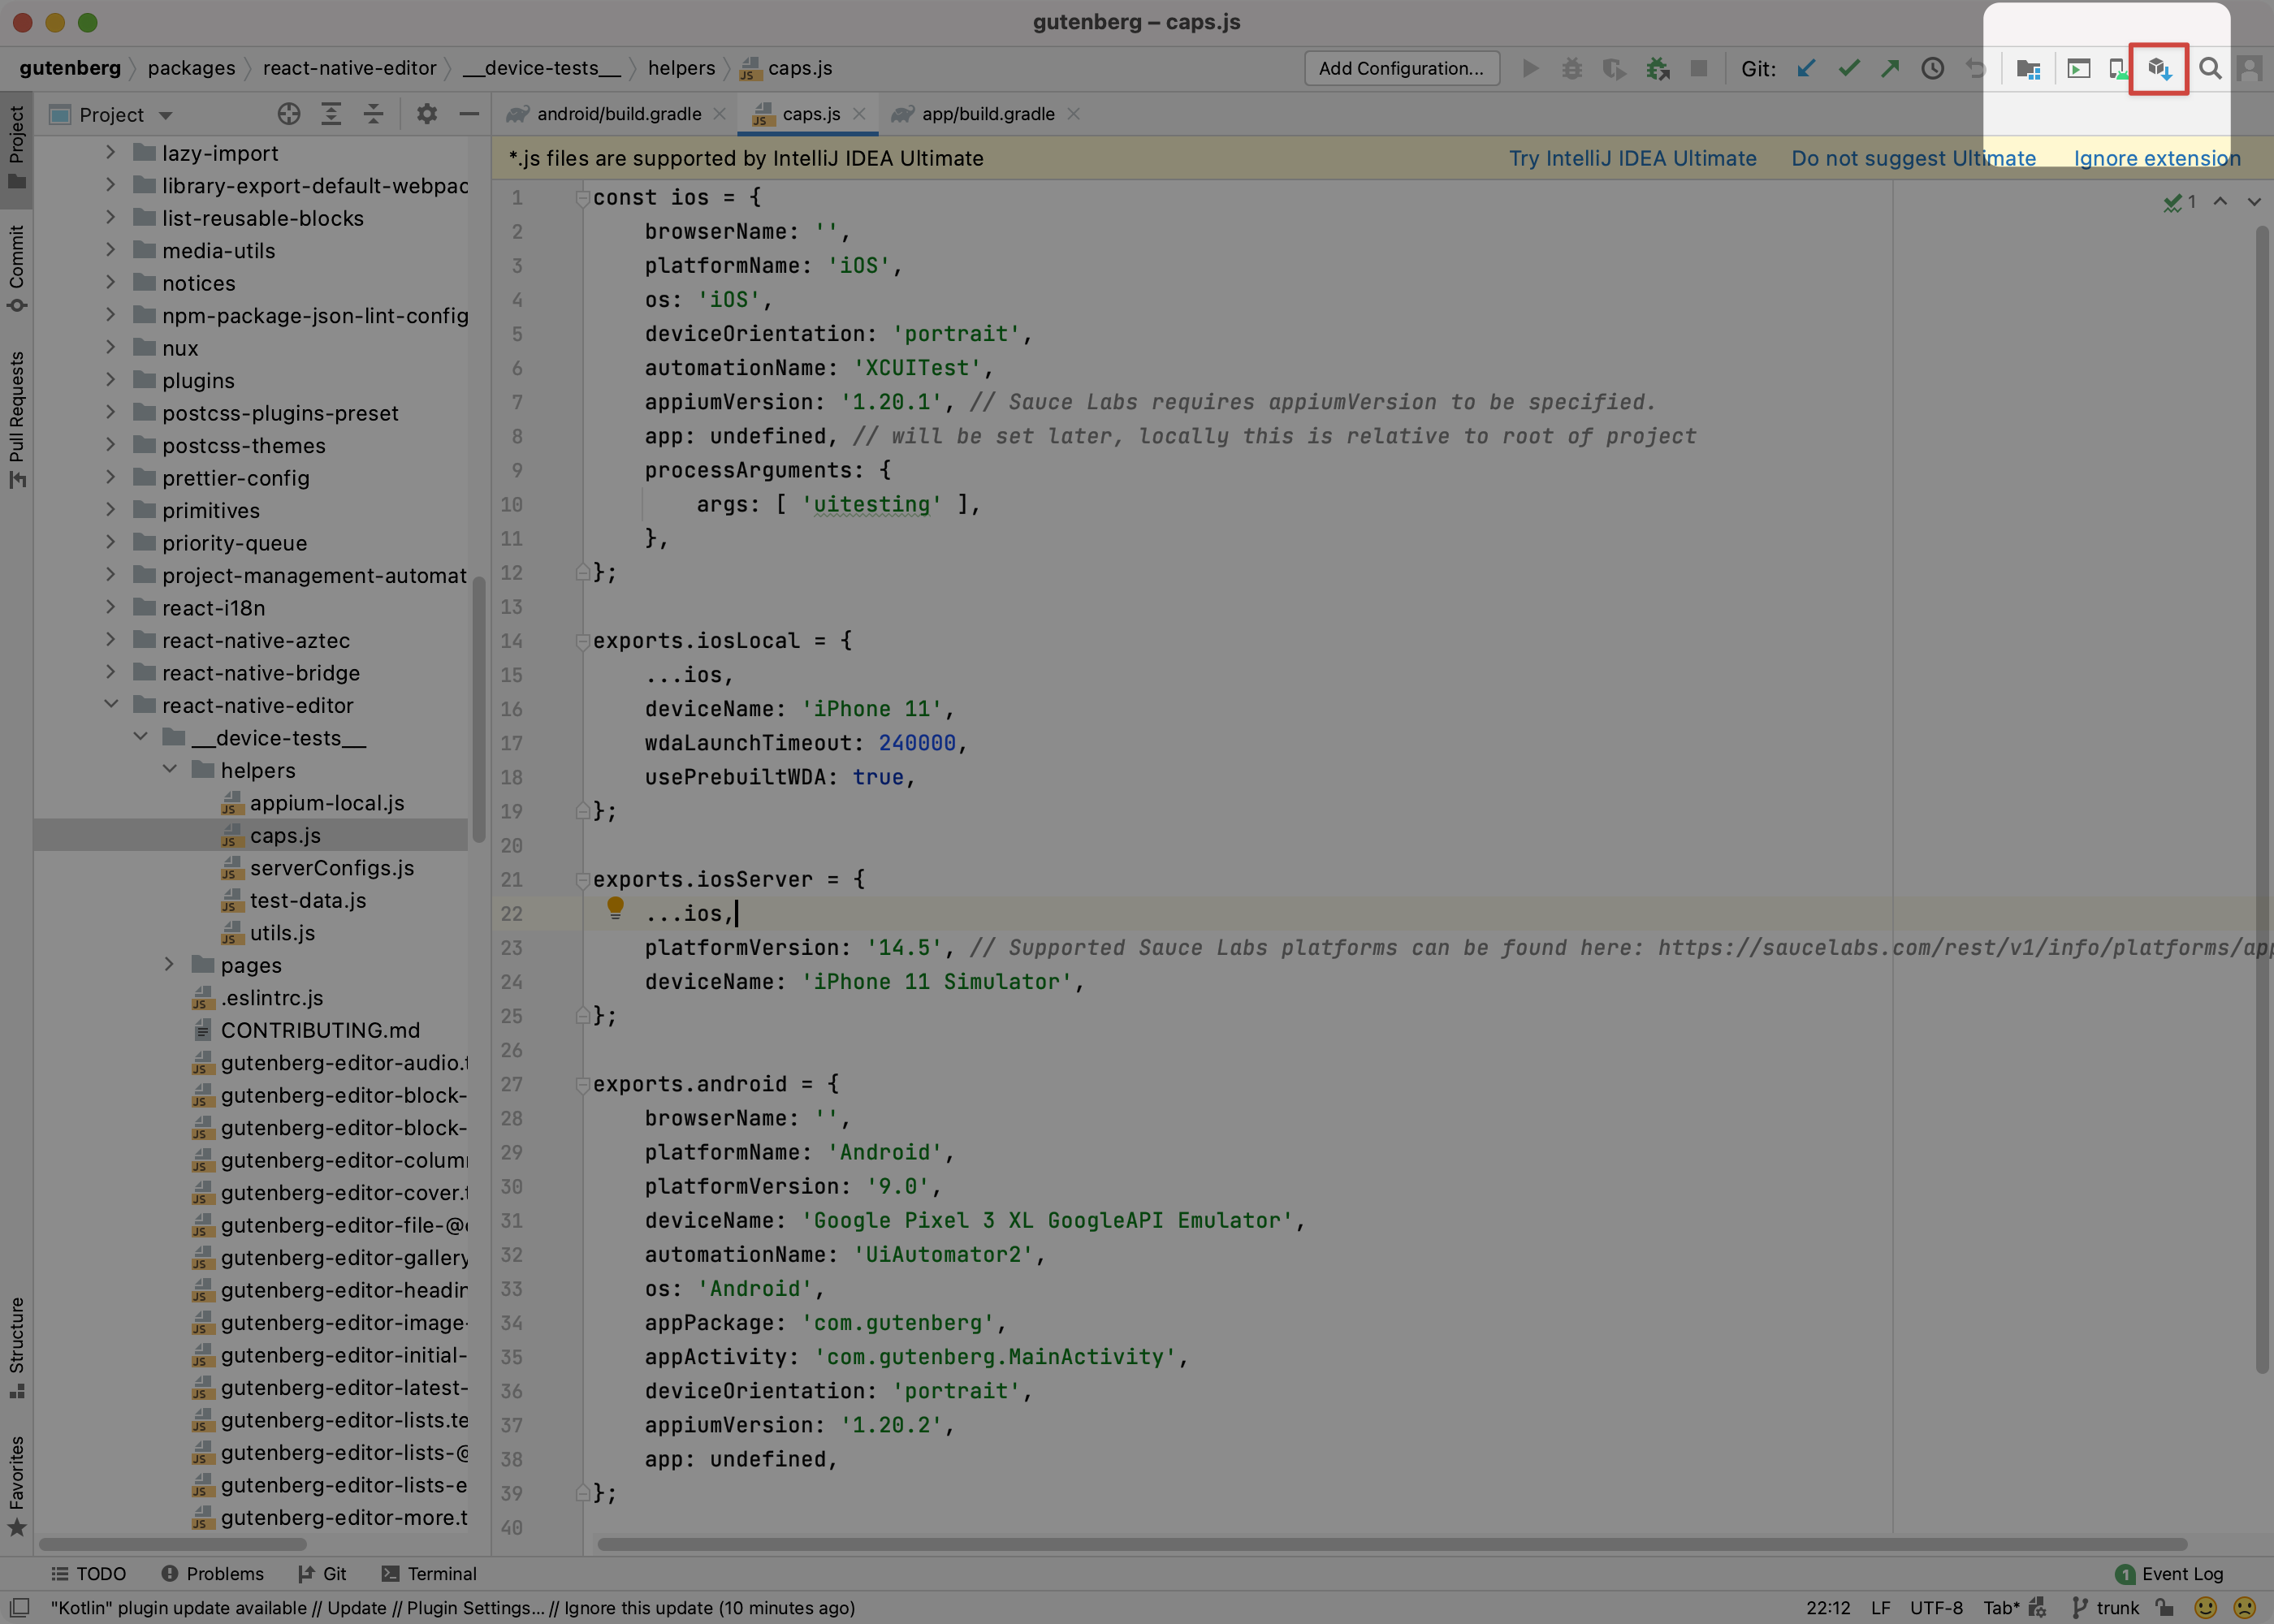
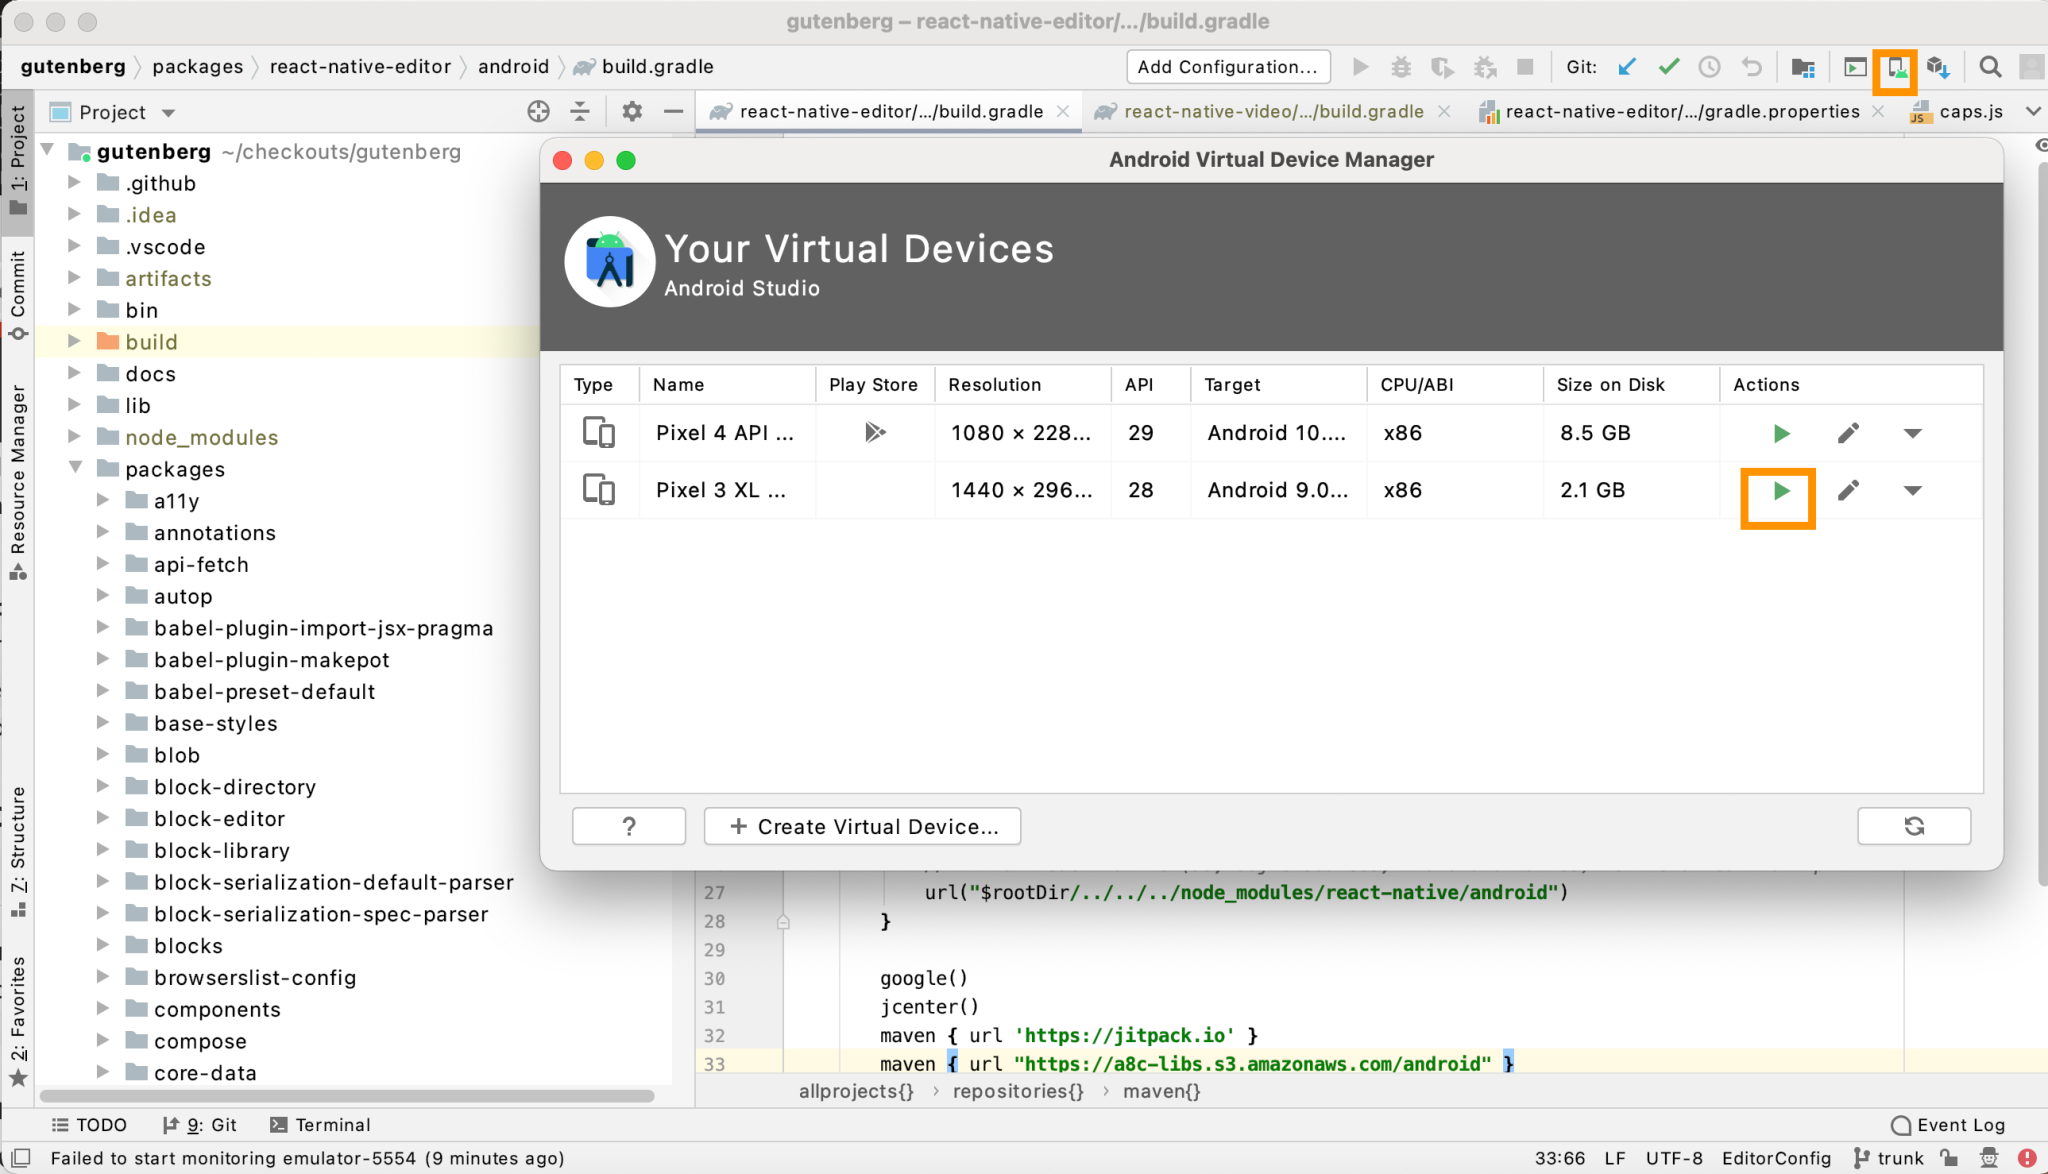
Create a new virtual device() that matches the device specified in packages/react-native-editor/device-tests/helpers/caps.js At the time of this writing, this would be a Pixel 3 XL image, using Android 9 (API 28).
Start the virtual device first. Go back to the AVD by clicking on the phone icon, then click the green play button.
Make sure no metro processes are running. This was launched previously with npm run native start:reset.
Then in a terminal run:
npm run native test:e2e:android:local
Passing a filename should also work to run a subset of tests:
npm run native test:e2e:android:local gutenberg-editor-gallery.test.js
After a bit of a wait we should see:
