October 25, 2021

2.5 years of Oculus Rift

Once again time has passed, and another update on Oculus Rift support feels due! As always, it feels like I’ve been busy with work and not found enough time for Rift CV1 hacking. Nevertheless, looking back over the history since I last wrote, there’s quite a lot to tell!

In general, the controller tracking is now really good most of the time. Like, wildly-swing-your-arms-and-not-lose-track levels (most of the time). The problems I’m hunting now are intermittent and hard to identify in the moment while using the headset – hence my enthusiasm over the last updates for implementing stream recording and a simulation setup. I’ll get back to that.

Outlier Detection

Since I last wrote, the tracking improvements have mostly come from identifying and rejecting incorrect measurements. That is, if I have 2 sensors active and 1 sensor says the left controller is in one place, but the 2nd sensor says it’s somewhere else, we’ll reject one of those – choosing the pose that best matches what we already know about the controller. The last known position, the gravity direction the IMU is detecting, and the last known orientation. The tracker will now also reject observations for a time if (for example) the reported orientation is outside the range we expect. The IMU gyroscope can track the orientation of a device for quite a while, so can be relied on to identify strong pose priors once we’ve integrated a few camera observations to get the yaw correct.

It works really well, but I think improving this area is still where most future refinements will come. That and avoiding incorrect pose extractions in the first place.

Plot of headset tracking – orientation and position

The above plot is a sample of headset tracking, showing the extracted poses from the computer vision vs the pose priors / tracking from the Kalman filter. As you can see, there are excursions in both position and orientation detected from the video, but these are largely ignored by the filter, producing a steadier result.

Left Touch controller tracking – orientation and position

This plot shows the left controller being tracked during a Beat Saber session. The controller tracking plot is quite different, because controllers move a lot more than the headset, and have fewer LEDs to track against. There are larger gaps here in the timeline while the vision re-acquires the device – and in those gaps you can see the Kalman filter interpolating using IMU input only (sometimes well, sometimes less so).

Improved Pose Priors

Another nice thing I did is changes in the way the search for a tracked device is made in a video frame. Before starting looking for a particular device it always now gets the latest estimate of the previous device position from the fusion filter. Previously, it would use the estimate of the device pose as it was when the camera exposure happened – but between then and the moment we start analysis more IMU observations and other camera observations might arrive and be integrated into the filter, which will have updated the estimate of where the device was in the frame.

This is the bit where I think the Kalman filter is particularly clever: Estimates of the device position at an earlier or later exposure can improve and refine the filter’s estimate of where the device was when the camera captured the frame we’re currently analysing! So clever. That mechanism (lagged state tracking) is what allows the filter to integrate past tracking observations once the analysis is done – so even if the video frame search take 150ms (for example), it will correct the filter’s estimate of where the device was 150ms in the past, which ripples through and corrects the estimate of where the device is now.

LED visibility model

To improve the identification of devices better, I measured the actual angle from which LEDs are visible (about 75 degrees off axis) and measured the size. The pose matching now has a better idea of which LEDs should be visible for a proposed orientation and what pixel size we expect them to have at a particular distance.

Better Smoothing

I fixed a bug in the output pose smoothing filter where it would glitch as you turned completely around and crossed the point where the angle jumps from +pi to -pi or vice versa.

Improved Display Distortion Correction

I got a wide-angle hi-res webcam and took photos of a checkerboard pattern through the lens of my headset, then used OpenCV and panotools to calculate new distortion and chromatic aberration parameters for the display. For me, this has greatly improved. I’m waiting to hear if that’s true for everyone, or if I’ve just fixed it for my headset.

Persistent Config Cache

Config blocks! A long time ago, I prototyped code to create a persistent OpenHMD configuration file store in ~/.config/openhmd. The rift-kalman-filter branch now uses that to store the configuration blocks that it reads from the controllers. The first time a controller is seen, it will load the JSON calibration block as before, but it will now store it in that directory – removing a multiple second radio read process on every subsequent startup.

Persistent Room Configuration

To go along with that, I have an experimental rift-room-config branch that creates a rift-room-config.json file and stores the camera positions after the first startup. I haven’t pushed that to the rift-kalman-filter branch yet, because I’m a bit worried it’ll cause surprising problems for people. If the initial estimate of the headset pose is wrong, the code will back-project the wrong positions for the cameras, which will get written to the file and cause every subsequent run of OpenHMD to generate bad tracking until the file is removed. The goal is to have a loop that monitors whether the camera positions seem stable based on the tracking reports, and to use averaging and resetting to correct them if not – or at least to warn the user that they should re-run some (non-existent) setup utility.

Video Capture + Processing

The final big ticket item was a rewrite of how the USB video frame capture thread collects pixels and passes them to the analysis threads. This now does less work in the USB thread, so misses fewer frames, and also I made it so that every frame is now searched for LEDs and blob identities tracked with motion vectors, even when no further analysis will be done on that frame. That means that when we’re running late, it better preserves LED blob identities until the analysis threads can catch up – increasing the chances of having known LEDs to directly find device positions and avoid searching. This rewrite also opened up a path to easily support JPEG decode – which is needed to support Rift Sensors connected on USB 2.0 ports.

Session Simulator

I mentioned the recording simulator continues to progress. Since the tracking problems are now getting really tricky to figure out, this tool is becoming increasingly important. So far, I have code in OpenHMD to record all video and tracking data to a .mkv file. Then, there’s a simulator tool that loads those recordings. Currently it is capable of extracting the data back out of the recording, parsing the JSON and decoding the video, and presenting it to a partially implemented simulator that then runs the same blob analysis and tracking OpenHMD does. The end goal is a Godot based visualiser for this simulation, and to be able to step back and forth through time examining what happened at critical moments so I can improve the tracking for those situations.

To make recordings, there’s the rift-debug-gstreamer-record branch of OpenHMD. If you have GStreamer and the right plugins (gst-plugins-good) installed, and you set env vars like this, each run of OpenHMD will generate a recording in the target directory (make sure the target dir exists):

export OHMD_TRACE_DIR=/home/user/openhmd-traces/
export OHMD_FULL_RECORDING=1

Up Next

The next things that are calling to me are to improve the room configuration estimation and storage as mentioned above – to detect when the poses a camera is reporting don’t make sense because it’s been bumped or moved.

I’d also like to add back in tracking of the LEDS on the back of the headset headband, to support 360 tracking. I disabled those because they cause me trouble – the headband is adjustable relative to the headset, so the LEDs don’t appear where the 3D model says they should be and that causes jitter and pose mismatches. They need special handling.

One last thing I’m finding exciting is a new person taking an interest in Rift S and starting to look at inside-out tracking for that. That’s just happened in the last few days, so not much to report yet – but I’ll be happy to have someone looking at that while I’m still busy over here in CV1 land!

As always, if you have any questions, comments or testing feedback – hit me up at [email protected] or on @thaytan Twitter/IRC.

Thank you to the kind people signed up as Github Sponsors for this project!

A call for more downstream testing of Meson

As Meson gets more and more popular, the number of regressions also grows. This is an unvoidable fact of life. To minimize this effort we publish release candidates before the actual releases. Unfortunately not many people use these so many issues are not found until after the release (as happened with 0.60.0).

For this reason we'd like to ask more people to test these rcs on their systems. It's fairly straightforward.

Testing individual projects

If you have a CI that installs Meson using pip, this is easy. You can tell Pip to use prerelease versions with the --pre flag.

pip install --pre meson

If you use prebuilt images rather than reinstalling on every build, do update your images once a week. Meson releases happen traditionally on Sunday evenings European time.

Testing if you are a distro or similar

The release candidates are packaged and uploaded to Debian experimental, so if you can use those, it is the simplest solution. They are not uploaded to unstable as I was instructed not to do so because of breakage potential. If you are a Debian person and know that the above explanation is incorrect and that I should be doing something else, let me know so I can change how that is done.

If you have some different setup that has a full CI run (hopefully something smaller than a full Debian archive rebuild) then doing that with the rc version would be the best test.

If you don't have such a test suite, you'll probably want to set one up for other reasons as well. :)

Registrations for GNOME.Asia Summit 2021 are open!

Registrations for GNOME.Asia Summit 2021 are open!

GNOME.Asia Summit will take place virtually from November 20th – 21st, 2021. It is the featured annual GNOME conference in Asia, focusing primarily on the GNOME desktop, but also covering applications and platform development tools. The Summit brings together the GNOME community in Asia to provide a forum for users, developers, foundation leaders, governments, and businesses to discuss the present technology and future developments.

This year’s summit will feature two speaking tracks on both event days as well as two Keynote Speakers.  

Please check our website event website to register for GNOME.Asia Summit 2021! 

October 22, 2021

#15 Sepia and App Updates

Update on what happened across the GNOME project in the week from October 15 to October 22.

Core Apps and Libraries

Libadwaita

Building blocks for modern GNOME apps using GTK4.

Alexander Mikhaylenko says

A large stylesheet refactoring has landed in libadwaita, light and dark variants are now shared with all their differences exported as public variables and customizable by apps. This allows to do things such as reliably recoloring the whole application into sepia.

Circle Apps and Libraries

Solanum

Balance working time and break time.

Chris 🌱️ reports

Solanum 3.0.0 is out and available on Flathub, with new preferences for timer length and updated translations.

Shortwave

Internet radio player with over 25000 stations.

Felix reports

I have revamped the Shortwave station details dialog, it now includes more information, and shows the location on a map for some stations. It uses libshumate for the map widget.

The search has been improved and now offers a possibility to filter the search results by different criteria.

Health

Collect, store and visualise metrics about yourself.

Cogitri says

Health 0.93.0 has been released and should be available on Flathub soon. The new release of Health features a reworked main view, a new calories view a daemon to remind users to reach their stepgoal and an updated stylesheet (thanks to libadwaita). Additionally, Health’s icons have been updated to be thinner and many translations have been added.

gtk-rs

Safe bindings to the Rust language for fundamental libraries from the GNOME stack.

Julian Hofer reports

I’ve added another chapter to the gtk4-rs book. This one extends the To-Do app so that it can filter tasks and retain them between sessions.

I’ve also extended the chapter about generic values with an explanation for variants.

The chapters were reviewed by slomo, Ivan Molodetskikh and Sabrina.

Dialect

Translate between languages.

Rafael Mardojai CM reports

Dialect 1.4.0 is out and available at Flathub. It comes with localized language names, keyboard shortcuts for most actions and bug fixes.

Mufeed Ali and I have ported Dialect to GTK4 + libadwaita.

Blanket

Improve focus and increase your productivity by listening to different sounds.

Rafael Mardojai CM says

Chris 🌱️'s port of Blanket to GTK4 + libadwaita was merged!

Metronome

Practice music with a regular tempo.

Adrien Plazas reports

Metronome can now be translated on Damned Lies.

Third Party Projects

sonnyp reports

The first release of Junction, an application/browser chooser is out. Set Junction as the default application for a resource and let it do the rest. Junction will pop up and offer multiple options to handle it.

Fractal

Matrix messaging app for GNOME written in Rust.

Alexandre Franke says

Not only is Fractal’s Julian featured in this week’s Matrix Live, he also has been very active in the month since our previous report. I won’t list here the very long list of merged merge requests, but the most noteworthy changes he brought are:

Contributions from others include enterprisey fixing the backtrace setup and simplyfying some error management code, Marco Melorio adding a separator in the UI to adapt to a change in libadwaita, Rachit Keerti Das fixing an incorrect link to install from Flathub, and Maximiliano cleaning up our dependencies and application name in code.

That’s all for this week!

See you next week, and be sure to stop by #thisweek:gnome.org with updates on your own projects!

October 21, 2021

My teleconf setup

Several friends have asked about my camera/videoconferencing setup, so some notes on that.

Picture from my desktop camera. Lighting isn’t quite as even as I’d like (and as always in stills, my smile is goofy) but you can see the background blur clearly.

Why?

I’ve joked that for lawyers, a good videoconferencing setup is now like a good suit—sort of pointless but nevertheless can help make a good impression in a field where impressions, for better and for worse, matter.

I picked up the new book “Presenting Virtually” from Duarte and it starts with something that’s pretty basic, but also not always obvious—you can’t control networks, and often don’t control what presentation software you’re using. What you do control is your hardware, so make that the best you can.

Camera

I bought a Canon 77D to take baby pictures and… it was in a closet when the pandemic hit. I use it with a 24mm pancake lens. Canon provides a driver that lets you use the camera as a webcam.

Given the cost, I’m not sure this makes sense for most people to do unless they already have a compatible Canon laying around. But if you do have a supported one it works great!

As an alternative, friends speak very highly of this new Dell camera.

Light

I cheat by having good natural light in my office and then supplementing it, rather than having to blast light all over to make up for the gap. This means my light was cheap; the primary criteria was being able to change the color (from a bright white to yellow-ish) so that things looked right.

The exact model I got is no longer available, but is basically similar to this one.

Pro tip for new-ish home workers: if you have two rooms, one dark and one bright, make your bedroom dark and cramped and your office big and light. The previous residents of our place made the reverse choice and I don’t understand it at all.

Microphone

I have a Blue Yeti mic. I’m not sure I’d recommend it for most people. The audio quality is very good, but positioning it over a desk is finicky. (I use these for both my camera and mic, and they work once you get them set up, but they’re a pain.) In addition, it has a headphone jack—which is fine except it insists on reporting to the operating system that it is live even when it has nothing plugged in, so I frequently have to say “no, bad zoom, use the speakers that are actually speakers”.

If I were doing it over again, I’d get something designed more specifically for the home office use case. A friend swears by their Jabra 510, and this new thing from Logitech looks pretty interesting.

What I’m not doing (at least not yet)

I’m sorely tempted to get a teleprompter, but Stephen has mostly convinced me not to. In my experience, at this time, the bar is pretty low—having a good camera and light really does make things noticeably better for people on the other end, even if your eye contact isn’t perfect while doing a slide deck. So you can get a lot of bang for a lot less effort than Stephen spent. Still, tempting some days :)

Hope this is helpful!

Text in librsvg starts to get better

Up to now, text support in librsvg has been fairly limited. The text chapter in the SVG spec is pretty big and it contains features that are very much outside of my experience (right-to-left languages, vertical text). But now I think I have a plan for how to improve the text features.

Bidirectional text

Bidirectional text, or "bidi" for short, happens when one has a right-to-left language like Arabic or Hebrew intermixed with things like Arabic numerals, or Latin text.

This is an interesting little example from the SVG spec:

<?xml version="1.0" encoding="utf-8"?>
<svg xmlns="http://www.w3.org/2000/svg"
     width="100%" height="100%" viewBox="0 0 600 72"
     direction="rtl" xml:lang="he">

  <title direction="ltr" xml:lang="en">Right-to-left Text</title>
  <desc direction="ltr" xml:lang="en">
    An example for using the 'direction' and 'unicode-bidi' properties
    in documents that predominantly use right-to-left languages.
  </desc>

  <text x="300" y="50" text-anchor="middle" font-size="36"> כתובת MAC:&#x200F;
    <tspan direction="ltr" unicode-bidi="embed">00-24-AF-2A-55-FC</tspan> 
  </text>

</svg>

It is supposed to render like this; it says "MAC address: xxx-yyy-zzz":

Text that says "MAC address: numbers" in Hebrew with an English acronym

However, until librsvg 2.52.2 this did not work correctly. You see, librsvg takes each piece of text inside a <text> and creates a Span for it. If there is a <tspan> element, it also gets a Span created. However, librsvg did not handle the case where an inner <tspan> changes the direction property from its parent <text> element.

Another bug:

<?xml version="1.0" encoding="utf-8"?>
<svg version="1.1" xmlns="http://www.w3.org/2000/svg" xml:lang="fa" direction="rtl" width="200" height="100">
    <g font-family="Dana-FaNum" font-size="16">
        <text x="50%" y="50%"><tspan font-weight="bold">نام: </tspan><tspan>مهدی</tspan></text>
    </g>
</svg>

It is supposed to render more or less like this (the line says, "Name: Mehdi"):

Right-to-left spans in text

This was broken, too!. I did not realize that within <text>, the spans need to be laid out exactly in the text direction, in this case rtl. I thought that it was sufficient to let Pango deal with each group of characters within a span.

Together with that, I fixed text-anchor for right-to-left text. This is what one uses to align a text block with respect to its start, middle, or end. It was also broken for RTL languages before.

One remaining bug is that there should be a space to the left of the :, but librsvg is eating it. I think it needs to implement the SVG2 white-space behavior, which replaces the ambiguous definition of xml:space from SVG1.1.

A test that makes me exceedingly happy

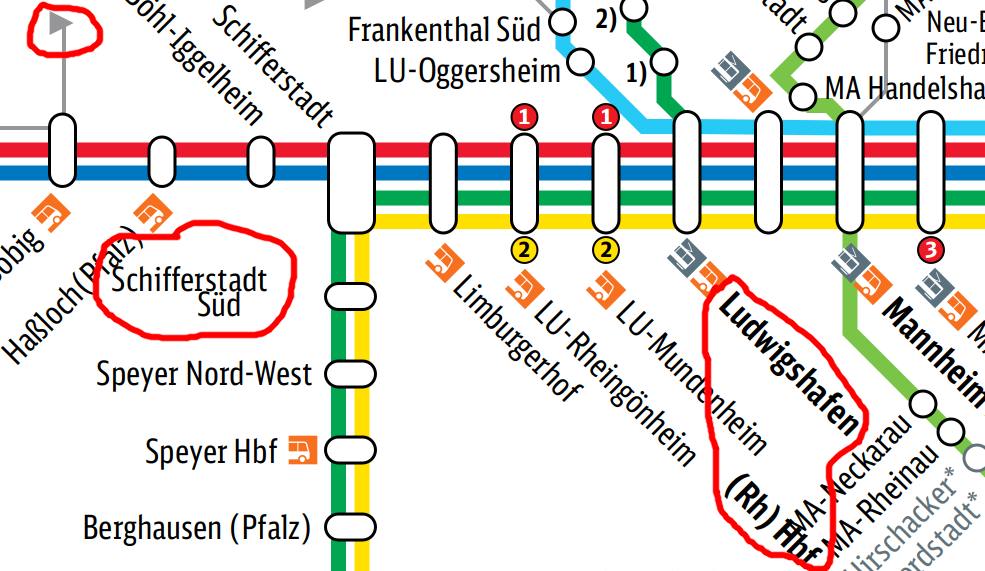
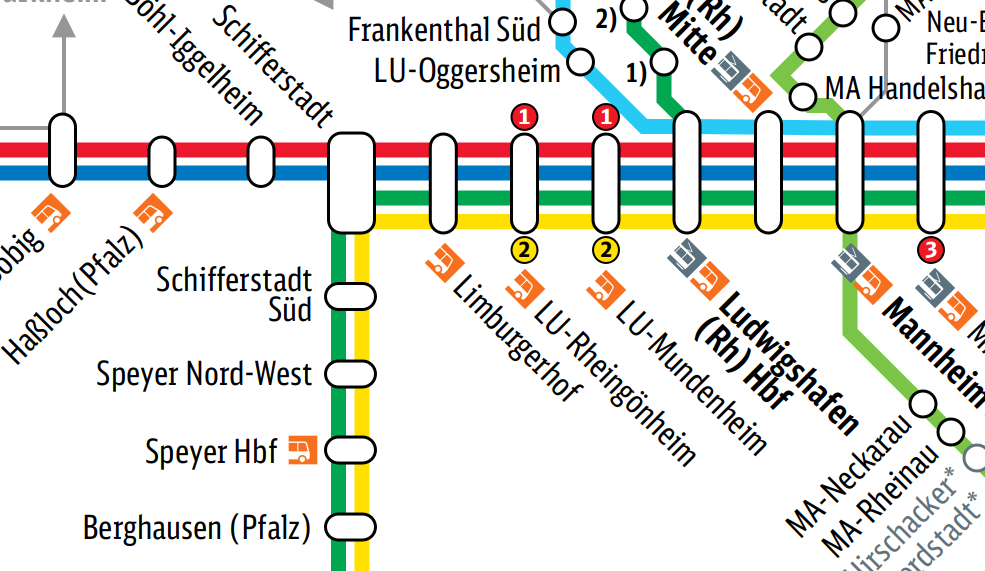
This family of images from Wikimedia Commons has been broken for many years. Someone has been painstakingly making SVG2 maps of German rail by writing SVG code by hand; they use features that became available only after Madds Holland's Outreachy internship from last Summer. Also, the maps use text offsetting features that were just broken.

S-Bahn map for the Rhein Neckar region

The little arrowheads were broken because librsvg didn't support orient="auto-start-reverse" in markers (arrowheads get done with SVG's "marker" feature). Madds added support for that during their Outreachy internship.

Then, most of the the multi-line text objects in there were laid out incorrectly. Librsvg was laying out spans inside text chunks incorrectly when they had dx/dy offsets and the text also had text-anchor different from the default.

Previously:

Broken rendering of the S-Bahn map; arrows and multi-line text are wrong

Now:

Good rendering of the S-Bahn map

One last detail which I haven't figured out is that the positioning of glyphs is a bit off. If you look at the slanted label for the LU-Rheingönheim station, the "heim" at the end looks a bit misaligned with the rest of the label. Firefox renders it correctly. Advice is appreciated!

Future plans

All those fixes will appear in librsvg 2.52.3, due in a few days.

I want to add more tests for right-to-left and bidi text; they can be affected by many properties for which there are no tests right now.

After bidi text works reasonably well, I want to add support for positioning individual glyphs with the x/y/dx/dy properties. People from Wikimedia Commons really want this, to be able to lay out equations and such.

Once individual glyphs can be positioned independently, maybe textPath support, which cartographers really like for curved labels.

A handy tool

I recently discovered the Ahem font. It is part of the CSS fonts tests, and consequently part of the Web Platform Tests. Quoting from its description:

The font’s em-square is exactly square. Its ascent and descent combined is exactly the size of the em square; this means that the font’s extent is exactly the same as its line-height, meaning that it can be exactly aligned with padding, borders, margins, and so forth.

That is, you can typeset something with the Ahem font and it will appear as contiguous squares. If you render the string ABCD, it will appear as a rectangle four-ems wide by one-em tall. This is wonderful for reproducible tests!

<?xml version="1.0" encoding="utf-8"?>
<svg xmlns="http://www.w3.org/2000/svg" width="600" height="300">
  <rect x="0" y="0" width="100%" height="100%" fill="white"/>
  <line x1="50%" y1="0" x2="50%" y2="100%" stroke-width="2" stroke="blue"/>
  <line x1="0" y1="100" x2="100%" y2="100" stroke-width="2" stroke="blue"/>

  <text x="50%" y="100" font-family="Ahem" font-size="20" text-anchor="end"><tspan dy="-1em">A</tspan><tspan dx="-40" dy="1em">BC</tspan></text>
</svg>

That renders like this:

Three black squares on a white background

Text rendering clearly means spending days trying to get three black squares to draw in the correct position.

October 20, 2021

PSA: gnome-settings-daemon's MediaKeys API is going away

 In 2007, Jan Arne Petersen added a D-Bus API to what was still pretty much an import into gnome-control-center of the "acme" utility I wrote to have all the keys on my iBook working.

It switched the code away from remapping keyboard keys to "XF86Audio*", to expecting players to contact the D-Bus daemon and ask to be forwarded key events.


Multimedia keys circa 2003

In 2013, we added support for controlling media players using MPRIS, as another interface. Fast-forward to 2021, and MPRIS support is ubiquitous, whether in free software, proprietary applications or even browsers. So we'll be parting with the "org.gnome.SettingsDaemon.MediaKeys" D-Bus API. If your application still wants to work with older versions of GNOME, it is recommended to at least quiet the MediaKeys API's unavailability.


Multimedia keys in 2021
 

TL;DR: Remove code that relies on gnome-settings-daemon's MediaKeys API, make sure to add MPRIS support to your app.

October 16, 2021

GNOME Gingerblue 2.0.0 Recording Software supports XSPF 1.0

GNOME Gingerblue 2.0.0 is Free Recording Software for GNOME.

In the 2.0.0 release I have added support for XSPF 1.0 from Xiph.org.

If you launch the software, a immediate recording is stored into the
$HOME/Music folder along with the playlist in $HOME/Music/GNOME.xspf

You can download the source code from download.gnome.org/sources/gingerblue/2.0/gingerblue-2.0.0.tar.xz for the software and read more about the free playlist standard at www.xspf.org

October 15, 2021

2021-10-15 Friday

  • Mail chew; admin, patch review here & there - encouraging to see more fixes & performance improvements for Online as well as good progress to our next major release.
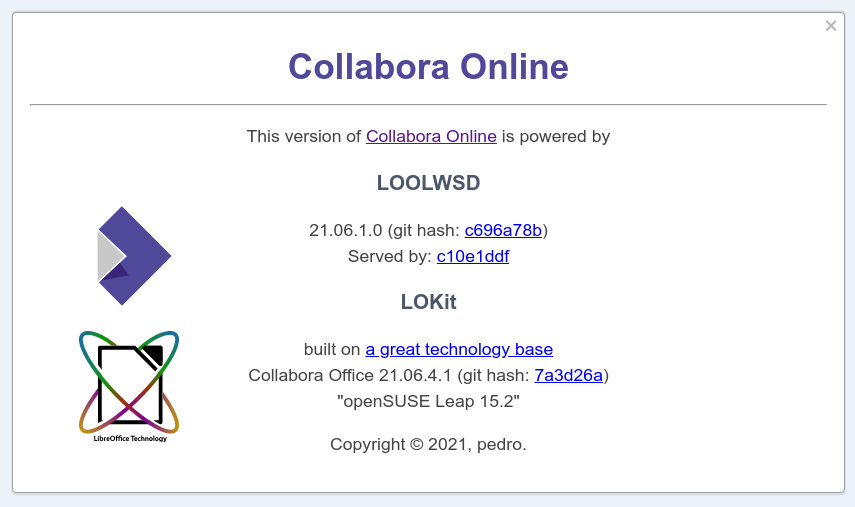
  • After Italo's keynote announcement of the new LibreOffice Technology marketing plan at the LibreOffice conference, we lost no time integrating this great way to fairly present the goodness of LibreOffice that we depend on to build Collabora Online & Collabora Office mobile into the product. With new links that can take you to our LibreOffice Technology page where we can celebrate the community & credit all the hard work done under the hood here, and of course the logo. Still a work-in-progress, and will start to appear in our products over the next weeks as/when we refresh them, but so far it looks like this for desktop & mobile:
    up-coming COOL About dialog up-coming COOL About dialog
    Thanks to Italo & Mike at TDF for developing the concept, and also to Pedro & Elisa, for their work on the code & logos - we'll be iterating it with them over the next days & weeks.

GWeather next

tl;dr Libgweather, the small GNOME library that queries weather services, is getting a major version bump to allow applications using it to be ported to GTK4.

In the beginning, there was a weather applet in the GNOME panel. It had a bunch of code that poked at a couple of websites to get the weather information for a given airport or weather observation stations, and shipped with a list of locations and their nearest METAR code.

In 2007, the relevant code was moved to its own separate repository, so that other applications and system settings could reuse the same code as the panel applet: the libgweather library was born. Aside from the basic weather information and location objects, libgweather also had a couple of widgets: one for selecting a location (with autocompletion), and one for selecting a timezone using a location.

Since libgweather was still very much an ad hoc library for a handful of applications, there was no explicit API and ABI stability guarantee made by its maintainers; in fact, in order to use it, you had to “opt in” with a specific C pre-processor symbol.

Time passed, and a few more applications appeared during the initial GNOME 3 cycles—like Weather, followed by Clocks a month later. Most of the consumers of libgweather were actually going through a language binding, which meant they were not really “opting into” the API through the explicit pre-processor symbol; it also meant that changes in the API and ABI could end up being found only after a libgweather release, instead of during a development cycle. Of course, back then, we only had a single CI/CD pipeline for the whole project, with far too little granularity and far too wide scope. Still, the GWeather consumers were few and far between, and the API was not stabilised.

Fast forward to now.

The core GNOME applications using GWeather are in the process of being ported to GTK4, but GWeather still ships with two GTK3 widgets. Since you cannot have GTK3 and GTK4 types in the same process, this requires either porting GWeather to GTK4 or dropping the widgets. As it turns out, the widgets are not really shared across applications using libgweather, and all of them have also been redesigned or are using the libadwaita/GTK4 port as a chance to refresh their overall appearences. This makes our life a little bit easier, as we can drop the widgets without really losing any actual functionality that people do care about.

For GNOME 42, the plan for libgweather is:

  • bump up the API version to 4.0, and ensure parallel installability with the older libgweather-3; this requires renaming things like the pkg-config file and the settings schema, alongside the shared library
  • drop the GTK widgets, and some old API that hasn’t been working in years, like getting the radar image animation
  • stabilise the API, and turn libgweather into a proper library, with the usual API and ABI stability guarantees (deprecations and new symbols added only during development cycles, no changes/removals until the following major API bump)
  • make it easier to use libgweather objects with GListModel-based API
  • document the API properly
  • clean up the internals from various years of inconsistent coding style and practices

I’m also going through the issues imported from Bugzilla and closing the ones that have long since been fixed.

In the meantime, the old libgweather-3 API is going to be frozen, for the tools that still use it and won’t be ported to GTK4 any time soon.

For more information, you can read:

If you’re using libgweather, I strongly recommend you to use the 40.0 release or build from the libgweather-3 branch until you are planning to port to GTK4.

If you’re distributing libgweather, I recommend you package the new libgweather under a new name, given that it’s parallel installable with the old one; my recommendation is to use libgweather4 or libgweather-4 as the name of the package.

#14 Well-Rounded

Update on what happened across the GNOME project in the week from October 08 to October 15.

Core Apps and Libraries

Libadwaita

Building blocks for modern GNOME apps using GTK4.

Tobias Bernard announces

Alexander Mikhaylenko landed a number of styling updates, including a new style for scrollbars and increased border radii across the entire stylesheet. Scrollbars are now rounded and no longer attached to the window edge, which makes for nicer visuals and a smoother state transition.

Alexander Mikhaylenko says

libadwaita demo is now published in the GNOME Nightly Flatpak repository.

Tracker

A filesystem indexer, metadata storage system and search tool.

Sam Thursfield announces

Tracker SPARQL database now provides much more helpful error messages for app developers who are writing their own ontologies. This work was done by Abanoub Ghadban as part of Google Summer of Code 2021. See https://gitlab.gnome.org/GNOME/tracker/-/merge_requests/452

Sysprof

A profiling tool that helps in finding the functions in which a program uses most of its time.

Ivan Molodetskikh announces

The development version of Sysprof is now better at finding debug-info files for Flatpak apps. Combined with the introduction of frame pointers to org.freedesktop.Platform 21.08 and, recently, to the nightly org.gnome.Platform, this means that you can now use Sysprof to profile GNOME Flatpak apps and get correct stack traces. Just make sure that the app uses the nightly org.gnome.Platform and that you have installed org.freedesktop.Sdk.Debug//21.08, org.gnome.Sdk.Debug//master and com.example.YourApp.Debug. The stack traces should also work with Sysprof built into GNOME Builder (“Run with Profiler”) once it is updated.

Text Editor

Text Editor is a simple text editor that focus on session management.

Tobias Bernard reports

Christian Hergert landed a new color scheme chooser with inline previews.

GNOME Shell

Core system user interface for things like launching apps, switching windows, system search, and more.

Ivan Molodetskikh says

The work-in-progress new GNOME Shell screenshot UI saw a number of fixes and updates this week. The panel now shows beautiful new icons for area, screen and window selection made by Tobias Bernard. Upon opening the UI, you’re presented with a pre-selected starting area which you can now drag around and resize in all 8 directions, while the panel fades out of the way. You can also draw a new area by holding Ctrl or with the right mouse button. Capturing the screenshot no longer freezes the screen for a moment as PNG compression now happens on a separate thread. New screenshots appear in Recent items in the file manager. Also, you can now take screenshots of GNOME Shell pop-up menus without them glitching out the UI.

Additionally, I opened a merge request to remove the screenshot hotkey handling from gnome-settings-daemon. “Take a screenshot” and “Take a screenshot of a window” hotkeys will be handled by GNOME Shell itself, bringing same-frame screenshots and notifications to window and full-screen screenshot hotkeys. For example, Alt-PrtSc now works for GTK 4 application pop-up menus.

GWeather

Emmanuele Bassi says

GWeather, the library for gathering weather information used by various GNOME applications, has been updated to allow its use by GTK4 applications: https://gitlab.gnome.org/GNOME/libgweather/-/issues/151

Circle Apps and Libraries

Webfont Kit Generator

Create @font-face kits easily.

Rafael Mardojai CM announces

Webfont Kit Generator was ported to GTK4 and libadwaita with some small design improvements.

Solanum

Balance working time and break time.

Chris 🌱️ says

Solanum now has preferences to set the various timer lengths and how many laps to go before a long break.

Share Preview

Test social media cards locally.

Rafael Mardojai CM says

Share Preview’s metadata inspector has been moved to a separate dialog, and now also allows you to inspect document body images.

Pika Backup

Simple backups based on borg.

Sophie Herold announces

Pika Backup got ported to GTK 4 and libadwaita.

Observing readers might also spot a “Schedule” page in the screenshot. More about that in a future update.

Third Party Projects

Aaron Erhardt announces

The second stable version of Relm4, an idiomatic GUI library based on gtk4-rs, was released and makes GUI development with Rust and GTK even better!

Most notably, Relm4 now offers better error messages, improved macros and an even better integration of libadwaita. The full release article can be found here. Also special thanks to tronta for adding the math trainer example.

Bilal Elmoussaoui says

Maximiliano & I ported Contrast to GTK 4 & libadwaita.

That’s all for this week!

See you next week, and be sure to stop by #thisweek:gnome.org with updates on your own projects!

October 14, 2021

2021-10-14 Thursday

  • Mail chew; catch up with Miklos, Andras & a great COOL community call - lovely to see some of the hacktober participants showing up and contributing.

October 12, 2021

GtkSourceStyleSchemePreview

In the past, we had a style scheme chooser widget to help people find style schemes that look useful. It was fairly rudimentary and doesn’t fit how we’d like style scheme selection to work going forward. So in what will become GtkSourceView 5.4, I’ve added the GtkSourceStyleSchemePreview widget which you can use to preview a specific style scheme.

It allows you to create your own chooser like is seen in this screenshot of Text Editor.

As usual, you can try it for yourself with Text Editor Nightly and follow along for more timely updates here.

Mo’ Pixels

Recently I’ve been indulging myself in pixel art again. One might assume that’s my comfort zone, but honestly I don’t feel like I’ve ever truly mastered it.

The initial push came from my friend, who quit his corporate job, to dive back into his passion and is working on games. Their first title is an oldschool pixel maze, (with a 2021 artistic twist, of course). His work inspired me to get back to pixel pushing.

To combine exploration with usefulness, I imagined mixing up of the new application icon style with pixels to perhaps bring back the fun of colorful patterns into a wallpaper.

Sadly the result is visually way too overwhelming, but the assets created can at least please your nostalgia bone here on planet GNOME (unless it becomes a mess without the stylesheet, we’ll see). Stay curious!

x x x x x x x x x x x x x x x x x x x x x x x x x x x x x x x x x x x x x x x x x x x x x x x

Platform Design Goings On

The GNOME design team has recently been working on GNOME’s application development platform, and I thought that it might be interesting for people to hear about what we’ve been up to.

The following is an overview of our recent platform design activities, particularly libadwaita. It will give an idea of what is currently going into the GNOME platform from a UXD perspective, as well as some of things that people might expect from the platform in the future.

Some context

If you follow GNOME development, you’ll know that GTK 4 was released back in December 2020. You’ll also maybe know about libhandy, which can be used in conjunction with GTK 3 to add additional widgets and capabilities. And you might know that libadwaita is being worked on as the libhandy successor for GTK 4.

Adrien Plazas did a great post announcing libadwaita, and Alexander Mikhaylenko has been posting detailed updates. libadwaita still isn’t stable, but the hope is to have a stable 1.0 release in the not too distant future.

One of the central goals of libadwaita is to make it easy to make great apps, using the components and design practices that make up GNOME’s app design approach. Needless to say, the GNOME design team has been on board with this initiative from the start! It has also required quite a bit of work from us, both to document and systematise the design conventions we’ve been using, as well as to design missing platform pieces.

The first major step in this work was completed last development cycle, with the rewritten HIG. The new version is synchronized with GTK 4 and libadwaita, so its design advice is an accurate portrayal of what can be done with the emerging new version of the GNOME platform.

The updated HIG will be an important part of the application developer experience, and we are now focused on delivering the other key elements.

Ongoing work

The following describes some of the areas of platform design work that the design team are currently involved with, particularly in the run up to libadwaita 1.0. As such, it covers work that is unfinished and is in various states of flux.

Styling

One of the first things that people will notice about apps that are using GTK 4 and libadwaita is their look, which is noticeably different from GTK 3 apps.

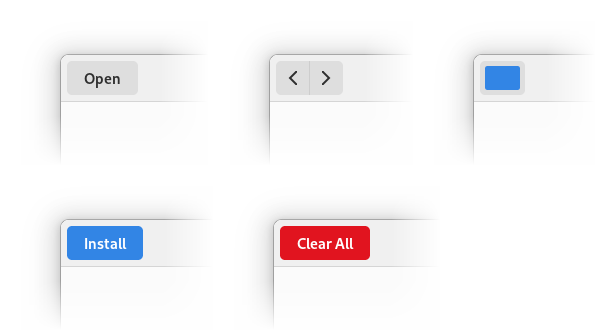
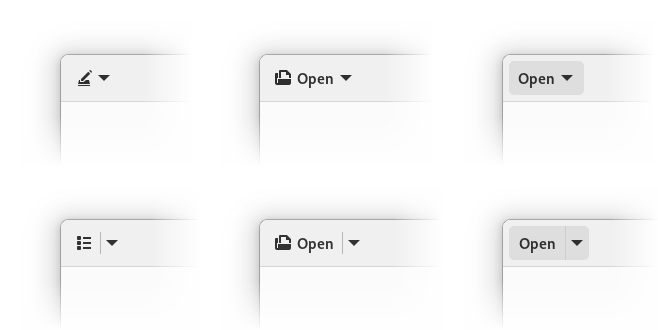
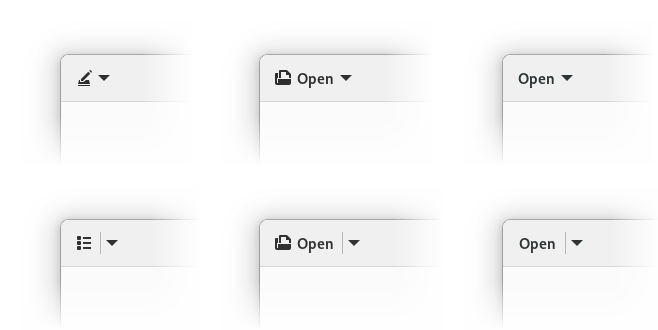
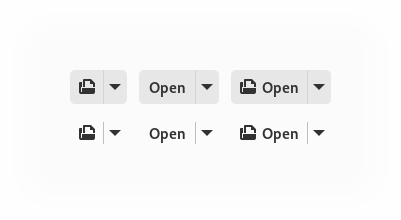
Header bar buttons are generally plain icons without outline or background. Other buttons have a flat colour. The background colours of container widgets are lighter in light mode, and darker in dark mode. Many of these changes in appearance are driven by technical changes: libadwaita’s support for dark mode and recolouring has knock-on effects for how widgets can be styled.

However, the design team is also keen to use the opportunity of libadwaita 1.0 to update the style of GNOME apps. The last time GTK had a style update was for GNOME 3.32, back in March 2019, and it could be several years before we get another opportunity to make changes.

On top of that, we do feel that the current GTK 3 look could be improved when compared to what’s being done on other platforms.

We are actively testing the style changes that have been made so far, using both in mockups and actual apps, and there could be adjustments before libadwaita 1.0. We also have a few other relatively minor style changes planned.

Dark mode

The new dark style preference is probably the main “feature” to come out of libadwaita — see Alexander’s recent post about it, if you haven’t already.

A properly supported dark style isn’t just a simple switch between two alternate CSS stylesheets, and the design team is currently working through a list of work items to make it into an excellent experience. This includes adjusting application-specific styling to work in both light and dark styles, modifying any full-colour icons we use to have adequate contrast in both modes, and creating light and dark versions of the GNOME wallpapers.

We have also, obviously, been working on designs for how to expose the dark preference itself.

Patterns app

Another ongoing initiative is the design and development of Patterns. This is a demo app which is intended to accompany libadwaita and the HIG.

One explicit goal of Patterns is to demonstrate those design patterns which we recommend app developers as part of the HIG, as opposed to demonstrating every possible UI that the platform is technically capable of producing.

There is plenty of work yet to do on Patterns, so if you’d like to help out with this effort, just head over to its Gitlab project.

New about

There isn’t much scope to add new widgets prior to libadwaita 1.0, but there are a few which the design team is hoping to sneak in. One of these is an updated about window design. The goal is to have a simple, refined design, which works on a variety of form factors.

Looking to the future

In addition to supporting development work that is currently ongoing, the design team is also working on designs which will hopefully happen in future versions of libadwaita, after 1.0, and I’ll give an overview of these so you can see what’s coming down the tracks. That said, all of these designs are speculative, so there is no guarantee that they will happen, or that they will happen in the form that’s described here. Also, note that the images here are mockups which aren’t a fully realistic representation of what any final UI might look like.

Entry rows

Boxed lists are a common design pattern in our apps, and libadwaita includes a number of convenience widgets to make it easy to create common types of lists and rows (currently, AdwActionRow, AdwComboRow, and AdwExpanderRow). One thing that’s missing here is a dedicated widget for rows which contain a text entry, and this is something that we’ve been actively exploring. It’s a tricky design problem but is something that we’re determined to resolve.

Toasts

In-app notifications are the bars that appear below the header bars of some GNOME apps, to show transient messages. They have been used for some time, and play a key role in a number of core apps. However, despite their centrality, they have never really been supported by the platform, having been provided as cut and paste code from libgd, which has meant that they’ve often been out of reach for many app developers.

Toasts are planned to be a new widget which will be provided by libadwaita, and which will effectively replace in-app notifications. We plan on avoiding some of the issues that can be seen with the existing in-app notifications, by providing a simple API which takes care of the tricky aspects of showing message popups, such as message queing.

Banners

Another widget which we hope to provide an alternative to is GtkInfoBars. These have been around for a very long time, and are used in many apps to show a coloured strip below the header containing text and controls.

Info bars require developers to pack the content of the bar themselves, which results in consistency and quality issues, as well as more work for developers. Also, they aren’t adaptive. So we are planning to introduce a new widget – banners – which are simpler to use, adaptive, and which take care of their own internal layout. This will avoid the info bar issues of the past, and be less work to use.

Selection mode

Another area of design development has been selection mode. This is found in some of the GNOME core apps, but is not currently covered by the HIG. Recent design exploration has sought to refine and update the design pattern, in order to allow us to recommend it to developers.

A good next step here will be to try the updated design in a core app, so we get an opportunity to validate it.

Putting it into practice

Over the past few weeks, I’ve been updating a number of GNOME’s core app designs, to put our updating styling and design patterns into practice, and make sure that they work together.

Here, you can see what Contacts, Photos and Clocks might look like once ported to GTK 4 and libadwaita. Obviously, these are just experiments, but they are a helpful way of exploring our new direction.

I have to say that, applying the new style to existing apps has been extremely refreshing from a design perspective, and the new approach has been working even better than I’d expected. The simplified visual style feels lighter, and a number of awkward old designs clicked into place when using the new list and button patterns.

Closing thoughts

Many of the things that are being done for the GNOME platform right now have been a dream for many years, so the fact that they are now happening is incredibly exciting. Having fully supported design patterns, with integrated documentation and demos will be huge win for anyone creating apps for the GNOME platform.

Alexander Mikhaylenko deserves special thanks for his work on libadwaita, which is making all this possible. Tobias Bernard, Adrien Plazas, Chris Davis, Jakub Steiner, and Maximiliano are all also playing key roles.

While phenomenal progress is being made in this area, resources are tight and there’s a lot of work falling on the shoulders of a few contributors. A good number of things we would like to implement for libadwaita 1.0 won’t make it because of these constraints. Which is my way of saying: help would be welcome!

Quadlet, an easier way to run system containers

Kubernetes and its likes is an excellent way to run containers in the cloud. And for development and testing, manually running podman is very useful (although do check out toolbox). But sometimes you really want to run a system service using a container. This could be on your laptop, NUC, or maybe some kind of edge or embedded device. The container should automatically start at boot, restart on errors, etc.

The recommended way to do this is to run podman from a systemd service. A lot of work has gone into podman to make this work well (and it constantly improves), and there are lots of documentation around the internet on how to do this. Additionally podman itself has some tools to help starting out (see podman generate systemd). But, the end result of all of these is that you get a complex, hard to understand systemd unit file with a very long “podman run” command that you have to maintain.

There has to be a simpler way!
Enter quadlet.

Quadlet is a systemd generator that takes a container description and automatically generates a systemd service file from it. The container description is in the systemd unit file format and describes how you want to run the container (i.e. what image, which ports exposed, etc), as well as standard systemd options, like dependencies. However, it doesn’t need to bother with technical details about how a container gets created or how it integrates with systemd, which makes the file much easier to understand and maintain.

This is easiest demonstrated by an example:

[Unit]
Description=Redis container

[Container]
Image=docker.io/redis
PublishPort=6379:6379
User=999

[Service]
Restart=always

[Install]
WantedBy=local.target

If you install the above in a file called
/etc/containers/systemd/redis.container (or
/usr/share/containers/systemd/redis.container) then, during boot (and at systemctl daemon-reload time), this is used to generate the file /run/systemd/generator/redis.service, which is then made
available as a regular service.

To get a feeling for this, the above container file generates the following service file:

# Automatically generated by quadlet-generator
[Unit]
Description=Redis container
RequiresMountsFor=%t/containers
SourcePath=/etc/containers/systemd/redis.container

[X-Container]
Image=docker.io/redis
PublishPort=6379:6379
User=999

[Service]
Restart=always
Environment=PODMAN_SYSTEMD_UNIT=%n
KillMode=mixed
ExecStartPre=-rm -f %t/%N.cid
ExecStopPost=-/usr/bin/podman rm -f -i --cidfile=%t/%N.cid
ExecStopPost=-rm -f %t/%N.cid
Delegate=yes
Type=notify
NotifyAccess=all
SyslogIdentifier=%N
ExecStart=/usr/bin/podman run --name=systemd-%N --cidfile=%t/%N.cid --replace --rm -d --log-driver journald --pull=never --runtime /usr/bin/crun --cgroups=split --tz=local --init --sdnotify=conmon --security-opt=no-new-privileges --cap-drop=all --mount type=tmpfs,tmpfs-size=512M,destination=/tmp --user 999 --uidmap 999:999:1 --uidmap 0:0:1 --uidmap 1:362144:998 --uidmap 1000:363142:64538 --gidmap 0:0:1 --gidmap 1:362144:65536 -p=6379:6379 docker.io/redis

[Install]
WantedBy=local.target

Once started it looks like a regular service:

● redis.service - Redis container
Loaded: loaded (/etc/containers/systemd/redis.container; generated)
Active: active (running) since Tue 2021-10-12 12:34:14; 1s ago
Main PID: 1559371 (conmon)
Tasks: 8 (limit: 38373)
Memory: 32.0M
CPU: 387ms
CGroup: /system.slice/redis.service
├─container
│ ├─1559375 /dev/init -- docker-entrypoint.sh redis-server
│ └─1559489 "redis-server *:6379"
└─supervisor
  └─1559371 /usr/bin/conmon --api-version 1 -c 24184463a9>

In practice you don’t need to care about the generated file, all you need to maintain is the container file. In fact, over time as podman/systemd integration is improved it may generate slightly different files to take advantage of the new features.

In addition to being easier to understand, quadlet comes with a set of defaults for how the container is run that better fit the usecase of running system services. For example, it defaults to running without any capabilities, it has a basic init process in the container, it uses the journal log driver, and it sets up the cgroups in a mode that best matches what systemd needs.

Right now this is a separate project, but I’ve been in touch with the podman developers, and there is some discussions of how to make this feature part of podman instead. But, until then you can use it from github.com/containers/quadlet, and I have made a COPR build available for experimenting.

For more information see the docs linked from the README.

October 06, 2021

Notes on histories: the European nation-state, the Lakota, and Athens

I have been doing a variety of history reading of late, but have not had time to properly synthesize them. They keep coming up in conversation, though, so I wanted to write down some bullet points I could refer to. I hope they are interesting and/or provocative in a good way to someone.

Resemblance to the history of open source was rarely why I read these books. (In fact at least one was read deliberately to get away from open source thinking.) And yet the parallels — around power, mindshare, “territory”, autonomy, empowerment, innovation—keep coming back to me. I leave conclusions, for the most part, for now, to the reader.

Final disclaimer: in the interest of finally publishing a damn thing (I read Ober years ago!), this post will necessarily condense and butcher thousands of pages of scholarship. Please read with that in mind — errors and oversights are almost certainly mine and not the fault of the original authors.

The Sovereign State and Its Competitors, Hendrik Spruyt

This book attempts to understand how Europe got from feudalism to the modern nation-state. It’s explicitly an argument against a view of history where nation-states were inevitable, instead trying to show that there were other possible paths during the late Middle Ages. (The book is very Euro-centric without acknowledging that, which is a shame since I think the book would be well-complemented by an analysis of how European nation-states interacted in colonial settings with non-nation-states, about which more later.)

The core argument goes something like this:

  • what is feudalism anyway? at some level, it means “no entity has a monopoly on power in a territory”, because feudal lords, the church, tribal-like kinship relationships, etc., all overlap and interact in complicated ways.
  • you get out of feudalism, and into nation-states by:
  • punctuated-equilibrium-style evolution: a major shock to existing system (in Spruyt’s analysis, massive economic growth starting in c. 1000) which creates new power centers (bourgeoisie and new cities), which destabilizes feudalism and …
  • creates a diverse set of post-feudal options: wealthy, powerful city-states in Italy; leagues of cities in Germany; something like the modern nation-state in France. (It is this diversity which Spruyt says a lot of historians ignore, and certainly which American high-school history completely ignores.) But…
  • that situation (with a lot of different, competing options) is unstable even if each individual solution makes sense for that place/time (i.e., “city-states were stable in/good for Italy” and “city-states were not stable in/fit for Europe” can both be very true), so then…
  • competition and conscious self-selection leaves you with modern nation-states on top, for a variety of reasons, including simply that nation states prefer negotiating with other nation-states; i.e., hard for France to make treaties with a loose coalition (league) of cities, so it partners with (and therefore empowers) other units like it.

I would love to see a similar analysis for the history of various corporate forms or industries. I’ve seen it suggested, for example, that the combination of the telegraph and the railroad made multi-jurisdiction limited-liability corporations the dominant form in the US, but there was nearly simultaneously a huge explosion in experimentation around cooperatives—should we complicate the “telegraphs → big companies” narrative in the same way Spruyt is attempting to complicate it here for the transition from feudal society to nation-states?

The mapping to open source is probably pretty obvious: internet-enabled development (and then internet-enabled distribution) delivered a shock to the existing software business ecosystem; for a time we had a flourishing of institutional/organizational forms. There is certainly a narrative (perhaps correct? perhaps not?) that we are settling into a new equilibrium with a smaller number of forms. What might this history tell us about where we’re going (and what questions we should ask about the narrative of where we’re going?)

Lakota America: A New History of Indigenous Power, Pekka Hämäläinen

US history books rarely show Native American tribes as entities with agency—the world acts on them, but not vice-versa. This book aims to be an antidote to that, showing over a course of roughly 200 years how the Lakota acted, learned, and changed in response to the world around them (including, but definitely not limited to, the US).

I definitely did not read this with the intent of “oh, this will make me think about open source”; I figured it was about as far away as I could get, and yet as I read I couldn’t help but think about parallels.

I think it’s important to be clear: by drawing parallels here I definitely don’t want to suggest that changes in open source are in any way morally/ethically comparable to genocide; if (free?)/open source culture vanished altogether tomorrow that would be a genuine tragedy, but an extremely minor tragedy compared to the very deliberate genocide that occurred occurred in North America.

But it’s hard not to see parallels in the gradual encirclement and disruption of one culture by another very different culture. Some other thoughts:

  • In one of the many ways in which the book thoughtfully gives the Lakota agency, the author writes of that “[t]hey had welcomed America’s merchandize but not its paternal embrace; they had accepted the Americans as traders and potential allies, but not as their sovereigns. They had, in other words, refused to be ‘discovered’ by [Lewis and Clark]”.
  • Just like in Spruyt’s Sovereign State, much is made of the simply different notions of “territory” between the nation-state and its competitors; in this case, between the Lakota whose governing style the book describes as “ranging widely but ruling lightly… a malleable, forever transmuting regime”, with little attention to borders or even ultimately to control, and the Americans who “were content with a cartographic proof of.. sovereignty”, needing (and imputing power to) lines on a map.
  • Technology is a small but significant undercurrent in the book: first guns, then horses, then ultimately the railroad. The first of these two were enthusiastically adopted by the Lakota, and indeed powered much of their imperial expansion in the 1800s. But they could not adopt the railroad in the same way. Nor was writing, though he does say that “[a] key element of Lakotas’ diplomatic prowess was the fact that they had so many literate allies who interpreted and explained [American] documents for them.”
  • “Contemporary Americans saw the Powder River country as an Indigenous retreat, an insular world intentionally cut off from the rapidly expanding American empire of cities, railroads, settlers, farms, ranches, and capitalism—a perception that has dominated outsider views of the Lakotas ever since. In reality, the Powder River country under the Lakota rule was a safe and dynamic cosmopolitan world of its own where transnational commercial circuits converged, where Indians enjoyed many comforts and advantages of the industrial age, and where new ideas about being in the world were constantly debated. Lakotas knew full well that they lived in a transitional period of innovation, quickening change, and questioning of old conventions. But contrary to the tired old stereotype of obstinate, tradition-bound Indians, they embraced this radical regeneration of their world.”

Additional selected Kindle highlights from my read are here.

Democracy and Knowledge: Innovation and Learning in Classical Athens, Josiah Ober

Ober is a data-driven classicist, focused on Athens and how it fit into the broader milieu of classical Greece. In my distant recollection, this book (or perhaps often just my takeaway from it) argues that:

  • Since you have literally a thousand Greek city states, you’re running a real experiment you can draw real conclusions from. And Athens, in a real material sense (backed by a variety of interesting data sets) “won” this experiment. (This has some parallels to Spruyt, arguing that in essence there was a flourishing of alternatives and then a winnowing.)
  • This greatness was in large part predicated on Athen’s ability as a democracy (relative to its neighbors, at any rate) to create and synthesize effective knowledge. In other words, it was better at being a government specifically because it was a democracy, using “local”/small-group/individual knowledge to make itself more effective.
  • Athens then ultimately failed (after nearly 200 years) in part because neighboring oligarchic governments took its good ideas, and re-implemented them. (This issue is also explored in Ober’s Rise and Fall of Classical Greece.)

I do wish I still had my original notes from reading this a decade or so ago; both it and Rise and Fall are deep and rich books that stirred my political theory bones in a great way.

October 04, 2021

Dark Style Preference

TL;DR GNOME will have a system-wide dark style preference in 42. Please update your apps to support it, see the instructions.


Dark style preference in GNOME
Dark style preference in GNOME 42. Separate dark and light screenshots

Lately, I’ve been working on having a proper dark style preference in GNOME. It’s a frequently requested feature, but also hard to get right. elementary UX architect Cassidy James Blaede did a good write-up about this, please read it if you haven’t yet (or watch his GUADEC talk if you prefer a video).

That was more than two years ago. Since then, elementary OS has started shipping an elementary-specific implementation designed in a way that it could be standardized later without many changes. While I could introduce another preference in GNOME, it was a good excuse to standardize it instead.

How does it work?

The idea is more or less exactly same as what elementary OS is doing: there’s a system preference, a tri-state with values: no-preference, prefer-dark, prefer-light. All 3 are just hints — apps are free to follow or not follow them as appropriate. The no-preference and prefer-dark values are exposed in settings, while the prefer-light value is reserved for future use.

Style: default; dark. Preferred visual style for system components. Apps may also choose to follow this preference. Schedule: Disabled; Sunset to Sunrise; Manual. From: 20:00, To: 06:00
Style preferences in elementary OS 6.0

The new preference is defined in the settings portal as the org.freedesktop.appearance.color-scheme key.

xdg-desktop-portal-gnome already implements this key (in the main branch, not in 41), and there are work-in-progress elementary and KDE implementations.

This way it’s not tied to any particular desktop or toolkit — any application can access the settings portal via DBus and read the preference — so applications like Firefox have a canonical location to access the preference from instead of trying to guess it from GTK theme name. Being in the portal also means it’s accessible to Flatpak apps without opening any sandbox holes.

API

Manually accessing the portal is a bit tedious, and so we wrap it into an easy to use API. Here’s where things differ more from the original elementary preference.

elementary exposes the preference in Granite (right now it only works with the elementary preference, there’s a pull request to make it use the portal), and leaves everything else to apps, so using the API looks like this:

var gtk_settings = Gtk.Settings.get_default ();
var granite_settings = Granite.Settings.get_default ();

gtk_settings.gtk_application_prefer_dark_theme = (
    granite_settings.prefers_color_scheme == DARK
);

granite_settings.notify["prefers-color-scheme"].connect (() => {
    gtk_settings.gtk_application_prefer_dark_theme = (
        granite_settings.prefers_color_scheme == DARK
    );
});

It works, but that’s quite verbose, and most apps do either that or prefers_color_scheme != LIGHT, and maybe vary other parts of the UI such as GtkSourceView color schemes.

For GNOME the API is in libadwaita and libhandy, and is vaguely inspired by CSS. The equivalent Vala code using libhandy looks like this:

Hdy.StyleManager.get_default ().color_scheme = PREFER_LIGHT;

The other color schemes are FORCE_LIGHT, PREFER_DARK and FORCE_DARK, as follows:

system \ app force-light prefer-light prefer-dark force-dark
prefer-light light light light dark
default light light dark dark
prefer-dark light dark dark dark

There’s also a read-only boolean property dark that corresponds to whether the UI currently appears dark.

There are also properties to check if the system has a system-wide color scheme preference, to allow apps to keep their dark style switches when running on GNOME 41, but drop them for 42; and, somewhat unrelated, a property to check if the system is currently using high contrast mode instead of it being a theme.

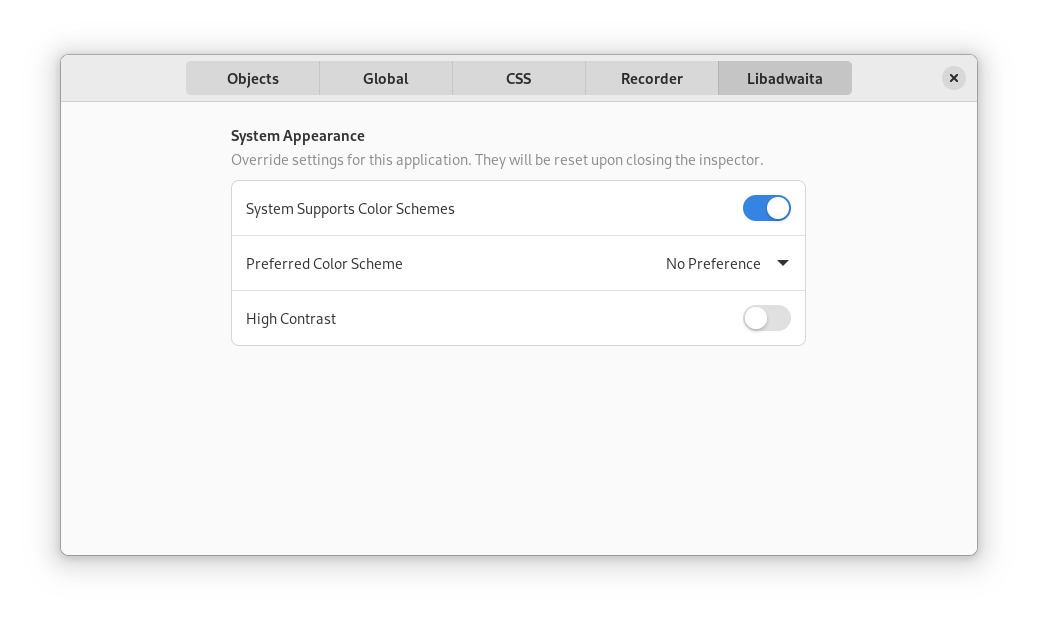
Libadwaita also provides a GtkInspector page to test all of this without changing the system preferences, though there’s no libhandy equivalent.

Libadwaita inspector page

The libadwaita API is already available in alpha 3, the libhandy one is not released yet.

Another difference is — the dark style preference is supported by default if you’re using libadwaita. While in libhandy the default is keeping the previous behavior — apps that were always light remain always light – libadwaita goes ahead and makes following the preference the default. Since it’s not API-stable yet, it’s an acceptable behavior break, same way as macOS and iOS support it automatically when building against new enough platform libraries, but don’t do it otherwise in order to keep existing apps working.

When porting from GTK3 and libhandy to GTK4 and libadwaita, apps are expected to start supporting this or otherwise opt out. When already using older versions of libadwaita, apps are expected to start supporting this when updating to alpha 3. When using libhandy, apps don’t get the support by default, but can explicitly opt in.

Transitions

Another thing libhandy and libadwaita do when switching appearance is they try very hard to block the CSS transitions that would usually occur. These transitions can take a long time and are inconsistent between widgets. For widgets with custom drawn content such as WebKitWebView this can’t work at all, so no point in trying.

An approach that yields much better results is doing the transition on the compositor side — then it works for any content automatically:

It’s still not perfect: GTK3 apps can take a pretty long time when doing this, and it will be noticeable: for example the GTK4 Patterns window on the video changes its appearance immediately while Settings and Web lag behind. The video was recorded in a VM though, and the transition should be smoother on bare metal.

When is it coming?

Most likely GNOME 42 – most of the plumbing has already landed, the main remaining things are:

  • The actual switch in Settings — I made a very simple UI for testing, shown in the video above; but it’s obviously not good enough to be used as is;
  • A switch in gnome-shell, similarly to how Android and iOS have one in Quick Settings or Control Center respectively;
  • The aforementioned compositor-side transition; I have a mostly working implementation shown in the video, but it still needs some work;
  • Day/night scheduling;
  • Synchronizing wallpaper with the preference when possible – for example, forcing the night version for the default timed wallpaper.
  • Supporting it from the applications.

How can you help?

The main area that needs work is the last item.

For core apps, we have an initiative, the goal is to port as many of them before 42 as possible.

The instructions from the initiative also apply to third party apps, although they can update at their own pace.

This applies to non-GTK apps as well — the instructions have an example of accessing the portal manually and following the preference from an SDL app.

Finally, if you maintain a GNOME-adjacent website, it would be nice if it followed the system preference. Some of the webpages do that, e.g. the GNOME 41 release notes or GTK documentation, but most don’t. Incl. this blog, yes.


So, let’s make it happen. For now, happy hacking.

I want to thank elementary folks for kick-starting all of this — it’s unlikely it would have happened otherwise.

October 01, 2021

PipeWire and fixing the Linux Video Capture stack

Wim Taymans

Wim Taymans laying out the vision for the future of Linux multimedia


PipeWire has already made great strides forward in terms of improving the audio handling situation on Linux, but one of the original goals was to also bring along the video side of the house. In fact in the first few releases of Fedora Workstation where we shipped PipeWire we solely enabled it as a tool to handle screen sharing for Wayland and Flatpaks. So with PipeWire having stabilized a lot for audio now we feel the time has come to go back to the video side of PipeWire and work to improve the state-of-art for video capture handling under Linux. Wim Taymans did a presentation to our team inside Red Hat on the 30th of September talking about the current state of the world and where we need to go to move forward. I thought the information and ideas in his presentation deserved wider distribution so this blog post is building on that presentation to share it more widely and also hopefully rally the community to support us in this endeavour.

The current state of video capture, usually webcams, handling on Linux is basically the v4l2 kernel API. It has served us well for a lot of years, but we believe that just like you don’t write audio applications directly to the ALSA API anymore, you should neither write video applications directly to the v4l2 kernel API anymore. With PipeWire we can offer a lot more flexibility, security and power for video handling, just like it does for audio. The v4l2 API is an open/ioctl/mmap/read/write/close based API, meant for a single application to access at a time. There is a library called libv4l2, but nobody uses it because it causes more problems than it solves (no mmap, slow conversions, quirks). But there is no need to rely on the kernel API anymore as there are GStreamer and PipeWire plugins for v4l2 allowing you to access it using the GStreamer or PipeWire API instead. So our goal is not to replace v4l2, just as it is not our goal to replace ALSA, v4l2 and ALSA are still the kernel driver layer for video and audio.

It is also worth considering that new cameras are getting more and more complicated and thus configuring them are getting more complicated. Driving this change is a new set of cameras on the way often called MIPI cameras, as they adhere to the API standards set by the MiPI Alliance. Partly driven by this V4l2 is in active development with a Codec API addition, statefull/stateless, DMABUF, request API and also adding a Media Controller (MC) Graph with nodes, ports, links of processing blocks. This means that the threshold for an application developer to use these APIs directly is getting very high in addition to the aforementioned issues of single application access, the security issues of direct kernel access and so on.

libcamera logo


Libcamera is meant to be the userland library for v4l2.


Of course we are not the only ones seeing the growing complexity of cameras as a challenge for developers and thus libcamera has been developed to make interacting with these cameras easier. Libcamera provides unified API for setup and capture for cameras, it hides the complexity of modern camera devices, it is supported for ChromeOS, Android and Linux.
One way to describe libcamera is as the MESA of cameras. Libcamera provides hooks to run (out-of-process) vendor extensions like for image processing or enhancement. Using libcamera is considering pretty much a requirement for embedded systems these days, but also newer Intel chips will also have IPUs configurable with media controllers.

Libcamera is still under heavy development upstream and do not yet have a stable ABI, but they did add a .so version very recently which will make packaging in Fedora and elsewhere a lot simpler. In fact we have builds in Fedora ready now. Libcamera also ships with a set of GStreamer plugins which means you should be able to get for instance Cheese working through libcamera in theory (although as we will go into, we think this is the wrong approach).

Before I go further an important thing to be aware of here is that unlike on ALSA, where PipeWire can provide a virtual ALSA device to provide backwards compatibility with older applications using the ALSA API directly, there is no such option possible for v4l2. So application developers will need to port to something new here, be that libcamera or PipeWire. So what do we feel is the right way forward?

Ideal Linux Multimedia Stack

How we envision the Linux multimedia stack going forward


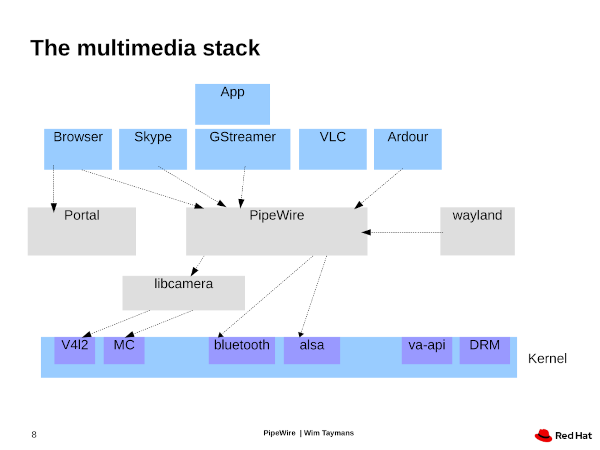
Above you see an illustration of what we believe should be how the stack looks going forward. If you made this drawing of what the current state is, then thanks to our backwards compatibility with ALSA, PulseAudio and Jack, all the applications would be pointing at PipeWire for their audio handling like they are in the illustration you see above, but all the video handling from most applications would be pointing directly at v4l2 in this diagram. At the same time we don’t want applications to port to libcamera either as it doesn’t offer a lot of the flexibility than using PipeWire will, but instead what we propose is that all applications target PipeWire in combination with the video camera portal API. Be aware that the video portal is not an alternative or a abstraction of the PipeWire API, it is just a way to set up the connection to PipeWire that has the added bonus of working if your application is shipping as a Flatpak or another type of desktop container. PipeWire would then be in charge of talking to libcamera or v42l for video, just like PipeWire is in charge of talking with ALSA on the audio side. Having PipeWire be the central hub means we get a lot of the same advantages for video that we get for audio. For instance as the application developer you interact with PipeWire regardless of if what you want is a screen capture, a camera feed or a video being played back. Multiple applications can share the same camera and at the same time there are security provided to avoid the camera being used without your knowledge to spy on you. And also we can have patchbay applications that supports video pipelines and not just audio, like Carla provides for Jack applications. To be clear this feature will not come for ‘free’ from Jack patchbays since Jack only does audio, but hopefully new PipeWire patchbays like Helvum can add video support.

So what about GStreamer you might ask. Well GStreamer is a great way to write multimedia applications and we strongly recommend it, but we do not recommend your GStreamer application using the v4l2 or libcamera plugins, instead we recommend that you use the PipeWire plugins, this is of course a little different from the audio side where PipeWire supports the PulseAudio and Jack APIs and thus you don’t need to port, but by targeting the PipeWire plugins in GStreamer your GStreamer application will get the full PipeWire featureset.

So what is our plan of action>
So we will start putting the pieces in place for this step by step in Fedora Workstation. We have already started on this by working on the libcamera support in PipeWire and packaging libcamera for Fedora. We will set it up so that PipeWire can have option to switch between v4l2 and libcamera, so that most users can keep using the v4l2 through PipeWire for the time being, while we work with upstream and the community to mature libcamera and its PipeWire backend. We will also enable device discoverer for PipeWire.

We are also working on maturing the GStreamer elements for PipeWire for the video capture usecase as we expect a lot of application developers will just be using GStreamer as opposed to targeting PipeWire directly. We will start with Cheese as our initial testbed for this work as it is a fairly simple application, using Cheese as a proof of concept to have it use PipeWire for camera access. We are still trying to decide if we will make Cheese speak directly with PipeWire, or have it talk to PipeWire through the pipewiresrc GStreamer plugin, but have their pro and cons in the context of testing and verifying this.

We will also start working with the Chromium and Firefox projects to have them use the Camera portal and PipeWire for camera support just like we did work with them through WebRTC for the screen sharing support using PipeWire.

There are a few major items we are still trying to decide upon in terms of the interaction between PipeWire and the Camera portal API. It would be tempting to see if we can hide the Camera portal API behind the PipeWire API, or failing that at least hide it for people using the GStreamer plugin. That way all applications get the portal support for free when porting to GStreamer instead of requiring using the Camera portal API as a second step. On the other side you need to set up the screen sharing portal yourself, so it would probably make things more consistent if we left it to application developers to do for camera access too.

What do we want from the community here?
First step is just help us with testing as we roll this out in Fedora Workstation and Cheese. While libcamera was written motivated by MIPI cameras, all webcams are meant to work through it, and thus all webcams are meant to work with PipeWire using the libcamera backend. At the moment that is not the case and thus community testing and feedback is critical for helping us and the libcamera community to mature libcamera. We hope that by allowing you to easily configure PipeWire to use the libcamera backend (and switch back after you are done testing) we can get a lot of you to test and let us what what cameras are not working well yet.

A little further down the road please start planning moving any application you maintain or contribute to away from v4l2 API and towards PipeWire. If your application is a GStreamer application the transition should be fairly simple going from the v4l2 plugins to the pipewire plugins, but beyond that you should familiarize yourself with the Camera portal API and the PipeWire API for accessing cameras.

For further news and information on PipeWire follow our @PipeWireP twitter account and for general news and information about what we are doing in Fedora Workstation make sure to follow me on twitter @cfkschaller.
PipeWire

September 29, 2021

GStreamer: one repository to rule them all

For the last years, the GStreamer community has been analysing and discussing the idea of merging all the modules into one single repository. Since all the official modules are released in sync and the code evolves simultaneously between those repositories, having the code split was a burden and several core GStreamer developers believed that it was worth making the effort to consolidate them into a single repository. As announced a while back this is now effective and this post is about explaining the technical choices and implications of that change.

You can also check out our Monorepo FAQ for a list of questions and answers.

Technicall details of the unification

Since we moved to meson as a build system a few years ago we implemented gst-build which leverages the meson subproject feature to build all GStreamer modules as one single project. This greatly enhanced the development experience of the GStreamer framework but we considered that we could improve it even more by having all GStreamer code in a single repository that looks the same as gst-build.

This is what the new unified git repository looks like, gst-build in the main gstreamer repository, except that all the code from the GStreamer modules located in the subprojects/ directory are checked in.

This new setup now lives in the main default branch of the gstreamer repository, the master branches for all the other modules repositories are now retired and frozen, no new merge request or code change will be accepted there.

This is only the first step and we will consider reorganizing the repository in the future, but the goal is to minimize disruptions.

The technical process for merging the repositories looks like:

foreach GSTREAMER_MODULE
    git remote add GSTREAMER_MODULE.name GSTREAMER_MODULE.url
    git fetch GSTREAMER_MODULE.name
    git merge GSTREAMER_MODULE.name/master
    git mv list_all_files_from_merged_gstreamer_module() GSTREAMER_MODULE.shortname
    git commit -m "Moved all files from " + GSTREAMER_MODULE.name
endforeach

This allows us to keep the exact same history (and checksum of each commit) for all the old gstreamer modules in the new repository which guarantees that the code is still exactly the same as before.

Releases with the new setup

In the same spirit of avoiding disruption, releases will look exactly the same as before. In the new unique gstreamer repository we still have meson subprojects for each GStreamer modules and they will have their own release tarballs. In practice, this means that not much (nothing?) should change for distribution packagers and consumers of GStreamer tarballs.

What should I do with my pending MRs in old modules repositories?

Since we can not create new merge requests in your name on gitlab, we wrote a move_mrs_to_monorepo script that you can run yourself. The script is located in the gstreamer repository and you can start moving all your pending MRs by simply calling it (scripts/move_mrs_to_monorepo.py and follow the instructions).


You can also check out our Monorepo FAQ for a list of questions and answers.

Thanks to everyone in the community for providing us with all the feedback and thanks to Xavier Claessens for co-leading the effort.

We are still working on ensuring the transition as smoothly as possible and if you have any question don’t hesitate to come talk to us in #gstreamer on the oftc IRC network.

Happy GStreamer hacking!

September 28, 2021

Librsvg's development branch is now called main

I have just renamed librsvg's master branch to main, as other modules already have.

Librsvg master branch renamed to main

This is what I did:

  • Rename the local branch, and push it:
git branch -m master main
git push origin main
  • Change the default branch in gitlab; for librsvg this is in the repository settings / Default branch - change that to main.

  • Set the same protection for the main branch as there was for master, if any - repository settings / Protected branches -> create a new protection and copy the settings from master.

  • Unprotect the master branch so I can delete it - repository settings / Protected branches -> unprotect the master branch.

  • Delete the master branch in the branches list.

  • Update the CI and build scripts: for librsvg it was just .gitlab-ci.yml.

  • Update your documentation: for librsvg it was just COMPILING.md.

  • Notify the release team; I created an issue and one for gnome-build-meta.

Update 2021/Sep/30: Extra things which Philip Withnall suggested:

  • Notify [email protected] so they can update the damned-lies software. (Librsvg has no translations).

  • See if any project have a librsvg.wrap (for Meson?) and notify them. I don't think I'm using search engines correctly...

  • Re-protect the master branch to prevent people accidentally pushing to it. Since that branch no longer exists, gitlab lets you create a protection by glob matching on a name, not an actual branch.

If you have a local checkout, you can do this:

# update from upstream
git fetch origin

# switch to your local master branch
git checkout master

# rename your local branch
git branch -m master main

# Remove the old upstream...
git branch --unset-upstream

# ... and set the new one
git branch -u origin/main

That's all!

September 27, 2021

Build a Tip Calculator App in Flutter

In this tutorial, you’ll create a Tip Calculator app and learn some of the basics of developing a Flutter app. The app will let the user input - Bill Amount and Tip Percentage. Based on these values, it will calculate Tip Amount and Total Amount.

Contents

Getting Started

Flutter lets you create your project on many operating systems. For example, macOS, Linux, Windows, or even Chrome OS.

Before getting started with this project, you’ll need the following things:

You can download the code used in this tutorial from this GitHub repository.

Creating a New Project

The first step is to create a new Flutter project. Open your terminal, navigate to a path of your choice and run the following command:

flutter create tip_calculator

Once your project is set up, navigate into the project directory and open it in your IDE. For VS Code, you can run the following commands:

cd tip_calculator
code .

Locate lib/main.dart file and you’ll find a lot of boilerplate code written for you. You are here to learn to write code on your own, so replace the file contents with the following code:

import 'package:flutter/material.dart';

void main() {
  runApp(const MyApp());
}

class MyApp extends StatelessWidget {
  const MyApp({Key? key}) : super(key: key);
  
  @override
  Widget build(BuildContext context) {
    return MaterialApp(
      title: 'Tip Calculator',
      theme: ThemeData(primarySwatch: Colors.green),
      home: const FormView(),
    );
  }
}

As you can see in the above code, you need a FormView screen as the home page of your app. So in the lib/main.dart, add the following code:

class FormView extends StatefulWidget {
  const FormView({Key? key}) : super(key: key);
  
  @override
  _FormViewState createState() => _FormViewState();
}

class _FormViewState extends State<FormView> {
  @override
  void initState() {
    super.initState();
  }
  
  @override
  Widget build(BuildContext context) {
    return Scaffold(
      appBar: AppBar(
        title: const Text('Tip Calculator'),
      ),
    );
  }
  
  @override
  void dispose() {
    super.dispose();
  }
}

At this point, you have a MyApp class which is a Stateless widget, and a FormView class which is a Stateful widget.

You use a stateful widget when you want to keep track of the state of your app. The UI of a stateful widget is always the function of the state of the widget. For example, a cart page in an eCommerce app. In all other cases, a stateless widget is often handier. It always builds the same UI regardless of the state of the app. For example, the logo for your app on an appbar.

The beauty of Flutter is you can compose Stateful widgets in Stateless widgets. As you develop more and more Flutter apps, you’ll learn to use Stateless widgets more often.

Launching an Emulator Device

At this point, you have enough code to launch your app without any build errors. The next thing you need to do is to connect to a physical device or an emulator. In this tutorial, you’ll work on an emulator.

In VS Code, open the Command Palette by pressing Control-Shift-P, type Flutter: Launch Emulator, and press Enter. Select a Mobile Device emulator and wait for it to initialize.

Menu for selecting Flutter emulator in VS Code

Once your emulator is up and running, press F5 to build and run your Flutter app in debug mode. You’ll see the following screen pop up on your emulator:

Flutter App with Appbar

This screen contains an app bar with your app title.

Building UI

Now your Flutter app is up and running, it is time to build the UI of the app. This app will have a Form with two Text fields and a Column for showing Tip Amount and Total Amount.

Adding a Form for User Input

Update the build function of the _FormViewState class by adding body for your FormView as in the following code:

body: Container(
  padding: const EdgeInsets.all(16.0),
  child: Form(
    child: Column(
      children: [
        TextFormField(
          decoration: const InputDecoration(labelText: 'Bill Amount'),
          keyboardType: const TextInputType.numberWithOptions(
            decimal: true,
          ),
        ),
        const SizedBox(height: 16),
        TextFormField(
          decoration: const InputDecoration(labelText: 'Tip Percentage'),
          keyboardType: const TextInputType.numberWithOptions(
            decimal: true,
          ),
        ),
        const SizedBox(height: 32),
        // todo
      ],
    ),
  ),
),

Save your progress by pressing Control-S and you’ll experience the Hot Reload feature of Flutter. Whenever you update your code, Flutter only rebuilds the part of the widget tree which is dependent upon the changed code rather than rebuilding the entire app. This feature in Flutter is called Hot Reload which lets you develop applications rapidly.

Build and run:

Flutter App with a Form

At this point, you have a Form with two TextFormField widgets for Bill Amount and Tip Percentage.

One of the specifications of the app is to have default values of 0 and 15 for the Bill Amount and Total Amount fields respectively.

So, in the _FormViewState class, add the following two class variables:

double _billAmount = 0;
double _tipPercentage = 15;

Update the TextFormField widget for Bill Amount as in the following snippet:

initialValue: _billAmount.toString(),

Then, update the TextFormField widget for Tip Percentage as in the following snippet:

initialValue: _tipPercentage.toString(),

This will assign a default value to both fields. Since initialValue needs to be a string, so you need to parse the double to a string.

At this point, if you try to do a Hot Reload, it won’t update your app for the changes you have made. This is because the global and static fields relate to the state and Hot Reload excludes any changes made to the app state. In this case, you need to Hot Restart your app.

In VS Code, build and run by pressing Control-Shift-F5 for Hot restart:

At this point, you have successfully rendered your form with two text fields for taking the user input.

Flutter App with Form fields having default values

Adding a Container for Calculations

Your form UI is complete at this stage. Next, you need to add some Text widgets to show the calculations for Tip Amount and Total Amount.

Add the following widget to the build function of the _FormViewState:

Column(
  children: [
    Row(
      children: [
        const Text('Tip Amount: '),
        Text(
          _totalTip.toString(),
          style: const TextStyle(fontWeight: FontWeight.bold),
        ),
      ],
    ),
    const SizedBox(height: 16),
    Row(
      children: [
        const Text('Total Amount: '),
        Text(
          _totalAmount.toString(),
          style: const TextStyle(fontWeight: FontWeight.bold),
        ),
      ],
    ),
  ],
),

If you try to build and run your project, you’ll get some build errors. This is because, in the Text widgets, you are referencing the _tipAmount and _totalAmount variables which you haven’t declared yet.

So, in the _FormViewState class, add the following two class variables:

double _totalTip = 0;
double _totalAmount = 0;

These variables store the calculations related to Tip Amount and Total Amount.

Build and run your project:

Flutter App with Form and Text Labels

At this point, you have successfully rendered a column containing two text labels to show calculations.

Calculating Tip and Total Amount

The app’s UI is complete at this stage. Next, you need to write business logic for calculating Tip Amount and Total Amount.

Updating State

In the _FormViewState class, add the _updateAmounts function as in the following code snippet:

void _updateAmounts() {
  setState(() {
    _totalTip = _billAmount * _tipPercentage / 100;
    _totalAmount = _billAmount + _totalTip;
  });
}

You might ask what is setState? Well, setState is a function provided by a Stateful widget using which you can update the state of your app. Whenever you call setState, Flutter executes the build function associated with the Stateful widget. This updates the UI of your app.

In the setState function, you have used some basic maths for calculating the total tip and total amount.

In this app, you don’t have to worry about government tax. It is better to keep governments out when you are learning something.

Updating UI on User Input

One requirement of this app is to calculate Tip Amount and Total Amount as soon as the user starts typing in the form fields. For this effect, you can use the onChanged callback provided by the TextFormField widget. It runs whenever the user types or deletes anything in a form field. It provides the current value of a form field as a function parameter.

Add the following parameter to the TextFormField widget for Bill Amount:

onChanged: (val) {
  _billAmount = double.tryParse(val) ?? 0;
  _updateAmounts();
},

Then, add the following parameter to the TextFormField widget for Tip Percentage:

onChanged: (val) {
  _tipPercentage = double.tryParse(val) ?? 0;
  _updateAmounts();
},

Here what’s going on in the code above:

  • You cannot assign the val variable to the _billAmount variable as the former is a string and the latter is a double. Hence, you use the double.tryParse function to parse a string to a double.
  • Since user input can be empty, so val can be empty, hence double.tryParse can return a null value. So, you use a null check operator(??) to assign _billAmount to 0 when the user input is empty.
  • After determining the _billAmount, you call the _updateAmounts function. It calculates the Tip Amount and Bill Amount and updates the UI of the app.

The same procedure applies to the working of the Tip Percentage text field.

Testing the App Manually

The coding part of your app is complete and the final step is to test whether it is doing the right calculations.

A good test covers some common use cases. You can test each of the below three test cases and make sure the app’s output matches the required output.

Bill Amount(Input) Tip Percentage(Input) Tip Amount(Output) Total Amount(Output)
0 15 0 0
100 15 15 115
100 20 20 120

Before testing, make sure to use Hot Restart to build and run your app:

Flutter Tip Calculator App in Action

Congratulations! The app is showing accurate results. You are ready to use it when you go out for lunch and tip the waiter.

What’s Next?

In this tutorial, you learned about creating UI in Flutter, Stateless and Stateful widgets, Hot Reloading, managing state, and updating UI. You can add more features to your app, like a Number of Friends field, which you can use to divide the total amount between your friends.

September 24, 2021

Fedora Workstation: Our Vision for Linux Desktop

Fedora Workstation
So I have spoken about what is our vision for Fedora Workstation quite a few times before, but I feel it is often useful to get back to it as we progress with our overall effort.So if you read some of my blog posts about Fedora Workstation over the last 5 years, be aware that there is probably little new in here for you. If you haven’t read them however this is hopefully a useful primer on what we are trying to achieve with Fedora Workstation.

The first few years after we launched Fedora Workstation in 2014 we focused on lot on establishing a good culture around what we where doing with Fedora, making sure that it was a good day to day desktop driver for people, and not just a great place to develop the operating system itself. I think it was Fedora Project Lead Matthew Miller who phrased it very well when he said that we want to be Leading Edge, not Bleeding Edge. We also took a good look at the operating system from an overall stance and tried to map out where Linux tended to fall short as a desktop operating system and also tried to ask ourselves what our core audience would and should be. We refocused our efforts on being a great Operating System for all kinds of developers, but I think it is fair to say that we decided that was to narrow a wording as our efforts are truly to reach makers of all kinds like graphics artists and musicians, in addition to coders. So I thought I go through our key pillar efforts and talk about where they are at and where they are going.

Flatpak

Flatpak logo
One of the first things we concluded was that our story for people who wanted to deploy applications to our platform was really bad. The main challenge was that the platform was moving very fast and it was a big overhead for application developers to keep on top of the changes. In addition to that, since the Linux desktop is so fragmented, the application developers would have to deal with the fact that there was 20 different variants of this platform, all moving at a different pace. The way Linux applications was packaged, with each dependency being packaged independently of the application created pains on both sides, for the application developer it means the world kept moving underneath them with limited control and for the distributions it meant packaging pains as different applications who all depended on the same library might work or fail with different versions of a given library. So we concluded we needed a system which allowed us to decouple of application from the host OS to let application developers update their platform at a pace of their own choosing and at the same time unify the platform in the sense that the application should be able to run without problems on the latest Fedora releases, the latest RHEL releases or the latest versions of any other distribution out there. As we looked at it we realized there was some security downsides compared to the existing model, since the Os vendor would not be in charge of keeping all libraries up to date and secure, so sandboxing the applications ended up a critical requirement. At the time Alexander Larsson was working on bringing Docker to RHEL and Fedora so we tasked him with designing the new application model. The initial idea was to see if we could adjust Docker containers to the desktop usecase, but Docker containers as it stood at that time were very unsuited for the purpose of hosting desktop applications and our experience working with the docker upstream at the time was that they where not very welcoming to our contributions. So in light of how major the changes we would need to implement and the unlikelyhood of getting them accepted upstream, Alex started on what would become Flatpak. Another major technology that was coincidentally being developed at the same time was OSTree by Colin Walters. To this day I think the best description of OSTree is that it functions as a git for binaries, meaning it allows you a simple way to maintain and update your binary applications with minimally sized updates. It also provides some disk deduplication which we felt was important due to the duplication of libraries and so on that containers bring with them. Finally another major design decision Alex did was that the runtime/baseimage should be hosted outside the container, so make possible to update the runtime independently of the application with relevant security updates etc.

Today there is a thriving community around Flatpaks, with the center of activity being flathub, the Flatpak application repository. In Fedora Workstation 35 you should start seeing Flatpak from Flathub being offered as long as you have 3rd party repositories enabled. Also underway is Owen Taylor leading our efforts of integrating Flatpak building into the internal tools we use at Red Hat for putting RHEL together, with the goal of switching over to Flatpaks as our primary application delivery method for desktop applications in RHEL and to help us bridge the Fedora and RHEL application ecosystem.

You can follow the latest news from Flatpak through the official Flatpak twitter account.

Silverblue

So another major issue we decided needing improvements was that of OS upgrades (as opposed to application updates). The model pursued by Linux distros since their inception is one of shipping their OS as a large collection of independently packaged libraries. This setup is inherently fragile and requires a lot of quality engineering and testing to avoid problems, but even then sometimes things sometimes fail, especially in a fast moving OS like Fedora. A lot of configuration changes and updates has traditionally been done through scripts and similar, making rollback to an older version in cases where there is a problem also very challenging. Adventurous developers could also have done changes to their own copy of the OS that would break the upgrade later on. So thanks to all the great efforts to test and verify upgrades they usually go well for most users, but we wanted something even more sturdy. So the idea came up to move to a image based OS model, similar to what people had gotten used to on their phones. And OSTree once again became the technology we choose to do this, especially considering it was being used in Red Hat first foray into image based operating systems for servers (the server effort later got rolled into CoreOS as part of Red Hat acquiring CoreOS). The idea is that you ship the core operating system as a singular image and then to upgrade you just replace that image with a new image, and thus the risks of problems are greatly reduced. On top of that each of those images can be tested and verified as a whole by your QE and test teams. Of course we realized that a subset of people would still want to be able to tweak their OS, but once again OSTree came to our rescue as it allows developers to layer further RPMS on top of the OS image, including replacing current system libraries with for instance newer ones. The great thing about OSTree layering is that once you are done testing/using the layers RPMS you can with a very simple command just drop them again and go back to the upstream image. So combined with applications being shipped as Flatpaks this would create an OS that is a lot more sturdy, secure and simple to update and with a lot lower chance of an OS update breaking any of your applications. On top of that OSTree allows us to do easy OS rollbacks, so if the latest update somehow don’t work for you can you quickly rollback while waiting for the issue you are having to be fixed upstream. And hence Fedora Silverblue was born as the vehicle for us to develop and evolve an image based desktop operating system.

You can follow our efforts around Silverblue through the offical Silverblue twitter account.

Toolbx

Toolbox with RHEL

Toolbox pet container with RHEL UBI


So Flatpak helped us address a lot of the the gaps for making a better desktop OS on the application side and Silverblue was the vehicle for our vision on the OS side, but we realized that we also needed some way for all kinds of developers to be able to easily take advantage of the great resource that is the Fedora RPM package universe and the wider tools universe out there. We needed something that provided people with a great terminal experience. We had already been working on various smaller improvements to the terminal for a while, but we realized we needed something a lot more substantial. Accessing an immutable OS like Silverblue through a terminal window tends to be quite limiting. So that it is usually not want you want to do and also you don’t want to rely on the OSTree layering for running all your development tools and so on as that is going to be potentially painful when you upgrade your OS.
Luckily the container revolution happening in the Linux world pointed us to the solution here too, as while containers were rolled out the concept of ‘pet containers’ were also born. The idea of a pet container is that unlike general containers (sometimes refer to as cattle containers) pet container are containers that you care about on an individual level, like your personal development environment. In fact pet containers even improves on how we used to do things as they allow you to very easily maintain different environments for different projects. So for instance if you have two projects, hosted in two separate pet containers, where the two project depends on two different versions of python, then containers make that simple as it ensures that there is no risk of one of your projects ‘contaminating’ the others with its dependencies, yet at the same time allow you to grab RPMS or other kind of packages from upstream resources and install them in your container. In fact while inside your pet container the world feels a lot like it always has when on the linux command line. Thanks to the great effort of Dan Walsh and his team we had a growing number of easy to use container tools available to us, like podman. Podman is developed with the primary usecase being for running and deploying your containers at scale, managed by OpenShift and Kubernetes. But it also gave us the foundation we needed for Debarshi Ray to kicked of the Toolbx project to ensure that we had an easy to use tool for creating and managing pet containers. As a bonus Toolbx allows us to achieve another important goal, to allow Fedora Workstation users to develop applications against RHEL in a simple and straightforward manner, because Toolbx allows you to create RHEL containers just as easy as it allows you to create Fedora containers.

You can follow our efforts around Toolbox on the official Toolbox twitter account

Wayland

Ok, so between Flatpak, Silverblue and Toolbox we have the vision clear for how to create a robust OS, with a great story for application developers to maintain and deliver applications for it, to Toolbox providing a great developer story on top of this OS. But we also looked at the technical state of the Linux desktop and realized that there where some serious deficits we needed to address. One of the first one we saw was the state of graphics where X.org had served us well for many decades, but its age was showing and adding new features as they came in was becoming more and more painful. Kristian Høgsberg had started work on an alternative to X while still at Red Hat called Wayland, an effort he and a team of engineers where pushing forward at Intel. There was a general agreement in the wider community that Wayland was the way forward, but apart from Intel there was little serious development effort being put into moving it forward. On top of that, Canonical at the time had decided to go off on their own and develop their own alternative architecture in competition with X.org and Wayland. So as we were seeing a lot of things happening in the graphics space horizon, like HiDPI, and also we where getting requests to come up with a way to make Linux desktops more secure, we decided to team up with Intel and get Wayland into a truly usable state on the desktop. So we put many of our top developers, like Olivier Fourdan, Adam Jackson and Jonas Ådahl, on working on maturing Wayland as quickly as possible.
As things would have it we also ended up getting a lot of collaboration and development help coming in from the embedded sector, where companies such as Collabora was helping to deploy systems with Wayland onto various kinds of embedded devices and contributing fixes and improvements back up to Wayland (and Weston). To be honest I have to admit we did not fully appreciate what a herculean task it would end up being getting Wayland production ready for the desktop and it took us quite a few Fedora releases before we decided it was ready to go. As you might imagine dealing with 30 years of technical debt is no easy thing to pay down and while we kept moving forward at a steady pace there always seemed to be a new batch of issues to be resolved, but we managed to do so, not just by maturing Wayland, but also by porting major applications such as Martin Stransky porting Firefox, and Caolan McNamara porting LibreOffice over to Wayland. At the end of the day I think what saw us through to success was the incredible collaboration happening upstream between a large host of individual contributors, companies and having the support of the X.org community. And even when we had the whole thing put together there where still practical issues to overcome, like how we had to keep defaulting to X.org in Fedora when people installed the binary NVidia driver because that driver did not work with XWayland, the X backwards compatibility layer in Wayland. Luckily that is now in the process of becoming a thing of the past with the latest NVidia driver updates support XWayland and us working closely with NVidia to ensure driver and windowing stack works well.

PipeWire

Pipewire in action

Example of PipeWire running


So now we had a clear vision for the OS and a much improved and much more secure graphics stack in the form of Wayland, but we realized that all the new security features brought in by Flatpak and Wayland also made certain things like desktop capturing/remoting and web camera access a lot harder. Security is great and critical, but just like the old joke about the most secure computer being the one that is turned off, we realized that we needed to make sure these things kept working, but in a secure and better manner. Thankfully we have GStreamer co-creator Wim Taymans on the team and he thought he could come up with a pulseaudio equivalent for video that would allow us to offer screen capture and webcam access in a convenient and secure manner.
As Wim where prototyping what we called PulseVideo at the time we also started discussing the state of audio on Linux. Wim had contributed to PulseAudio to add a security layer to it, to make for instance it harder for a rogue application to eavesdrop on you using your microphone, but since it was not part of the original design it wasn’t a great solution. At the same time we talked about how our vision for Fedora Workstation was to make it the natural home for all kind of makers, which included musicians, but how the separateness of the pro-audio community getting in the way of that, especially due to the uneasy co-existence of PulseAudio on the consumer side and Jack for the pro-audio side. As part of his development effort Wim came to the conclusion that he code make the core logic of his new project so fast and versatile that it should be able to deal with the low latency requirements of the pro-audio community and also serve its purpose well on the consumer audio and video side. Having audio and video in one shared system would also be an improvement for us in terms of dealing with combined audio and video sources as guaranteeing audio video sync for instance had often been a challenge in the past. So Wims effort evolved into what we today call PipeWire and which I am going to be brave enough to say has been one of the most successful launches of a major new linux system component we ever done. Replacing two old sound servers while at the same time adding video support is no small feat, but Wim is working very hard on fixing bugs as quickly as they come in and ensure users have a great experience with PipeWire. And at the same time we are very happy that PipeWire now provides us with the ability of offering musicians and sound engineers a new home in Fedora Workstation.

You can follow our efforts on PipeWire on the PipeWire twitter account.

Hardware support and firmware

In parallel with everything mentioned above we where looking at the hardware landscape surrounding desktop linux. One of the first things we realized was horribly broken was firmware support under Linux. More and more of the hardware smarts was being found in the firmware, yet the firmware access under Linux and the firmware update story was basically non-existent. As we where discussing this problem internally, Peter Jones who is our representative on UEFI standards committee, pointed out that we probably where better poised to actually do something about this problem than ever, since UEFI was causing the firmware update process on most laptops and workstations to become standardized. So we teamed Peter up with Richard Hughes and out of that collaboration fwupd and LVFS was born. And in the years since we launched that we gone from having next to no firmware available on Linux (and the little we had only available through painful processes like burning bootable CDs etc.) to now having a lot of hardware getting firmware update support and more getting added almost on a weekly basis.
For the latest and greatest news around LVFS the best source of information is Richard Hughes twitter account.

In parallel to this Adam Jackson worked on glvnd, which provided us with a way to have multiple OpenGL implementations on the same system. For those who has been using Linux for a while I am sure you remembers the pain of the NVidia driver and Mesa fighting over who provided OpenGL on your system as it was all tied to a specific .so name. There was a lot of hacks being used out there to deal with that situation, of varying degree of fragility, but with the advent of glvnd nobody has to care about that problem anymore.

We also decided that we needed to have a part of the team dedicated to looking at what was happening in the market and work on covering important gaps. And with gaps I mean fixing the things that keeps the hardware vendors from being able to properly support Linux, not writing drivers for them. Instead we have been working closely with Dell and Lenovo to ensure that their suppliers provide drivers for their hardware and when needed we work to provide a framework for them to plug their hardware into. This has lead to a series of small, but important improvements, like getting the fingerprint reader stack on Linux to a state where hardware vendors can actually support it, bringing Thunderbolt support to Linux through Bolt, support for high definition and gaming mice through the libratbag project, support in the Linux kernel for the new laptop privacy screen feature, improved power management support through the power profiles daemon and now recently hiring a dedicated engineer to get HDR support fully in place in Linux.

Summary

So to summarize. We are of course not over the finish line with our vision yet. Silverblue is a fantastic project, but we are not yet ready to declare it the official version of Fedora Workstation, mostly because we want to give the community more time to embrace the Flatpak application model and for developers to embrace the pet container model. Especially applications like IDEs that cross the boundary between being in their own Flatpak sandbox while also interacting with things in your pet container and calling out to system tools like gdb need more work, but Christian Hergert has already done great work solving the problem in GNOME Builder while Owen Taylor has put together support for using Visual Studio Code with pet containers. So hopefully the wider universe of IDEs will follow suit, in the meantime one would need to call them from the command line from inside the pet container.

The good thing here is that Flatpaks and Toolbox also works great on traditional Fedora Workstation, you can get the full benefit of both technologies even on a traditional distribution, so we can allow for a soft and easy transition.

So for anyone who made it this far, appoligies for this become a little novel, that was not my intention when I started writing it :)

Feel free to follow my personal twitter account for more general news and updates on what we are doing around Fedora Workstation.
Christian F.K. Schaller photo

September 23, 2021

GNOME Builder 41 Highlights

Improved Flatpak SDK Management

Builder now maintains a private Flatpak installation to install SDKs and SDK extensions that are not available in the user’s Flatpak installation. This means Builder will no longer add flathub or gnome-nightly to your user’s Flatpak installation.

Builder now uses an out-of-process Flatpak helper (gnome-builder-flatpak) to vastly improve its ability to track and resolve SDK extensions. This will improve the situation for applications requiring Rust, LLVM, and others going forward.

You can update your SDKs and dependencies together using the “Update Dependencies” button in the build popover.

More information can be found in Christian’s blog post.

New Search Panel

There is now a persistent project-wide search panel always visible. Specific folder search can still be done from the project tree and will end up in an extra search tab which can be closed. Vanadiae also redesigned the look of the search panel to allow changing search parameters and re-searching from the same tab.

Remote mobile development support

James Westman implemented further integration of deviced so it is now possible to deploy and start an application on a remote device with the run button. See his tutorial: https://www.jwestman.net/2021/08/06/tutorial-mobile-dev-with-builder.html

Updated Templates

Builder supports now GTK4 templates for the C language. The example application now also features additional elements like a hamburger menu, a shortcuts window and an About dialog. It also splits the main code into a GtkApplication subclass to make it more in-line with real world apps practices.

If you’re interested in getting additional languages support for the new GTK 4 template, then feel free to open a merge request to get it added!

Hover popup documenation

The hover popup documentation got an overhaul with a new markdown renderer thanks to Tom A. Wagner. He utilizes cmark, a C markdown parser, to correctly visualize the markdown content in GTK widgets.

Session Handling

Vanadiae reworked the session handling of Builder. In the past this work got outsourced to plugins. But every implementation was started at the same time which meant that pages would end up in random order during saving/restoring of the session. This book-keeping is now done by the core so plugins can concentrate on the content.

Session state will now always be saved immediately to avoid losing session state during a crash of Builder.

Vala Language Server

Swapped the main Vala Language Server from GVLS to VLS. The memory consumption should be lower now.

Papercuts

  • You can now disable the entry breakpoint on main. (Christian Hergert)
  • Mnemonics are now used everywhere to enhance the keyboard only experience. (vanadiae)
  • “Reveal in project tree” option added in editor context menu (vanadiae)
  • Better performance for search button searches (vanadiae)
  • The Run Terminal is now only spawned on the main editor. Additional Workspaces aren’t cluttered with additional Run Terminals (Günther Wagner)
  • Debugger Controls ar now only spawned on the main editor (Günther Wagner)
  • Improvements for rust-analyzer support. In particular, people are notified that they need to install rust-analyzer if they don’t have it, which helps understanding why the various Rust integration features are not working for someone. (Günther Wagner)
  • Devhelp support improved. It uses now typical shortcuts from devhelp for searching and handles correctly local as well as remote URLs and redirects to a browser in the later case. (vanadiae)
  • CMake projects can now be built and started directly with Builder using the Codemodel (Günther Wagner)
  • Direct usage of jedi got dropped in favor of a more widely supported Python Language Server. This greatly improves the language support because the LSP has a more stable and standard API.

debugger preferences

CMake integration

Personal story: Tuxpaint

I got asked if it is possible to add additional flags for make-targets in a flatpak environment. Reason: he wanted to save drawings of his kids in tuxpaint but tuxpaint did not implemented the necessary updates in order to save files in a flatpak environment. Tuxpaint is a very old application and i was encouraged to help this father to help his kids. Therefore i implemented the necessary tooling to compile and run tuxpaint in GNOME Builder. <3

Reducing the effectiveness of a safety feature

We just purchased a 2021 KIA eNIRO to use as our family car. As typical with EVs, this has to produce a fake engine noise to avoid squashing the hard of hearing (or animals) not expecting two tons of metal to be silently moving. When we test drove a 2020 car last year, there was a physical button on the dash to turn this off, on the premise that the noise sometimes isn’t required or appropriate, but it always defaulted to “on” for every start. As the car gets faster the noise also increases in volume, until after about 30km/h fading to nothing. In reverse the same thing happens with some additional beeps. Getting our 2021 car this year, the button was no longer present and the less-than-affectionately known VESS module cannot be muted. I can guess why, someone probably turned it off and squashed something or someone and someone in the UK/US/EU government understandably freaked out. KIA also removed the wire from the wiring loom, and won’t sell the 2020 button cluster, so it’s not even like you can retrofit a new car to act like the old one.

To be super clear: I don’t have a problem with the VESS noise, but because the “speaker” is in the front bumper the solution for going backwards is “turn up the volume”. Living in London means that houses are pretty close together and me reversing into the drive at 2mph shouldn’t submit the house opposite with a noise several times louder than a huge garbage truck. The solution in the various KIA owner forums seems to be “just unplug the VESS module” but this seems at best unethical and probably borderline illegal given it’s a device with the express purpose of trying to avoid hurting someone with your 2 ton lump of metal.

Given VESS is, as you might expect, just another device on the CAN bus and people have reverse engineered the command stream so you can actually just plug the VESS module into a USB device (with a CAN converter) and play with it yourself. My idea would be to make a modchip-like device that plugs into the VESS module using the existing plug, and basically MITM the CAN messages. All messages going from VESS back to the ECU get allow-listed (even though the ECU doesn’t seem to care if the VESS goes AWOL…) and any speed measurements going forward also get passed straight through. The clever part would be to MITM the speed when the “reverse gear” command has been issued, so that the car thinks it’s going about 20km/h backwards. This makes the VESS still make the engine and beeping noise but it’s only about as loud as the VESS module when going forwards when outside the car.

Technically this is quite easy, VESS->txrxCAN->MCU->txrxCAN->ECU and you can probably use an inexpensive Microchip reference board for a prototype. My question is more if this would:

  1. Be ethical
  2. Be legal
  3. Invalidate my insurance
  4. Invalidate the warranty of my nice new shiny car

Feedback very welcome!

What's new in XI 2.4 - touchpad gestures

After a nine year hiatus, a new version of the X Input Protocol is out. Credit for the work goes to Povilas Kanapickas, who also implemented support for XI 2.4 in the various pieces of the stack [0]. So let's have a look.

X has had touch events since XI 2.2 (2012) but those were only really useful for direct touch devices (read: touchscreens). There were accommodations for indirect touch devices like touchpads but they were never used. The synaptics driver set the required bits for a while but it was dropped in 2015 because ... it was complicated to make use of and no-one seemed to actually use it anyway. Meanwhile, the rest of the world moved on and touchpad gestures are now prevalent. They've been standard in MacOS for ages, in Windows for almost ages and - with recent GNOME releases - now feature prominently on the Linux desktop as well. They have been part of libinput and the Wayland protocol for years (and even recently gained a new set of "hold" gestures). Meanwhile, X was left behind in the dust or mud, depending on your local climate.

XI 2.4 fixes this, it adds pinch and swipe gestures to the XI2 protocol and makes those available to supporting clients [2]. Notably here is that the interpretation of gestures is left to the driver [1]. The server takes the gestures and does the required state handling but otherwise has no decision into what constitutes a gesture. This is of course no different to e.g. 2-finger scrolling on a touchpad where the server just receives scroll events and passes them on accordingly.

XI 2.4 gesture events are quite similar to touch events in that they are processed as a sequence of begin/update/end with both types having their own event types. So the events you will receive are e.g. XIGesturePinchBegin or XIGestureSwipeUpdate. As with touch events, a client must select for all three (begin/update/end) on a window. Only one gesture can exist at any time, so if you are a multi-tasking octopus prepare to be disappointed.

Because gestures are tied to an indirect-touch device, the location they apply at is wherever the cursor is currently positioned. In that, they work similar to button presses, and passive grabs apply as expected too. So long-term the window manager will likely want a passive grab on the root window for swipe gestures while applications will implement pinch-to-zoom as you'd expect.

In terms of API there are no suprises. libXi 1.8 is the version to implement the new features and there we have a new XIGestureClassInfo returned by XIQueryDevice and of course the two events: XIGesturePinchEvent and XIGestureSwipeEvent. Grabbing is done via e.g. XIGrabSwipeGestureBegin, so for those of you with XI2 experience this will all look familiar. For those of you without - it's probably no longer worth investing time into becoming an XI2 expert.

Overall, it's a nice addition to the protocol and it will help getting the X server slightly closer to Wayland for a widely-used feature. Once GTK, mutter and all the other pieces in the stack are in place, it will just work for any (GTK) application that supports gestures under Wayland already. The same will be true for Qt I expect.

X server 21.1 will be out in a few weeks, xf86-input-libinput 1.2.0 is already out and so are xorgproto 2021.5 and libXi 1.8.

[0] In addition to taking on the Xorg release, so clearly there are no limits here
[1] More specifically: it's done by libinput since neither xf86-input-evdev nor xf86-input-synaptics will ever see gestures being implemented
[2] Hold gestures missed out on the various deadlines

September 22, 2021

Authenticated Boot and Disk Encryption on Linux

The Strange State of Authenticated Boot and Disk Encryption on Generic Linux Distributions

TL;DR: Linux has been supporting Full Disk Encryption (FDE) and technologies such as UEFI SecureBoot and TPMs for a long time. However, the way they are set up by most distributions is not as secure as they should be, and in some ways quite frankly weird. In fact, right now, your data is probably more secure if stored on current ChromeOS, Android, Windows or MacOS devices, than it is on typical Linux distributions.

Generic Linux distributions (i.e. Debian, Fedora, Ubuntu, …) adopted Full Disk Encryption (FDE) more than 15 years ago, with the LUKS/cryptsetup infrastructure. It was a big step forward to a more secure environment. Almost ten years ago the big distributions started adding UEFI SecureBoot to their boot process. Support for Trusted Platform Modules (TPMs) has been added to the distributions a long time ago as well — but even though many PCs/laptops these days have TPM chips on-board it's generally not used in the default setup of generic Linux distributions.

How these technologies currently fit together on generic Linux distributions doesn't really make too much sense to me — and falls short of what they could actually deliver. In this story I'd like to have a closer look at why I think that, and what I propose to do about it.

The Basic Technologies

Let's have a closer look what these technologies actually deliver:

  1. LUKS/dm-crypt/cryptsetup provide disk encryption, and optionally data authentication. Disk encryption means that reading the data in clear-text form is only possible if you possess a secret of some form, usually a password/passphrase. Data authentication means that no one can make changes to the data on disk unless they possess a secret of some form. Most distributions only enable the former though — the latter is a more recent addition to LUKS/cryptsetup, and is not used by default on most distributions (though it probably should be). Closely related to LUKS/dm-crypt is dm-verity (which can authenticate immutable volumes) and dm-integrity (which can authenticate writable volumes, among other things).

  2. UEFI SecureBoot provides mechanisms for authenticating boot loaders and other pre-OS binaries before they are invoked. If those boot loaders then authenticate the next step of booting in a similar fashion there's a chain of trust which can ensure that only code that has some level of trust associated with it will run on the system. Authentication of boot loaders is done via cryptographic signatures: the OS/boot loader vendors cryptographically sign their boot loader binaries. The cryptographic certificates that may be used to validate these signatures are then signed by Microsoft, and since Microsoft's certificates are basically built into all of today's PCs and laptops this will provide some basic trust chain: if you want to modify the boot loader of a system you must have access to the private key used to sign the code (or to the private keys further up the certificate chain).

  3. TPMs do many things. For this text we'll focus one facet: they can be used to protect secrets (for example for use in disk encryption, see above), that are released only if the code that booted the host can be authenticated in some form. This works roughly like this: every component that is used during the boot process (i.e. code, certificates, configuration, …) is hashed with a cryptographic hash function before it is used. The resulting hash is written to some small volatile memory the TPM maintains that is write-only (the so called Platform Configuration Registers, "PCRs"): each step of the boot process will write hashes of the resources needed by the next part of the boot process into these PCRs. The PCRs cannot be written freely: the hashes written are combined with what is already stored in the PCRs — also through hashing and the result of that then replaces the previous value. Effectively this means: only if every component involved in the boot matches expectations the hash values exposed in the TPM PCRs match the expected values too. And if you then use those values to unlock the secrets you want to protect you can guarantee that the key is only released to the OS if the expected OS and configuration is booted. The process of hashing the components of the boot process and writing that to the TPM PCRs is called "measuring". What's also important to mention is that the secrets are not only protected by these PCR values but encrypted with a "seed key" that is generated on the TPM chip itself, and cannot leave the TPM (at least so goes the theory). The idea is that you cannot read out a TPM's seed key, and thus you cannot duplicate the chip: unless you possess the original, physical chip you cannot retrieve the secret it might be able to unlock for you. Finally, TPMs can enforce a limit on unlock attempts per time ("anti-hammering"): this makes it hard to brute force things: if you can only execute a certain number of unlock attempts within some specific time then brute forcing will be prohibitively slow.

How Linux Distributions use these Technologies

As mentioned already, Linux distributions adopted the first two of these technologies widely, the third one not so much.

So typically, here's how the boot process of Linux distributions works these days:

  1. The UEFI firmware invokes a piece of code called "shim" (which is stored in the EFI System Partition — the "ESP" — of your system), that more or less is just a list of certificates compiled into code form. The shim is signed with the aforementioned Microsoft key, that is built into all PCs/laptops. This list of certificates then can be used to validate the next step of the boot process. The shim is measured by the firmware into the TPM. (Well, the shim can do a bit more than what I describe here, but this is outside of the focus of this article.)

  2. The shim then invokes a boot loader (often Grub) that is signed by a private key owned by the distribution vendor. The boot loader is stored in the ESP as well, plus some other places (i.e. possibly a separate boot partition). The corresponding certificate is included in the list of certificates built into the shim. The boot loader components are also measured into the TPM.

  3. The boot loader then invokes the kernel and passes it an initial RAM disk image (initrd), which contains initial userspace code. The kernel itself is signed by the distribution vendor too. It's also validated via the shim. The initrd is not validated, though (!). The kernel is measured into the TPM, the initrd sometimes too.

  4. The kernel unpacks the initrd image, and invokes what is contained in it. Typically, the initrd then asks the user for a password for the encrypted root file system. The initrd then uses that to set up the encrypted volume. No code authentication or TPM measurements take place.

  5. The initrd then transitions into the root file system. No code authentication or TPM measurements take place.

  6. When the OS itself is up the user is prompted for their user name, and their password. If correct, this will unlock the user account: the system is now ready to use. At this point no code authentication, no TPM measurements take place. Moreover, the user's password is not used to unlock any data, it's used only to allow or deny the login attempt — the user's data has already been decrypted a long time ago, by the initrd, as mentioned above.

What you'll notice here of course is that code validation happens for the shim, the boot loader and the kernel, but not for the initrd or the main OS code anymore. TPM measurements might go one step further: the initrd is measured sometimes too, if you are lucky. Moreover, you might notice that the disk encryption password and the user password are inquired by code that is not validated, and is thus not safe from external manipulation. You might also notice that even though TPM measurements of boot loader/OS components are done nothing actually ever makes use of the resulting PCRs in the typical setup.

Attack Scenarios

Of course, before determining whether the setup described above makes sense or not, one should have an idea what one actually intends to protect against.

The most basic attack scenario to focus on is probably that you want to be reasonably sure that if someone steals your laptop that contains all your data then this data remains confidential. The model described above probably delivers that to some degree: the full disk encryption when used with a reasonably strong password should make it hard for the laptop thief to access the data. The data is as secure as the password used is strong. The attacker might attempt to brute force the password, thus if the password is not chosen carefully the attacker might be successful.

Two more interesting attack scenarios go something like this:

  1. Instead of stealing your laptop the attacker takes the harddisk from your laptop while you aren't watching (e.g. while you went for a walk and left it at home or in your hotel room), makes a copy of it, and then puts it back. You'll never notice they did that. The attacker then analyzes the data in their lab, maybe trying to brute force the password. In this scenario you won't even know that your data is at risk, because for you nothing changed — unlike in the basic scenario above. If the attacker manages to break your password they have full access to the data included on it, i.e. everything you so far stored on it, but not necessarily on what you are going to store on it later. This scenario is worse than the basic one mentioned above, for the simple fact that you won't know that you might be attacked. (This scenario could be extended further: maybe the attacker has a chance to watch you type in your password or so, effectively lowering the password strength.)

  2. Instead of stealing your laptop the attacker takes the harddisk from your laptop while you aren't watching, inserts backdoor code on it, and puts it back. In this scenario you won't know your data is at risk, because physically everything is as before. What's really bad though is that the attacker gets access to anything you do on your laptop, both the data already on it, and whatever you will do in the future.

I think in particular this backdoor attack scenario is something we should be concerned about. We know for a fact that attacks like that happen all the time (Pegasus, industry espionage, …), hence we should make them hard.

Are we Safe?

So, does the scheme so far implemented by generic Linux distributions protect us against the latter two scenarios? Unfortunately not at all. Because distributions set up disk encryption the way they do, and only bind it to a user password, an attacker can easily duplicate the disk, and then attempt to brute force your password. What's worse: since code authentication ends at the kernel — and the initrd is not authenticated anymore —, backdooring is trivially easy: an attacker can change the initrd any way they want, without having to fight any kind of protections. And given that FDE unlocking is implemented in the initrd, and it's the initrd that asks for the encryption password things are just too easy: an attacker could trivially easily insert some code that picks up the FDE password as you type it in and send it wherever they want. And not just that: since once they are in they are in, they can do anything they like for the rest of the system's lifecycle, with full privileges — including installing backdoors for versions of the OS or kernel that are installed on the device in the future, so that their backdoor remains open for as long as they like.

That is sad of course. It's particular sad given that the other popular OSes all address this much better. ChromeOS, Android, Windows and MacOS all have way better built-in protections against attacks like this. And it's why one can certainly claim that your data is probably better protected right now if you store it on those OSes then it is on generic Linux distributions.

(Yeah, I know that there are some niche distros which do this better, and some hackers hack their own. But I care about general purpose distros here, i.e. the big ones, that most people base their work on.)

Note that there are more problems with the current setup. For example, it's really weird that during boot the user is queried for an FDE password which actually protects their data, and then once the system is up they are queried again – now asking for a username, and another password. And the weird thing is that this second authentication that appears to be user-focused doesn't really protect the user's data anymore — at that moment the data is already unlocked and accessible. The username/password query is supposed to be useful in multi-user scenarios of course, but how does that make any sense, given that these multiple users would all have to know a disk encryption password that unlocks the whole thing during the FDE step, and thus they have access to every user's data anyway if they make an offline copy of the harddisk?

Can we do better?

Of course we can, and that is what this story is actually supposed to be about.

Let's first figure out what the minimal issues we should fix are (at least in my humble opinion):

  1. The initrd must be authenticated before being booted into. (And measured unconditionally.)

  2. The OS binary resources (i.e. /usr/) must be authenticated before being booted into. (But don't need to be encrypted, since everyone has the same anyway, there's nothing to hide here.)

  3. The OS configuration and state (i.e. /etc/ and /var/) must be encrypted, and authenticated before they are used. The encryption key should be bound to the TPM device; i.e system data should be locked to a security concept belonging to the system, not the user.

  4. The user's home directory (i.e. /home/lennart/ and similar) must be encrypted and authenticated. The unlocking key should be bound to a user password or user security token (FIDO2 or PKCS#11 token); i.e. user data should be locked to a security concept belonging to the user, not the system.

Or to summarize this differently:

  1. Every single component of the boot process and OS needs to be authenticated, i.e. all of shim (done), boot loader (done), kernel (done), initrd (missing so far), OS binary resources (missing so far), OS configuration and state (missing so far), the user's home (missing so far).

  2. Encryption is necessary for the OS configuration and state (bound to TPM), and for the user's home directory (bound to a user password or user security token).

In Detail

Let's see how we can achieve the above in more detail.

How to Authenticate the initrd

At the moment initrds are generated on the installed host via scripts (dracut and similar) that try to figure out a minimal set of binaries and configuration data to build an initrd that contains just enough to be able to find and set up the root file system. What is included in the initrd hence depends highly on the individual installation and its configuration. Pretty likely no two initrds generated that way will be fully identical due to this. This model clearly has benefits: the initrds generated this way are very small and minimal, and support exactly what is necessary for the system to boot, and not less or more. It comes with serious drawbacks too though: the generation process is fragile and sometimes more akin to black magic than following clear rules: the generator script natively has to understand a myriad of storage stacks to determine what needs to be included and what not. It also means that authenticating the image is hard: given that each individual host gets a different specialized initrd, it means we cannot just sign the initrd with the vendor key like we sign the kernel. If we want to keep this design we'd have to figure out some other mechanism (e.g. a per-host signature key – that is generated locally; or by authenticating it with a message authentication code bound to the TPM). While these approaches are certainly thinkable, I am not convinced they actually are a good idea though: locally and dynamically generated per-host initrds is something we probably should move away from.

If we move away from locally generated initrds, things become a lot simpler. If the distribution vendor generates the initrds on their build systems then it can be attached to the kernel image itself, and thus be signed and measured along with the kernel image, without any further work. This simplicity is simply lovely. Besides robustness and reproducibility this gives us an easy route to authenticated initrds.

But of course, nothing is really that simple: working with vendor-generated initrds means that we can't adjust them anymore to the specifics of the individual host: if we pre-build the initrds and include them in the kernel image in immutable fashion then it becomes harder to support complex, more exotic storage or to parameterize it with local network server information, credentials, passwords, and so on. Now, for my simple laptop use-case these things don't matter, there's no need to extend/parameterize things, laptops and their setups are not that wildly different. But what to do about the cases where we want both: extensibility to cover for less common storage subsystems (iscsi, LVM, multipath, drivers for exotic hardware…) and parameterization?

Here's a proposal how to achieve that: let's build a basic initrd into the kernel as suggested, but then do two things to make this scheme both extensible and parameterizable, without compromising security.

  1. Let's define a way how the basic initrd can be extended with additional files, which are stored in separate "extension images". The basic initrd should be able to discover these extension images, authenticate them and then activate them, thus extending the initrd with additional resources on-the-fly.

  2. Let's define a way how we can safely pass additional parameters to the kernel/initrd (and actually the rest of the OS, too) in an authenticated (and possibly encrypted) fashion. Parameters in this context can be anything specific to the local installation, i.e. server information, security credentials, certificates, SSH server keys, or even just the root password that shall be able to unlock the root account in the initrd …

In such a scheme we should be able to deliver everything we are looking for:

  1. We'll have a full trust chain for the code: the boot loader will authenticate and measure the kernel and basic initrd. The initrd extension images will then be authenticated by the basic initrd image.

  2. We'll have authentication for all the parameters passed to the initrd.

This so far sounds very unspecific? Let's make it more specific by looking closer at the components I'd suggest to be used for this logic:

  1. The systemd suite since a few months contains a subsystem implementing system extensions (v248). System extensions are ultimately just disk images (for example a squashfs file system in a GPT envelope) that can extend an underlying OS tree. Extending in this regard means they simply add additional files and directories into the OS tree, i.e. below /usr/. For a longer explanation see systemd-sysext(8). When a system extension is activated it is simply mounted and then merged into the main /usr/ tree via a read-only overlayfs mount. Now what's particularly nice about them in this context we are talking about here is that the extension images may carry dm-verity authentication data, and PKCS#7 signatures (once this is merged, that is, i.e. v250).

  2. The systemd suite also contains a concept called service "credentials". These are small pieces of information passed to services in a secure way. One key feature of these credentials is that they can be encrypted and authenticated in a very simple way with a key bound to the TPM (v250). See LoadCredentialEncrypted= and systemd-creds(1) for details. They are great for safely storing SSL private keys and similar on your system, but they also come handy for parameterizing initrds: an encrypted credential is just a file that can only be decoded if the right TPM is around with the right PCR values set.

  3. The systemd suite contains a component called systemd-stub(7). It's an EFI stub, i.e. a small piece of code that is attached to a kernel image, and turns the kernel image into a regular EFI binary that can be directly executed by the firmware (or a boot loader). This stub has a number of nice features (for example, it can show a boot splash before invoking the Linux kernel itself and such). Once this work is merged (v250) the stub will support one more feature: it will automatically search for system extension image files and credential files next to the kernel image file, measure them and pass them on to the main initrd of the host.

Putting this together we have nice way to provide fully authenticated kernel images, initrd images and initrd extension images; as well as encrypted and authenticated parameters via the credentials logic.

How would a distribution actually make us of this? A distribution vendor would pre-build the basic initrd, and glue it into the kernel image, and sign that as a whole. Then, for each supposed extension of the basic initrd (e.g. one for iscsi support, one for LVM, one for multipath, …), the vendor would use a tool such as mkosi to build an extension image, i.e. a GPT disk image containing the files in squashfs format, a Verity partition that authenticates it, plus a PKCS#7 signature partition that validates the root hash for the dm-verity partition, and that can be checked against a key provided by the boot loader or main initrd. Then, any parameters for the initrd will be encrypted using systemd-creds encrypt -T. The resulting encrypted credentials and the initrd extension images are then simply placed next to the kernel image in the ESP (or boot partition). Done.

This checks all boxes: everything is authenticated and measured, the credentials also encrypted. Things remain extensible and modular, can be pre-built by the vendor, and installation is as simple as dropping in one file for each extension and/or credential.

How to Authenticate the Binary OS Resources

Let's now have a look how to authenticate the Binary OS resources, i.e. the stuff you find in /usr/, i.e. the stuff traditionally shipped to the user's system via RPMs or DEBs.

I think there are three relevant ways how to authenticate this:

  1. Make /usr/ a dm-verity volume. dm-verity is a concept implemented in the Linux kernel that provides authenticity to read-only block devices: every read access is cryptographically verified against a top-level hash value. This top-level hash is typically a 256bit value that you can either encode in the kernel image you are using, or cryptographically sign (which is particularly nice once this is merged). I think this is actually the best approach since it makes the /usr/ tree entirely immutable in a very simple way. However, this also means that the whole of /usr/ needs to be updated as once, i.e. the traditional rpm/apt based update logic cannot work in this mode.

  2. Make /usr/ a dm-integrity volume. dm-integrity is a concept provided by the Linux kernel that offers integrity guarantees to writable block devices, i.e. in some ways it can be considered to be a bit like dm-verity while permitting write access. It can be used in three ways, one of which I think is particularly relevant here. The first way is with a simple hash function in "stand-alone" mode: this is not too interesting here, it just provides greater data safety for file systems that don't hash check their files' data on their own. The second way is in combination with dm-crypt, i.e. with disk encryption. In this case it adds authenticity to confidentiality: only if you know the right secret you can read and make changes to the data, and any attempt to make changes without knowing this secret key will be detected as IO error on next read by those in possession of the secret (more about this below). The third way is the one I think is most interesting here: in "stand-alone" mode, but with a keyed hash function (e.g. HMAC). What's this good for? This provides authenticity without encryption: if you make changes to the disk without knowing the secret this will be noticed on the next read attempt of the data and result in IO errors. This mode provides what we want (authenticity) and doesn't do what we don't need (encryption). Of course, the secret key for the HMAC must be provided somehow, I think ideally by the TPM.

  3. Make /usr/ a dm-crypt (LUKS) + dm-integrity volume. This provides both authenticity and encryption. The latter isn't typically needed for /usr/ given that it generally contains no secret data: anyone can download the binaries off the Internet anyway, and the sources too. By encrypting this you'll waste CPU cycles, but beyond that it doesn't hurt much. (Admittedly, some people might want to hide the precise set of packages they have installed, since it of course does reveal a bit of information about you: i.e. what you are working on, maybe what your job is – think: if you are a hacker you have hacking tools installed – and similar). Going this way might simplify things in some cases, as it means you don't have to distinguish "OS binary resources" (i.e /usr/) and "OS configuration and state" (i.e. /etc/ + /var/, see below), and just make it the same volume. Here too, the secret key must be provided somehow, I think ideally by the TPM.

All three approach are valid. The first approach has my primary sympathies, but for distributions not willing to abandon client-side updates via RPM/dpkg this is not an option, in which case I would propose the other two approaches for these cases.

The LUKS encryption key (and in case of dm-integrity standalone mode the key for the keyed hash function) should be bound to the TPM. Why the TPM for this? You could also use a user password, a FIDO2 or PKCS#11 security token — but I think TPM is the right choice: why that? To reduce the requirement for repeated authentication, i.e. that you first have to provide the disk encryption password, and then you have to login, providing another password. It should be possible that the system boots up unattended and then only one authentication prompt is needed to unlock the user's data properly. The TPM provides a way to do this in a reasonably safe and fully unattended way. Also, when we stop considering just the laptop use-case for a moment: on servers interactive disk encryption prompts don't make much sense — the fact that TPMs can provide secrets without this requiring user interaction and thus the ability to work in entirely unattended environments is quite desirable. Note that crypttab(5) as implemented by systemd (v248) provides native support for authentication via password, via TPM2, via PKCS#11 or via FIDO2, so the choice is ultimately all yours.

How to Encrypt/Authenticate OS Configuration and State

Let's now look at the OS configuration and state, i.e. the stuff in /etc/ and /var/. It probably makes sense to not consider these two hierarchies independently but instead just consider this to be the root file system. If the OS binary resources are in a separate file system it is then mounted onto the /usr/ sub-directory of the root file system.

The OS configuration and state (or: root file system) should be both encrypted and authenticated: it might contain secret keys, user passwords, privileged logs and similar. This data matters and contains plenty data that should remain confidential.

The encryption of choice here is dm-crypt (LUKS) + dm-integrity similar as discussed above, again with the key bound to the TPM.

If the OS binary resources are protected the same way it is safe to merge these two volumes and have a single partition for both (see above)

How to Encrypt/Authenticate the User's Home Directory

The data in the user's home directory should be encrypted, and bound to the user's preferred token of authentication (i.e. a password or FIDO2/PKCS#11 security token). As mentioned, in the traditional mode of operation the user's home directory is not individually encrypted, but only encrypted because FDE is in use. The encryption key for that is a system wide key though, not a per-user key. And I think that's problem, as mentioned (and probably not even generally understood by our users). We should correct that and ensure that the user's password is what unlocks the user's data.

In the systemd suite we provide a service systemd-homed(8) (v245) that implements this in a safe way: each user gets its own LUKS volume stored in a loopback file in /home/, and this is enough to synthesize a user account. The encryption password for this volume is the user's account password, thus it's really the password provided at login time that unlocks the user's data. systemd-homed also supports other mechanisms of authentication, in particular PKCS#11/FIDO2 security tokens. It also provides support for other storage back-ends (such as fscrypt), but I'd always suggest to use the LUKS back-end since it's the only one providing the comprehensive confidentiality guarantees one wants for a UNIX-style home directory.

Note that there's one special caveat here: if the user's home directory (e.g. /home/lennart/) is encrypted and authenticated, what about the file system this data is stored on, i.e. /home/ itself? If that dir is part of the the root file system this would result in double encryption: first the data is encrypted with the TPM root file system key, and then again with the per-user key. Such double encryption is a waste of resources, and unnecessary. I'd thus suggest to make /home/ its own dm-integrity volume with a HMAC, keyed by the TPM. This means the data stored directly in /home/ will be authenticated but not encrypted. That's good not only for performance, but also has practical benefits: it allows extracting the encrypted volume of the various users in case the TPM key is lost, as a way to recover from dead laptops or similar.

Why authenticate /home/, if it only contains per-user home directories that are authenticated on their own anyway? That's a valid question: it's because the kernel file system maintainers made clear that Linux file system code is not considered safe against rogue disk images, and is not tested for that; this means before you mount anything you need to establish trust in some way because otherwise there's a risk that the act of mounting might exploit your kernel.

Summary of Resources and their Protections

So, let's now put this all together. Here's a table showing the various resources we deal with, and how I think they should be protected (in my idealized world).

Resource Needs Authentication Needs Encryption Suggested Technology Validation/Encryption Keys/Certificates acquired via Stored where
Shim yes no SecureBoot signature verification firmware certificate database ESP
Boot loader yes no ditto firmware certificate database/shim ESP/boot partition
Kernel yes no ditto ditto ditto
initrd yes no ditto ditto ditto
initrd parameters yes yes systemd TPM encrypted credentials TPM ditto
initrd extensions yes no systemd-sysext with Verity+PKCS#7 signatures firmware/initrd certificate database ditto
OS binary resources yes no dm-verity root hash linked into kernel image, or firmware/initrd certificate database top-level partition
OS configuration and state yes yes dm-crypt (LUKS) + dm-integrity TPM top-level partition
/home/ itself yes no dm-integrity with HMAC TPM top-level partition
User home directories yes yes dm-crypt (LUKS) + dm-integrity in loopback files User password/FIDO2/PKCS#11 security token loopback file inside /home partition

This should provide all the desired guarantees: everything is authenticated, and the individualized per-host or per-user data is also encrypted. No double encryption takes place. The encryption keys/verification certificates are stored/bound to the most appropriate infrastructure.

Does this address the three attack scenarios mentioned earlier? I think so, yes. The basic attack scenario I described is addressed by the fact that /var/, /etc/ and /home/*/ are encrypted. Brute forcing the former two is harder than in the status quo ante model, since a high entropy key is used instead of one derived from a user provided password. Moreover, the "anti-hammering" logic of the TPM will make brute forcing prohibitively slow. The home directories are protected by the user's password or ideally a personal FIDO2/PKCS#11 security token in this model. Of course, a password isn't better security-wise then the status quo ante. But given the FIDO2/PKCS#11 support built into systemd-homed it should be easier to lock down the home directories securely.

Binding encryption of /var/ and /etc/ to the TPM also addresses the first of the two more advanced attack scenarios: a copy of the harddisk is useless without the physical TPM chip, since the seed key is sealed into that. (And even if the attacker had the chance to watch you type in your password, it won't help unless they possess access to to the TPM chip.) For the home directory this attack is not addressed as long as a plain password is used. However, since binding home directories to FIDO2/PKCS#11 tokens is built into systemd-homed things should be safe here too — provided the user actually possesses and uses such a device.

The backdoor attack scenario is addressed by the fact that every resource in play now is authenticated: it's hard to backdoor the OS if there's no component that isn't verified by signature keys or TPM secrets the attacker hopefully doesn't know.

For general purpose distributions that focus on updating the OS per RPM/dpkg the idealized model above won't work out, since (as mentioned) this implies an immutable /usr/, and thus requires updating /usr/ via an atomic update operation. For such distros a setup like the following is probably more realistic, but see above.

Resource Needs Authentication Needs Encryption Suggested Technology Validation/Encryption Keys/Certificates acquired via Stored where
Shim yes no SecureBoot signature verification firmware certificate database ESP
Boot loader yes no ditto firmware certificate database/shim ESP/boot partition
Kernel yes no ditto ditto ditto
initrd yes no ditto ditto ditto
initrd parameters yes yes systemd TPM encrypted credentials TPM ditto
initrd extensions yes no systemd-sysext with Verity+PKCS#7 signatures firmware/initrd certificate database ditto
OS binary resources, configuration and state yes yes dm-crypt (LUKS) + dm-integrity TPM top-level partition
/home/ itself yes no dm-integrity with HMAC TPM top-level partition
User home directories yes yes dm-crypt (LUKS) + dm-integrity in loopback files User password/FIDO2/PKCS#11 security token loopback file inside /home partition

This means there's only one root file system that contains all of /etc/, /var/ and /usr/.

Recovery Keys

When binding encryption to TPMs one problem that arises is what strategy to adopt if the TPM is lost, due to hardware failure: if I need the TPM to unlock my encrypted volume, what do I do if I need the data but lost the TPM?

The answer here is supporting recovery keys (this is similar to how other OSes approach this). Recovery keys are pretty much the same concept as passwords. The main difference being that they are computer generated rather than user-chosen. Because of that they typically have much higher entropy (which makes them more annoying to type in, i.e you want to use them only when you must, not day-to-day). By having higher entropy they are useful in combination with TPM, FIDO2 or PKCS#11 based unlocking: unlike a combination with passwords they do not compromise the higher strength of protection that TPM/FIDO2/PKCS#11 based unlocking is supposed to provide.

Current versions of systemd-cryptenroll(1) implement a recovery key concept in an attempt to address this problem. You may enroll any combination of TPM chips, PKCS#11 tokens, FIDO2 tokens, recovery keys and passwords on the same LUKS volume. When enrolling a recovery key it is generated and shown on screen both in text form and as QR code you can scan off screen if you like. The idea is write down/store this recovery key at a safe place so that you can use it when you need it. Note that such recovery keys can be entered wherever a LUKS password is requested, i.e. after generation they behave pretty much the same as a regular password.

TPM PCR Brittleness

Locking devices to TPMs and enforcing a PCR policy with this (i.e. configuring the TPM key to be unlockable only if certain PCRs match certain values, and thus requiring the OS to be in a certain state) brings a problem with it: TPM PCR brittleness. If the key you want to unlock with the TPM requires the OS to be in a specific state (i.e. that all OS components' hashes match certain expectations or similar) then doing OS updates might have the affect of making your key inaccessible: the OS updates will cause the code to change, and thus the hashes of the code, and thus certain PCRs. (Thankfully, you unrolled a recovery key, as described above, so this doesn't mean you lost your data, right?).

To address this I'd suggest three strategies:

  1. Most importantly: don't actually use the TPM PCRs that contain code hashes. There are actually multiple PCRs defined, each containing measurements of different aspects of the boot process. My recommendation is to bind keys to PCR 7 only, a PCR that contains measurements of the UEFI SecureBoot certificate databases. Thus, the keys will remain accessible as long as these databases remain the same, and updates to code will not affect it (updates to the certificate databases will, and they do happen too, though hopefully much less frequent then code updates). Does this reduce security? Not much, no, because the code that's run is after all not just measured but also validated via code signatures, and those signatures are validated with the aforementioned certificate databases. Thus binding an encrypted TPM key to PCR 7 should enforce a similar level of trust in the boot/OS code as binding it to a PCR with hashes of specific versions of that code. i.e. using PCR 7 means you say "every code signed by these vendors is allowed to unlock my key" while using a PCR that contains code hashes means "only this exact version of my code may access my key".

  2. Use LUKS key management to enroll multiple versions of the TPM keys in relevant volumes, to support multiple versions of the OS code (or multiple versions of the certificate database, as discussed above). Specifically: whenever an update is done that might result changing the relevant PCRs, pre-calculate the new PCRs, and enroll them in an additional LUKS slot on the relevant volumes. This means that the unlocking keys tied to the TPM remain accessible in both states of the system. Eventually, once rebooted after the update, remove the old slots.

  3. If these two strategies didn't work out (maybe because the OS/firmware was updated outside of OS control, or the update mechanism was aborted at the wrong time) and the TPM PCRs changed unexpectedly, and the user now needs to use their recovery key to get access to the OS back, let's handle this gracefully and automatically reenroll the current TPM PCRs at boot, after the recovery key checked out, so that for future boots everything is in order again.

Other approaches can work too: for example, some OSes simply remove TPM PCR policy protection of disk encryption keys altogether immediately before OS or firmware updates, and then reenable it right after. Of course, this opens a time window where the key bound to the TPM is much less protected than people might assume. I'd try to avoid such a scheme if possible.

Anything Else?

So, given that we are talking about idealized systems: I personally actually think the ideal OS would be much simpler, and thus more secure than this:

I'd try to ditch the Shim, and instead focus on enrolling the distribution vendor keys directly in the UEFI firmware certificate list. This is actually supported by all firmwares too. This has various benefits: it's no longer necessary to bind everything to Microsoft's root key, you can just enroll your own stuff and thus make sure only what you want to trust is trusted and nothing else. To make an approach like this easier, we have been working on doing automatic enrollment of these keys from the systemd-boot boot loader, see this work in progress for details. This way the Firmware will authenticate the boot loader/kernel/initrd without any further component for this in place.

I'd also not bother with a separate boot partition, and just use the ESP for everything. The ESP is required anyway by the firmware, and is good enough for storing the few files we need.

FAQ

Can I implement all of this in my distribution today?

Probably not. While the big issues have mostly been addressed there's a lot of integration work still missing. As you might have seen I linked some PRs that haven't even been merged into our tree yet, and definitely not been released yet or even entered the distributions.

Will this show up in Fedora/Debian/Ubuntu soon?

I don't know. I am making a proposal how these things might work, and am working on getting various building blocks for this into shape. What the distributions do is up to them. But even if they don't follow the recommendations I make 100%, or don't want to use the building blocks I propose I think it's important they start thinking about this, and yes, I think they should be thinking about defaulting to setups like this.

Work for measuring/signing initrds on Fedora has been started, here's a slide deck with some information about it.

But isn't a TPM evil?

Some corners of the community tried (unfortunately successfully to some degree) to paint TPMs/Trusted Computing/SecureBoot as generally evil technologies that stop us from using our systems the way we want. That idea is rubbish though, I think. We should focus on what it can deliver for us (and that's a lot I think, see above), and appreciate the fact we can actually use it to kick out perceived evil empires from our devices instead of being subjected to them. Yes, the way SecureBoot/TPMs are defined puts you in the driver seat if you want — and you may enroll your own certificates to keep out everything you don't like.

What if my system doesn't have a TPM?

TPMs are becoming quite ubiquitous, in particular as the upcoming Windows versions will require them. In general I think we should focus on modern, fully equipped systems when designing all this, and then find fall-backs for more limited systems. Frankly it feels as if so far the design approach for all this was the other way round: try to make the new stuff work like the old rather than the old like the new (I mean, to me it appears this thinking is the main raison d'être for the Grub boot loader).

More specifically, on the systems where we have no TPM we ultimately cannot provide the same security guarantees as for those which have. So depending on the resource to protect we should fall back to different TPM-less mechanisms. For example, if we have no TPM then the root file system should probably be encrypted with a user provided password, typed in at boot as before. And for the encrypted boot credentials we probably should simply not encrypt them, and place them in the ESP unencrypted.

Effectively this means: without TPM you'll still get protection regarding the basic attack scenario, as before, but not the other two.

What if my system doesn't have UEFI?

Many of the mechanisms explained above taken individually do not require UEFI. But of course the chain of trust suggested above requires something like UEFI SecureBoot. If your system lacks UEFI it's probably best to find work-alikes to the technologies suggested above, but I doubt I'll be able to help you there.

rpm/dpkg already cryptographically validates all packages at installation time (gpg), why would I need more than that?

This type of package validation happens once: at the moment of installation (or update) of the package, but not anymore when the data installed is actually used. Thus when an attacker manages to modify the package data after installation and before use they can make any change they like without this ever being noticed. Such package download validation does address certain attack scenarios (i.e. man-in-the-middle attacks on network downloads), but it doesn't protect you from attackers with physical access, as described in the attack scenarios above.

Systems such as ostree aren't better than rpm/dpkg regarding this BTW, their data is not validated on use either, but only during download or when processing tree checkouts.

Key really here is that the scheme explained here provides offline protection for the data "at rest" — even someone with physical access to your device cannot easily make changes that aren't noticed on next use. rpm/dpkg/ostree provide online protection only: as long as the system remains up, and all OS changes are done through the intended program code-paths, and no one has physical access everything should be good. In today's world I am sure this is not good enough though. As mentioned most modern OSes provide offline protection for the data at rest in one way or another. Generic Linux distributions are terribly behind on this.

This is all so desktop/laptop focused, what about servers?

I am pretty sure servers should provide similar security guarantees as outlined above. In a way servers are a much simpler case: there are no users and no interactivity. Thus the discussion of /home/ and what it contains and of user passwords doesn't matter. However, the authenticated initrd and the unattended TPM-based encryption I think are very important for servers too, in a trusted data center environment. It provides security guarantees so far not given by Linux server OSes.

I'd like to help with this, or discuss/comment on this

Submit patches or reviews through GitHub. General discussion about this is best done on the systemd mailing list.

An Xorg release without Xwayland

Xorg is about to released.

And it's a release without Xwayland.

And... wait, what?

Let's unwind this a bit, and ideally you should come away with a better understanding of Xorg vs Xwayland, and possibly even Wayland itself.

Heads up: if you are familiar with X, the below is simplified to the point it hurts. Sorry about that, but as an X developer you're probably good at coping with pain.

Let's go back to the 1980s, when fashion was weird and there were still reasons to be optimistic about the future. Because this is a thought exercise, we go back with full hindsight 20/20 vision and, ideally, the winning Lotto numbers in case we have some time for some self-indulgence.

If we were to implement an X server from scratch, we'd come away with a set of components. libxprotocol that handles the actual protocol wire format parsing and provides a C api to access that (quite like libxcb, actually). That one will just be the protocol-to-code conversion layer.

We'd have a libxserver component which handles all the state management required for an X server to actually behave like an X server (nothing in the X protocol require an X server to display anything). That library has a few entry points for abstract input events (pointer and keyboard, because this is the 80s after all) and a few exit points for rendered output.

libxserver uses libxprotocol but that's an implementation detail, we can ignore the protocol for the rest of the post.

Let's create a github organisation and host those two libraries. We now have: http://github.com/x/libxserver and http://github.com/x/libxprotocol [1].

Now, to actually implement a working functional X server, our new project would link against libxserver hook into this library's API points. For input, you'd use libinput and pass those events through, for output you'd use the modesetting driver that knows how to scream at the hardware until something finally shows up. This is somewhere between outrageously simplified and unacceptably wrong but it'll do for this post.

Your X server has to handle a lot of the hardware-specifics but other than that it's a wrapper around libxserver which does the work of ... well, being an X server.

Our stack looks like this:


+------------------------+
| xserver [libxserver]|--------[ X client ]
| |
|[libinput] [modesetting]|
+------------------------+
| kernel |
+------------------------+
Hooray, we have re-implemented Xorg. Or rather, XFree86 because we're 20 years from all the pent-up frustratrion that caused the Xorg fork. Let's host this project on http://github.com/x/xorg

Now, let's say instead of physical display devices, we want to render into an framebuffer, and we have no input devices.


+------------------------+
| xserver [libxserver]|--------[ X client ]
| |
| [write()] |
+------------------------+
| some buffer |
+------------------------+
This is basically Xvfb or, if you are writing out PostScript, Xprint. Let's host those on github too, we're accumulating quite a set of projects here.

Now, let's say those buffers are allocated elsewhere and we're just rendering to them. And those buffer are passed to us via an IPC protocol, like... Wayland!


+------------------------+
| xserver [libxserver]|--------[ X client ]
| |
|input events [render]|
+------------------------+
| |
+------------------------+
| Wayland compositor |
+------------------------+
And voila, we have Xwayland. If you swap out the protocol you can have Xquartz (X on Macos) or Xwin (X on Windows) or Xnext/Xephyr (X on X) or Xvnc (X over VNC). The principle is always the same.

Fun fact: the Wayland compositor doesn't need to run on the hardware, you can play display server matryoshka until you run out of turtles.

In our glorious revisioned past all these are distinct projects, re-using libxserver and some external libraries where needed. Depending on the projects things may be very simple or get very complex, it depends on how we render things.

But in the end, we have several independent projects all providing us with an X server process - the specific X bits are done in libxserver though. We can release Xwayland without having to release Xorg or Xvfb.

libxserver won't need a lot of releases, the behaviour is largely specified by the protocol requirements and once you're done implementing it, it'll be quite a slow-moving project.

Ok, now, fast forward to 2021, lose some hindsight, hope, and attitude and - oh, we have exactly the above structure. Except that it's not spread across multiple independent repos on github, it's all sitting in the same git directory: our Xorg, Xwayland, Xvfb, etc. are all sitting in hw/$name, and libxserver is basically the rest of the repo.

A traditional X server release was a tag in that git directory. An XWayland-only release is basically an rm -rf hw/*-but-not-xwayland followed by a tag, an Xorg-only release is basically an rm -rf hw/*-but-not-xfree86 [2].

In theory, we could've moved all these out into separate projects a while ago but the benefits are small and no-one has the time for that anyway.

So there you have it - you can have Xorg-only or XWayland-only releases without the world coming to an end.

Now, for the "Xorg is dead" claims - it's very likely that the current release will be the last Xorg release. [3] There is little interest in an X server that runs on hardware, or rather: there's little interest in the effort required to push out releases. Povilas did a great job in getting this one out but again, it's likely this is the last release. [4]

Xwayland - very different, it'll hang around for a long time because it's "just" a protocol translation layer. And of course the interest is there, so we have volunteers to do the releases.

So basically: expecting Xwayland releases, be surprised (but not confused) by Xorg releases.

[1] Github of course doesn't exist yet because we're in the 80s. Time-travelling is complicated.
[2] Historical directory name, just accept it.
[3] Just like the previous release...
[4] At least until the next volunteer steps ups. Turns out the problem "no-one wants to work on this" is easily fixed by "me! me! I want to work on this". A concept that is apparently quite hard to understand in the peanut gallery.

September 21, 2021

Properties, introspection, and you

It is a truth universally acknowledged, that a GObject class in possession of a property, must be in want of an accessor function.

The main issue with that statement is that it’s really hard to pair the GObject property with the accessor functions that set the property’s value, and retrieve it.

From a documentation perspective, tools might not establish any relation (gtk-doc), or they might require some additional annotation to do so (gi-docgen); but at the introspection level there’s nothing in the XML or the binary data that lets you go from a property name to a setter, or a getter, function. At least, until now.

GObject-introspection 1.70, released alongside GLib 2.70 and GNOME 41, introduced various annotations for both properties and methods that let you go from one to the other; additionally, new API was added to libgirepository to allow bindings to dynamic languages to establish that relation at run time.

Annotations

If you have a property, and you document it as you should, you’ll have something like this:

/**
 * YourWidget:your-property
 *
 * A property that does something amazing.
 */

If you want to associate the setter and getter functions to this property, all you need to do is add the following identifier annotations to it:

/**
 * YourWidget:your-property: (setter set_your_property) (getter get_your_property)
 *
 * A property that does something amazing.
 */

The (setter) and (getter) annotations take the name of the method that is used to set, and get, the property, respectively. The method name is relative to the type, so you should not pass the C symbol.

On the accessor methods side, you have two additional annotations:

/**
 * your_widget_set_your_property: (set-property your-property)
 * @self: your widget
 * @value: the value to set
 *
 * Sets the given value for your property.
 */

and:

/**
 * your_widget_get_your_property: (get-property your-property)
 * @self: your widget
 *
 * Retrieves the value of your property.
 *
 * Returns: the value of the property
 */

Heuristics

Of course, you’re now tempted to go and add those annotations to all your properties and related accessors. Before you do that, though, you should know that the introspection scanner will try and match properties and accessors by itself, using appropriate heuristics:

  • if your object type has a writable, non-construct-only property, and a method that is called set_<property>, then the property will have a setter and the method will be matched to the property
  • if your object type has a readable property, and a method that is called get_<property>, then the property will have a getter and the method will be matched to the property
  • additionally, if the property is read-only and the property type is boolean, the scanner will look at a method that has the same name as the property as well; this is meant to catch getters like gtk_widget_has_focus(), which accesses the read-only property has-focus

API

All of the above ends up in the introspection XML, which is used by documentation tools and code generators. Bindings for dynamic languages using libgirepository can also access this information at run time, by using the API in GIPropertyInfo to retrieve the setter and getter function information for a property; and the API in GIFunctionInfo to retrieve the property being set.

Future

Ideally, with this information, language bindings should be able to call the accessor functions instead of going through the generic g_object_set_property() and g_object_get_property() API, except as a fallback. This should speed up the property access in various cases. Additionally, bindings could decide to stop exposing C accessors, and only expose the property, in order to make the API more idiomatic.

On the documentation side, this will ensure that tools like gi-docgen will be able to bind the properties and their accessors more reliably, without requiring extra attributes.

And one more thing

One thing that did not make it in time for the 1.70 release, but will land early in the next development cycle for gobject-introspection, is the validation for properties. Language bindings don’t really like it when the C API exposes properties that have the same name of methods and virtual functions; we already have a validation pass ready to land, so expect warnings in the near future.

Another feature that will land early in the cycle is the (emitter) annotation, which will bind a method emitting a signal with the signal name. This is a feature taken from Vala’s metadata, and should improve the quality of life of people using introspection data with Vala, as well as removing the need for another attribute in gi-docgen.

Finally, if you maintain a language binding: please look at !204, and make sure you’re not calling g_assert_not_reached() or g_error() when encountering a new scope type. The forever scope cannot land if it breaks every single binding in existence.

September 20, 2021

Maps and GNOME 41


 It's been a while since my last blog post. And in the meantime GNOME 41 was released. So I thought it would be time for a new post, although there's not been that much news to show in Maps itself since the last update (where I showcased the refreshed icons for search results.

But a few small visual improvements have been done since.

Already in 40.0, we made the display of population numbers for places (such as towns, cities, and similar) locale-aware. So that it now uses localized digits and decimal separators.


Now in 41.0 another small refinement has been made to show elevations below mean sea level expressed in words, rather that just showing a negative numer (which, although correct, may look a bit technical):


Also along the lines of visual polish, we now show population numbers in a rounded format if the value is an exact multiple of 100,000, assuming such a figure is most likely not an exact number but rather an approximation.


This utilises the localization API from ES (JavaScript) and as can be seen here gives a localized unit suffix and also in the case of Japanese as shown in the last example, the multiple in this case is 10,000, as this is based on traditional Chinese numerals, with denominations 10⁴, 10⁸ and so on. So in this case it would translate to “800 ten-thousands (man)”.

And over in libshumate (the new GTK4-based map rendering library we're working to eventually replace libchamplain, and enable migrating to GTK4), James and Corentin has been busy.

Among other things, James has implemented rotation support (for pinch gestures on tough screens among others), fractional scaling (should make smoother pinch zooming possible, something that has been quite poor currently in libchamplain, and thus in Maps). Also he started working on a renderer that vector format tiles:

Using vector tiles is something that's been in long-term plans for a long time. One thing that this could enable is the possibility to download map data for offline usage, something that is not really feasible with bitmap tiles. But actually I think something perhaps even more useful could be the possibility to render names in the user's language. This has always been an area where compromises had to be done. For example Mapbox' street tiles uses English names in the default tile set which would have the benefit of rendering as something that many people could read out as common Romanized transliterations of place names where the native reading is in a script they can't read. The downside being that they see place names near there home always in English, even though they could read (and might be more familiar with) the native reading. On the other hand the default openstreetmap.org tiles (which Maps now uses) renders the native names (which is better for your home location, but vice versa would make any place where the native script is unfamiliar not understandable).

And myself I have started on a little side project GNOME streets. a style for rendering bitmap tile maps using the GNOME color palette (though only some parts of the map uses these colors so far):


Eventually such a style could either be deployed on a GNOME-hosted bitmap tile server, or it could perhaps be used as the base of a stylesheet for rendering vectors tiles client-side in Maps.

So, over and out for now, until next time!

Glyphtracer 2.0

Ages ago I wrote a simple GUI app called Glyphtracer to simplify the task of creating fonts from scanned images. It seems people are still using it. The app is written in Python 2 and Qt 4, so getting it running becomes harder and harder as time goes by.

Thus I spent a few hours porting it to Python3 and PyQt 5 and bumped the major version to 2.0. The program can be obtained from this Github repo.


September 19, 2021

Creating Quality Backtraces for Crash Reports

Hello Linux users! Help developers help you: include a quality backtraces taken with gdb each and every time you create an issue report for a crash. If you don’t, most developers will request that you provide a backtrace, then ignore your issue until you manage to figure out how to do so. Save us the trouble and just provide the backtrace with your initial report, so everything goes smoother. (Backtraces are often called “stack traces.” They are the same thing.)

Don’t just copy the lower-quality backtrace you see in your system journal into your issue report. That’s a lot better than nothing, but if you really want the crash to be fixed, you should provide the developers with a higher-quality backtrace from gdb. Don’t know how to get a quality backtrace with gdb? Read on.

Future of Crash Reporting

Here are instructions for getting a quality backtrace for a crashing process on Fedora 35, which is scheduled to be released in October:

$ coredumpctl gdb
(gdb) bt full

Press ‘c’ (continue) when required. When it’s done printing, press ‘q’ to quit. That’s it! That’s all you need to know. You’re done. Two points of note:

  • When a process crashes, a core dump is caught by systemd-coredump and stored for future use. The coredumpctl gdb command opens the most recent core dump in gdb. systemd-coredump has been enabled by default in Fedora since Fedora 26, which was released four years ago. (It’s also enabled by default in RHEL 8.)
  • After opening the core dump, gdb uses debuginfod to automatically download all required debuginfo packages, ensuring the generated backtrace is useful. debuginfod is a new feature in Fedora 35.

If you’re not an inhabitant of the future, you are probably missing at least debuginfod today, and possibly also systemd-coredump depending on which operating system you are using, so we will also learn how to take a backtrace without these tools. It will be more complicated, of course.

systemd-coredump

If your operating system enables systemd-coredump by default, then congratulations! This makes reporting crashes much easier because you can easily retrieve a core dump for any recent crash using the coredumpctl command. For example, coredumpctl alone will list all available core dumps. coredumpctl gdb will open the core dump of the most recent crash in gdb. coredumpctl gdb 1234 will open the core dump corresponding to the most recent crash of a process with pid 1234. It doesn’t get easier than this.

Core dumps are stored under /var/lib/systemd/coredump. systemd-coredump will automatically delete core dumps that exceed configurable size limits (2 GB by default). It also deletes core dumps if your free disk space falls below a configurable threshold (15% free by default). Additionally, systemd-tmpfiles will delete core dumps automatically after some time has passed (three days by default). This ensures your disk doesn’t fill up with old core dumps. Although most of these settings seem good to me, the default 2 GB size limit is way too low in my opinion, as it causes systemd to immediately discard crashes of any application that uses WebKit. I recommend raising this limit to 20 GB by creating an /etc/systemd/systemd.conf.d/50-coredump.conf drop-in containing the following:

[Coredump]
ProcessSizeMax=20G
ExternalSizeMax=20G

The other settings are likely sufficient to prevent your disk from filling up with core dumps.

Sadly, although systemd-coredump has been around for a good while now and many Linux operating systems have it enabled by default, many still do not. Most notably, the Debian ecosystem is still not yet on board. To check if systemd-coredump is enabled on your system:

$ cat /proc/sys/kernel/core_pattern

If you see systemd-coredump, then you’re good.

To enable it in Debian or Ubuntu, just install it:

# apt install systemd-coredump

Ubuntu users, note this will cause apport to be uninstalled, since it is currently incompatible. Also note that I switched from $ (which indicates a normal prompt) to # (which indicates a root prompt).

In other operating systems, you may have to manually enable it:

# echo "kernel.core_pattern=|/usr/lib/systemd/systemd-coredump %P %u %g %s %t %c %h" > /etc/sysctl.d/50-coredump.conf
# /usr/lib/systemd/systemd-sysctl --prefix kernel.core_pattern

Note the exact core pattern to use changes occasionally in newer versions of systemd, so these instructions may not work everywhere.

Detour: Manual Core Dump Handling

If you don’t want to enable systemd-coredump, life is harder and you should probably reconsider, but it’s still possible to debug most crashes. First, enable core dump creation by removing the default 0-byte size limit on core files:

$ ulimit -c unlimited

This change is temporary and only affects the current instance of your shell. For example, if you open a new tab in your terminal, you will need to set the ulimit again in the new tab.

Next, run your program in the terminal and try to make it crash. A core file will be generated in the current directory. Open it by starting the program that crashed in gdb and passing the filename of the core file that was created. For example:

$ gdb gnome-chess ./core

This is downright primitive, though:

  • You’re going to have a hard time getting backtraces for services that are crashing, for starters. If starting the service normally, how do you set the ulimit? I’m sure there’s a way to do it, but I don’t know how! It’s probably easier to start the service manually, but then what command line flags are needed to properly do so? It will be different for each service, and you have to figure this all out for yourself.
  • Special situations become very difficult. For example, if a service is crashing only when run early during boot, or only during an initial setup session, you are going to have an especially hard time.
  • If you don’t know how to reproduce a crash that occurs only rarely, it’s inevitably going to crash when you’re not prepared to manually catch the core dump. Sadly, not all crashes will occur on demand when you happen to be running the software from a terminal with the right ulimit configured.
  • Lastly, you have to remember to delete that core file when you’re done, because otherwise it will take up space on your disk space until you do. You’ll probably notice if you leave core files scattered in ~/home, but you might not notice if you’re working someplace else.

Seriously, just enable systemd-coredump. It solves all of these problems and guarantees you will always have easy access to a core dump when something crashes, even for crashes that occur only rarely.

Debuginfo Installation

Now that we know how to open a core dump in gdb, let’s talk about debuginfo. When you don’t have the right debuginfo packages installed, the backtrace generated by gdb will be low-quality. Almost all Linux software developers deal with low-quality backtraces on a regular basis, because most users are not very good at installing debuginfo. Again, if you’re reading this in the future using Fedora 35 or newer, you don’t have to worry about this anymore because debuginfod will take care of everything for you. I would be thrilled if other Linux operating systems would quickly adopt debuginfod so we can put the era of low-quality crash reports behind us. But since most readers of this blog today will not yet have debuginfod enabled, let’s learn how to install debuginfo manually.

As an example, I decided to force gnome-chess to crash using the command killall -SEGV gnome-chess, then I ran coredumpctl gdb to open the resulting core dump in gdb. After a bunch of spam, I saw this:

Missing separate debuginfos, use: dnf debuginfo-install gnome-chess-40.1-1.fc34.x86_64
--Type <RET> for more, q to quit, c to continue without paging--
Core was generated by `/usr/bin/gnome-chess --gapplication-service'.
Program terminated with signal SIGSEGV, Segmentation fault.
#0  0x00007fa23d8b55bf in __GI___poll (fds=0x5636deb06930, nfds=2, timeout=2830)
    at ../sysdeps/unix/sysv/linux/poll.c:29
29  return SYSCALL_CANCEL (poll, fds, nfds, timeout);
[Current thread is 1 (Thread 0x7fa23ca0cd00 (LWP 140177))]
(gdb)

If you are using Fedora, RHEL, or related operating systems, the line “missing separate debuginfos” is a good hint that debuginfo is missing. It even tells you exactly which dnf debuginfo-install command to run to remedy this problem! But this is a Fedora ecosystem feature, and you won’t see this on most other operating systems. Usually, you’ll need to manually locate the right debuginfo packages to install. Debian and Ubuntu users can do this by searching for and installing -dbg or -dbgsym packages until each frame in the backtrace looks good. You’ll just have to manually guess the names of which debuginfo packages you need to install based on the names of the libraries in the backtrace. Look here for instructions for popular operating systems.

How do you know when the backtrace looks good? When each frame has file names, line numbers, function parameters, and local variables! Here is an example of a bad backtrace, if I continue the gnome-chess example above without properly installing the required debuginfo:

(gdb) bt full
#0 0x00007fa23d8b55bf in __GI___poll (fds=0x5636deb06930, nfds=2, timeout=2830)
    at ../sysdeps/unix/sysv/linux/poll.c:29
        sc_ret = -516
        sc_cancel_oldtype = 0
#1 0x00007fa23eee648c in g_main_context_iterate.constprop () at /lib64/libglib-2.0.so.0
#2 0x00007fa23ee8fc03 in g_main_context_iteration () at /lib64/libglib-2.0.so.0
#3 0x00007fa23e4b599d in g_application_run () at /lib64/libgio-2.0.so.0
#4 0x00005636dd7b79a2 in chess_application_main ()
#5 0x00007fa23d7e7b75 in __libc_start_main (main=0x5636dd7aaa50 <main>, argc=2, argv=0x7fff827b6438, init=<optimized out>, fini=<optimized out>, rtld_fini=<optimized out>, stack_end=0x7fff827b6428)
    at ../csu/libc-start.c:332
        self = <optimized out>
        result = <optimized out>
        unwind_buf = 
              {cancel_jmp_buf = {{jmp_buf = {94793644186304, 829313697107602221, 94793644026480, 0, 0, 0, -829413713854928083, -808912263273321683}, mask_was_saved = 0}}, priv = {pad = {0x0, 0x0, 0x2, 0x7fff827b6438}, data = {prev = 0x0, cleanup = 0x0, canceltype = 2}}}
        not_first_call = <optimized out>
#6 0x00005636dd7aaa9e in _start ()

This backtrace has six frames, which shows where the code was during program execution when the crash occurred. You can see line numbers for frame #0 (poll.c:29) and #5 (libc-start.c:332), and these frames also show the values of function parameters and variables on the stack, which are often useful for figuring out what went wrong. These frames have good debuginfo because I already had debuginfo installed for glibc. But frames #1 through #4 do not look so useful, showing only function names and the library and nothing else. This is because I’m using Fedora 34 rather than Fedora 35, so I don’t have debuginfod yet, and I did not install proper debuginfo for libgio, libglib, and gnome-chess. (The function names are actually only there because programs in Fedora include some limited debuginfo by default. In many operating systems, you will see ??? instead of function names.) A developer looking at this backtrace is not going to know what went wrong.

Now, let’s run the recommended debuginfo-install command:

# dnf debuginfo-install gnome-chess-40.1-1.fc34.x86_64

When the command finishes, we’ll start gdb again, using coredumpctl gdb just like before. This time, we see this:

Missing separate debuginfos, use: dnf debuginfo-install avahi-libs-0.8-14.fc34.x86_64 colord-libs-1.4.5-2.fc34.x86_64 cups-libs-2.3.3op2-7.fc34.x86_64 fontconfig-2.13.94-2.fc34.x86_64 glib2-2.68.4-1.fc34.x86_64 graphene-1.10.6-2.fc34.x86_64 gstreamer1-1.19.1-2.1.18.4.fc34.x86_64 gstreamer1-plugins-bad-free-1.19.1-3.1.18.4.fc34.x86_64 gstreamer1-plugins-base-1.19.1-2.1.18.4.fc34.x86_64 gtk4-4.2.1-1.fc34.x86_64 json-glib-1.6.6-1.fc34.x86_64 krb5-libs-1.19.2-2.fc34.x86_64 libX11-1.7.2-3.fc34.x86_64 libX11-xcb-1.7.2-3.fc34.x86_64 libXfixes-6.0.0-1.fc34.x86_64 libdrm-2.4.107-1.fc34.x86_64 libedit-3.1-38.20210714cvs.fc34.x86_64 libepoxy-1.5.9-1.fc34.x86_64 libgcc-11.2.1-1.fc34.x86_64 libidn2-2.3.2-1.fc34.x86_64 librsvg2-2.50.7-1.fc34.x86_64 libstdc++-11.2.1-1.fc34.x86_64 libxcrypt-4.4.25-1.fc34.x86_64 llvm-libs-12.0.1-1.fc34.x86_64 mesa-dri-drivers-21.1.8-1.fc34.x86_64 mesa-libEGL-21.1.8-1.fc34.x86_64 mesa-libgbm-21.1.8-1.fc34.x86_64 mesa-libglapi-21.1.8-1.fc34.x86_64 nettle-3.7.3-1.fc34.x86_64 openldap-2.4.57-5.fc34.x86_64 openssl-libs-1.1.1l-1.fc34.x86_64 pango-1.48.9-2.fc34.x86_64

Yup, Fedora ecosystem users will need to run dnf debuginfo-install twice to install everything required, because gdb doesn’t list all required packages until the second time. Next, we’ll run coredumpctl gdb one last time. There will usually be a few more debuginfo packages that are still missing because they’re not available in the Fedora repositories, but now you’ll probably have enough to get a quality backtrace:

(gdb) bt full
#0  0x00007fa23d8b55bf in __GI___poll (fds=0x5636deb06930, nfds=2, timeout=2830)
    at ../sysdeps/unix/sysv/linux/poll.c:29
        sc_ret = -516
        sc_cancel_oldtype = 0
#1  0x00007fa23eee648c in g_main_context_poll
    (priority=, n_fds=2, fds=0x5636deb06930, timeout=, context=0x5636de7b24a0)
    at ../glib/gmain.c:4434
        ret = 
        errsv = 
        poll_func = 0x7fa23ee97c90 
        max_priority = 2147483647
        timeout = 2830
        some_ready = 
        nfds = 2
        allocated_nfds = 2
        fds = 0x5636deb06930
        begin_time_nsec = 30619110638882
#2  g_main_context_iterate.constprop.0
    (context=context@entry=0x5636de7b24a0, block=block@entry=1, dispatch=dispatch@entry=1, self=)
    at ../glib/gmain.c:4126
        max_priority = 2147483647
        timeout = 2830
        some_ready = 
        nfds = 2
        allocated_nfds = 2
        fds = 0x5636deb06930
        begin_time_nsec = 30619110638882
#3  0x00007fa23ee8fc03 in g_main_context_iteration
    (context=context@entry=0x5636de7b24a0, may_block=may_block@entry=1) at ../glib/gmain.c:4196
        retval = 
#4  0x00007fa23e4b599d in g_application_run
    (application=0x5636de7ae260 [ChessApplication], argc=-2105843004, argv=)
    at ../gio/gapplication.c:2560
        arguments = 0x5636de7b2400
        status = 0
        context = 0x5636de7b24a0
        acquired_context = 
        __func__ = "g_application_run"
#5  0x00005636dd7b79a2 in chess_application_main (args=0x7fff827b6438, args_length1=2)
    at src/gnome-chess.p/gnome-chess.c:5623
        _tmp0_ = 0x5636de7ae260 [ChessApplication]
        _tmp1_ = 0x5636de7ae260 [ChessApplication]
        _tmp2_ = 
        result = 0
...

I removed the last two frames because they are triggering a strange WordPress bug, but that’s enough to get the point. It looks much better! Now the developer can see exactly where the program crashed, including filenames, line numbers, and the values of function parameters and variables on the stack. This is as good as a crash report is normally going to get. In this case, it crashed when running poll() because gnome-chess was not actually doing anything at the time of the crash, since we crashed it by manually sending a SIGSEGV signal. Normally the backtrace will look more interesting.

Special Note for Arch Linux Users

Arch does not ship debuginfo packages, btw. To prepare a quality backtrace, you need to rebuild each package yourself with debuginfo enabled. This is a chore, to say the least. You will probably need to rebuild several system libraries in addition to the application itself if you want to get a quality backtrace. This is hardly impossible, but it’s a lot of work, too much to expect users to do for a typical bug report. You might want to consider attempting to reproduce your crash on another operating system in order to make it easier to get the backtrace. What a shame!

debuginfod for Fedora 34

Again, all of that manual debuginfo installation is no longer required as of Fedora 35, where debuginfod is enabled by default. It’s actually all ready to go in Fedora 34, just not enabled by default yet. You can try it early using the DEBUGINFOD_URLS environment variable:

$ DEBUGINFOD_URLS=https://debuginfod.fedoraproject.org/ coredumpctl gdb

Then you can watch gdb download the required debuginfo for you! Again, this environment variable will no longer be necessary in Fedora 35. (Technically, it will still be needed, but it will be configured by default.)

debuginfod for Debian Users

Debian users can use debuginfod, but it has to be enabled manually:

$ DEBUGINFOD_URLS=https://debuginfod.debian.net/ gdb

See here for more information. This requires Debian 11 “bullseye” or newer. If you’re using Ubuntu or other operating systems derived from Debian, you’ll need to wait until a debuginfod server for your operating system is available.

Flatpak

If your application uses Flatpak, you can use the flatpak-coredumpctl script to open core dumps in gdb. For most runtimes, including those distributed by GNOME or Flathub, you will need to manually install (a) the debug extension for your app, (b) the SDK runtime corresponding to the platform runtime that you are using, and (c) the debug extension for the SDK runtime. For example, to install everything required to debug Epiphany 40 from Flathub, you would run:

$ flatpak install org.gnome.Epiphany.Debug//stable
$ flatpak install org.gnome.Sdk//40
$ flatpak install org.gnome.Sdk.Debug//40

(flatpak-coredumpctl will fail to start if you don’t have the correct SDK runtime installed, but it will not fail if you’re missing the debug extensions. You’ll just wind up with a bad backtrace.)

The debug extensions need to exactly match the versions of the app and runtime that crashed, so backtrace generation may be unreliable after you install them for the very first time, because you would have installed the latest versions of the extensions, but your core dump might correspond to an older app or runtime version. If the crash is reproducible, it’s a good idea to run flatpak update after installing to ensure you have the latest version of everything, then reproduce the crash again.

Once your debuginfo is installed, you can open the backtrace in gdb using flatpak-coredumpctl. You just have to tell flatpak-coredumpctl the app ID to use:

$ flatpak-coredumpctl org.gnome.Epiphany

You can pass matches to coredumpctl using -m. For example, to open the core dump corresponding to a crashed process with pid 1234:

$ flatpak-coredumpctl -m 1234 org.gnome.Epiphany

Thibault Saunier wrote flatpak-coredumpctl because I complained about how hard it used to be to debug crashed Flatpak applications. Clearly it is no longer hard. Thanks Thibault!

Update: On newer versions of Debian and Ubuntu, flatpak-coredumpctl is included in the libflatpak-dev subpackage rather than the base flatpak package, so you’ll have to install libflatpak-dev first. But on older OS versions, including Debian 10 “buster” and Ubuntu 20.04, it is unfortunately installed as /usr/share/doc/flatpak/examples/flatpak-coredumpctl rather than /usr/bin/flatpak-coredumpctl due to a regrettable packaging choice that has been corrected in newer package versions. As a workaround, you can simply copy it to /usr/local/bin. Don’t forget to delete your copy after upgrading to a newer OS version, or it will shadow the packaged version.

Fedora Flatpaks

Flatpaks distributed by Fedora are different than those distributed by GNOME or by Flathub because they do not have debug extensions. Historically, this has meant that debugging crashes was impractical. The best solution was to give up.

Good news! Fedora’s Flatpaks are compatible with debuginfod, which means debug extensions will no longer be missed. You do still need to manually install the org.fedoraproject.Sdk runtime corresponding to the version of the org.fedoraproject.Platform runtime that the application uses, because this is required for flatpak-coredumpctl to work, but nothing else is required. For example, to get a backtrace for Fedora’s Epiphany Flatpak using a Fedora 35 host system, I ran:

$ flatpak install org.fedoraproject.Sdk//f34
$ flatpak-coredumpctl org.gnome.Epiphany
(gdb) bt full

(The f34 is not a typo. Epiphany currently uses the Fedora 34 runtime regardless of what host system you are using.)

That’s it!

Miscellany

At this point, you should know enough to obtain a high-quality backtrace on most Linux systems. That will usually be all you really need, but it never hurts to know a little more, right?

Alternative Types of Backtraces

At the top of this blog post, I suggested using bt full to take the backtrace because this type of backtrace is the most useful to most developers. But there are other types of backtraces you might occasionally want to collect:

  • bt on its own without full prints a much shorter backtrace without stack variables or function parameters. This form of the backtrace is more useful for getting a quick feel for where the bug is occurring, because it is much shorter and easier to read than a full backtrace. But because there are no stack variables or function parameters, it might not contain enough information to solve the crash. I sometimes like to paste the first few lines of a bt backtrace directly into an issue report, then submit the bt full version of the backtrace as an attachment, since an entire bt full backtrace can be long and inconvenient if pasted directly into an issue report.
  • thread apply all bt prints a backtrace for every thread. Normally these backtraces are very long and noisy, so I don’t collect them very often, but when a threadsafety issue is suspected, this form of backtrace will sometimes be required.
  • thread apply all bt full prints a full backtrace for every thread. This is what automated bug report tools generally collect, because it provides the most information. But these backtraces are usually huge, and this level of detail is rarely needed, so I normally recommend starting with a normal bt full.

If in doubt, just use bt full like I showed at the top of this blog post. Developers will let you know if they want you to provide the backtrace in a different form.

gdb Logging

You can make gdb print your session to a file. For longer backtraces, this may be easier than copying the backtrace from a terminal:

(gdb) set logging on

Memory Corruption

While a backtrace taken with gdb is usually enough information for developers to debug crashes, memory corruption is an exception. Memory corruption is the absolute worst. When memory corruption occurs, the code will crash in a location that may be far removed from where the actual bug occurred, rendering gdb backtraces useless for tracking down the bug. As a general rule, if you see a crash inside a memory allocation routine like malloc() or g_slice_alloc(), you probably have memory corruption. If you see magazine_chain_pop_head(), that’s called by g_slice_alloc() and is a sure sign of memory corruption. Similarly, crashes in GTK’s CSS machinery are almost always caused by memory corruption somewhere else.

Memory corruption is generally impossible to debug unless you are able to reproduce the issue under valgrind. valgrind is extremely slow, so it’s impractical to use it on a regular basis, but it will get to the root of the problem where gdb cannot. As a general rule, you want to run valgrind with --track-origins=yes so that it shows you exactly what went wrong:

$ valgrind --track-origins=yes my_app

When valgrinding a GLib application, including all GNOME applications, always use the G_SLICE=always-malloc environment variable to disable GLib’s slice allocator, to ensure the highest-quality diagnostics. Correction: the slice allocator can now detect valgrind and disable itself automatically.

When valgrinding a WebKit application, there are some WebKit-specific environment variables to use. Malloc=1 will disable the bmalloc allocator, GIGACAGE_ENABLED=0 will disable JavaScriptCore’s Gigacage feature (Update: turns out this is actually implied by Malloc=1), and WEBKIT_FORCE_SANDBOX=0 will disable the web process sandbox used by WebKitGTK or WPE WebKit:

$ Malloc=1 WEBKIT_FORCE_SANDBOX=0 valgrind --track-origins=yes epiphany

If you cannot reproduce the issue under valgrind, you’re usually totally out of luck. Memory corruption that only occurs rarely or under unknown conditions will lurk in your code indefinitely and cause occasional crashes that are effectively impossible to fix.

Another good tool for debugging memory corruption is address sanitizer (asan), but this is more complicated to use. Experienced users who are comfortable with rebuilding applications using special compiler flags may find asan very useful. However, because it can be very difficult to use,  I recommend sticking with valgrind if you’re just trying to report a bug.

Apport and ABRT

There are two popular downstream bug reporting tools: Ubuntu has Apport, and Fedora has ABRT. These tools are relatively easy to use — no command line knowledge required — and produce quality crash reports. Unfortunately, while the tools are promising, the crash reports go to downstream packagers who are generally either not watching bug reports, or else not interested or capable of fixing upstream software problems. Since downstream reports are very often ignored, it’s better to report crashes directly to upstream if you want your issue to be seen by the right developers and actually fixed. Of course, only report issues upstream if you’re using a recent software version. Fedora and Arch users can pretty much always safely report directly to upstream, as can Ubuntu users who are using the very latest version of Ubuntu. If you are an Ubuntu LTS user, you should stick with reporting issues to downstream only, or at least take the time to verify that the issue still occurs with a more recent software version.

There are a couple more problems with these tools. As previously mentioned, Ubuntu’s apport is incompatible with systemd-coredump. If you’ve read this far, you know you really want systemd-coredump enabled, so I recommend disabling apport until it learns to play ball with systemd-coredump.

The technical design of Fedora’s ABRT is currently better because it actually retrieves your core dumps from systemd-coredump, so you don’t have to choose between one or the other. Unfortunately, ABRT has many serious user experience bugs and warts. I can’t recommend it for this reason, but it if it works well enough for you, it does create some great downstream crash reports. Whether a downstream package maintainer will look at those reports is hit or miss, though.

What is a crash, really?

Most developers consider crashes on Unix systems to be program termination via a Unix signal that triggers creation of a core dump. The most common of these are SIGSEGV (segmentation fault, “invalid memory reference”) or SIBABRT (usually an intentional crash due to an assertion failure). Less-common signals are SIGBUS (“bad memory access”) or SIGILL (“illegal instruction”). Sandboxed applications might occasionally see SIGSYS (“bad system call”). See the manpage signal(7) for a full list. These are cases where you can get a backtrace to help with tracking down the issues.

What is not a crash? If your application is hanging or just not behaving properly, that is not a crash. If your application is killed using SIGTERM or SIGKILL — this can happen when systemd-oomd determines you are low on memory,  or when a service is taking too long to stop — this is also not a crash in the usual sense of the word, because you’re not going to be able to get a backtrace for it. If a website is slow or unavailable, the news might say that it “crashed,” but it’s obviously not the same thing as what we’re talking about here. The techniques in this blog post are no use for these sorts of “crashes.”

Conclusion

If you have systemd-coredump enabled and debuginfod installed and working, most crash reports will be simple.  Memory corruption is a frustrating exception. Encourage your operating system to enable systemd-coredump and debuginfod if it doesn’t already.  Happy crash reporting!

September 18, 2021

The Truth they are not telling you about “Themes”

Before we start, let’s get this out of the way because the week long delirium on social media has dragged enough.

Yes, libadwaita “hardcodes” Adwaita. Yes, applications, as is, will not be following a custom system theme. Yes this does improve the default behavior of application for GNOME when run on other platforms like Elementary OS. However, this is the result of a technical limitation, and not some evil plot as Twitter will keep telling you…

The reason is that in order for High Contrast (and the upcoming Dark Style) to work, libadwaita needs to override the theme name property so it doesn’t fallback to GTK’s “Default” High Contrast style. The “Default” style is an older version of Adwaita, not your system style.

Compared to GTK 3, there isn’t a new way to enforce the “hardcoded” style. The GTK_THEME variable still works, as does ~/.config/gtk-4.0/gtk.css and probably 3 other ways of doing this. The process to theme your system might be a bit different compared to GTK 3 but it will still work. Likewise, if you are developing a distribution, you have control of the end product and can do anything you want with the code. There is a plethora of options available. Apparently complaining on social media and bullying volunteers into submission was one such option…

And I guess this also needs to be stated: this change only affects apps that choose to use libadwaita and adopt the GNOME Design Guidelines, not “every” GTK 4 application.

As usual, the fact that the themes keep working doesn’t mean they are supported. The same issues about restyling applications when they don’t expect it apply and GNOME can not realistically support arbitrary stylesheets that none of the contributors develop against and test.

Now onto the actual blogpost.

There seems to be some confusion when it comes to libadwaita’s stylesheet and coloring APIs. It’s easy to mix them up when you haven’t heard of libadwaita before, so here is a short introduction on what they are and how they differ.

Keep in mind that the features discussed below are not guaranteed to land. After libadwaita 1.0 the stylesheet will be frozen and treated as an API. That means that if a feature doesn’t make it by 1.0 it will be a breaking change and will have to wait for libadwaita 2.0.

An Application Coloring API / Accent Colors

The idea here is that you can define “accent” colors to be applied for various parts of widgets. You can also recolor any part of a widget however you like. Take a look at Epiphany’s private mode header bar for an example. For this to be possible the whole stylesheet had to be reworked. Extra care was needed to ensure that the functionality wouldn’t conflict with the high contrast preference and wouldn’t need special handling. I hope Alexander will blog about this work in more detail, as it was truly fascinating. I am very excited to see what developers do with the coloring API.

For now the colors can be controlled with the GTK-specific @define-color, similar to CSS variables. Programmatic API will be added later on as the dust settles. The API will be based on AdwStyleManager which is getting introduced by the Dark style preference MR and hasn’t landed yet.

Here’s a quick example:

@define-color accent_color @yellow_5;
@define-color accent_bg_color @yellow_2;
@define-color accent_fg_color black;

.controls {
    color: white;
    background: linear-gradient(to right, shade(@blue_3, .8), @purple_2);
}

.slider > trough > highlight {
    background: linear-gradient(to left, shade(@red_1, .8), @yellow_4);
}

.controls textview text {
  background: none;
}

.controls entry,
.controls spinbutton,
.controls textview {
  background-color: alpha(black, .15);
  color: white;
}

.navigation-sidebar,
headerbar {
  background: alpha(white, .1);
  color: white;
}


GNOME Patterns application showcasing the capabilities of the CSS styles.

For a more detailed example of what you can do check Federico’s recent blogpost.

System Accents

This is heavily inspired by system accent settings in elementary OS, and it’s similar in function. Think of it like a way to set the accent color system-wide, then applications can read it and decide to follow or override it. A case where you want to override would be if your app had a Sepia mode for example.

The coloring API mentioned above is designed in a way that makes this feature easy to implement. The interface and UI for this are not yet fleshed out completely, and it’s debatable if it’s going to be implemented/merged at all. There are a couple of design issues and concerns that need further research. It’s a possibility, but don’t bet on it.

Picture of the Elementary OS 6 Appearance Settings panel.

Vendor Styling

The story behind this idea is extensive and best left for another post, so here’s the current status on this infamous topic.

There have been great accomplishments to reducing the possible fallout of restyling applications with brand colors. Nowadays vendors recognize that arbitrary restyling can be damaging to application developers and have taken some precautions.

Yaru reworked its style and rebased it on Adwaita, this helped reduced the changes to mostly the color palette and minor stylistic tweaks. This got rid of a lot of bugs surfacing in applications, as Yaru now at least has the same spacing, margins and padding as Adwaita. Pop!_OS followed suit shortly after, I believe it’s now based on Yaru.

However, both Ubuntu and Pop also introduced “Dark-modes”, Pop making it the default, which broke applications’ expectations. They did it despite being warned about it. As a result this ended up increasing the issues with theming by about an order of magnitude as now you would frequently end up with black on black, grey on grey and other fun coloring bugs. It should also be noted that neither Ubuntu nor System 76 approached any contributor I know of, about properly implementing a Dark Style preference upstream. Even though GNOME and Elementary contributors had been collaborating in public for the last 3 years.

Screenshot of gedit with Yaru Dark stylesheet, where the selected text becomes invisible.

Yaru developers did some research on the topic and there was a call for engagement by GNOME, but unfortunately ever since the last theming BoF in 2019, the conversation had dried up. The interested parties haven’t provided any details on what the scope of the API would need to be, how it would look like, or the detailed requirements. Nobody stepped up to help with the Adwaita changes that were required either, or with dark mode, or to work on the QA tooling, or to figure out the implementation details. Now we are sadly out of time for libadwaita 1.0 and there isn’t much hope for such a complex thing to be ready in the next 4 months.

Conclusion

For libadwaita 1.0 and GNOME 42 the work on recoloring widgets will likely be completed. A proper Dark Style setting will likely also be implement by then. System-wide accent colors are being discussed and looked at, but there are design related concerns about them, so it’s possible that they will never land. And there won’t be any “Theming API” for libadawaita 1.0. Maybe there will be renewed interest from the vendors that want it in the future, but given the story so far, I won’t hold my breath. I hope to be proven wrong.

September 16, 2021

Chafa 1.8: Terminal graphics with a side of everything

The Chafa changelog was growing long again, owing to about half a year's worth of slow accretion. Hence, a release. Here's some stuff that happened.

High-end protocols

With existing choices of the old text mode standby and its friend, the most unreasonably efficient sixel encoder known to man, I threw Kitty and iTerm2 on the pile, bringing our total number of output formats to four. I think that's all the terminal graphics anyone could want (unless you want ReGIS; in which case, tough tty).

Moar terminals

Modern terminal emulators are generally less fickle than their pre-y2k ancestors. However, sometimes it takes a little sleuthing to figure out which extended features might be hiding behind e.g. some mysterious xterm-256color façade so we can do the right thing.

Comparison of Chafa graphics in various terminals
Chafa, friend to all terminals (sample picture mine: Las Canicas, Santa María del Tule)

Luckily, Chafa has a steadily improving handle on terminals of the Unix/GNU/Linux world. A few examples:

Of course, this is forever a work in progress and an area where I receive regular, highly appreciated contributions *chef's kiss – somehow still not an actual emoji*.

Funky lo-fi features

Øyvind Kolås (of GIMP and GEGL fame) swooped in with new builtins for the legacy computing block, meaning Chafa is now PETSCII Ready™ – or as ready as you can be with Unicode 13.0: The standard has a few annoying issues, such as not declaring any code points for the four permutations of black triangle, relying instead on existing code points in the geometric shapes block (U+25E2..U+25E5) which are typically represented by fonts as sitting on the baseline surrounded by empty space and therefore useless next to the legacy computing and block elements blocks.

Still, it's got a sweet 2×3 dot matrix (--symbols sextant) and all those nifty wedge shapes (--symbols wedge).

Symbols for Legacy Computing, excerpt
Can't not have these. Well, most of them, anyway

Øyvind also added an 8-color mode. Used together (-c 8 --symbols legacy+space), these features enable visual emulation of Teletext Level 1 and similar systems widely deployed in the late 1970s until roughly 1990 (technically into the present, albeit perhaps not so widely anymore).

PETSCII parrots rendered by Chafa
PETSCII parrots; left: full color, right: 8 colors

Somewhere along the way I discovered that Øyvind has a Patreon page – and if you're a GIMP user and/or care about the free software graphics ecosystem, you may want to read this article and consider its implications.

A bit of background austerity

I followed up in the retro vein with a foreground-only (--fg-only) modifier, which allows emulation of vintage systems that could only specify a single color per cell against a uniform background color. A popular example is the Commodore 64's standard character mode. It's also useful in terminals where block symbols don't render correctly (for example due to missing font support), since it prevents background color variation from drowning out details in low-coverage symbols used in their place. The Linux console tends to be among these due to hardware and font limitations that are somehow still in play today.

This is also how many classic ASCII art packages did things; so I guess I am once again asking you to party like it's 1999 (…and stay up all night trying to make your Napster killer render with AAlib).

ASCII parrots rendered by Chafa
Left: 16-color ASCII on black, right: same, but on light gray using --invert

When used with --fg-only, the existing --bg option has a greater impact than usual; in addition to being the fade color for alpha blending, it determines the relationship between symbols and blank space, including symbols where the background color "wins" part of a cell. A dark image on a bright background will have more high-coverage symbols that cover up the background as much as possible.

If your terminal has a bright background color, --invert is a shortcut to inverting the sense of --fg and --bg; the white-on-black default then becomes black-on-white.

Since foreground-only mode leaves the background color alone, you can easily experiment with setting it yourself, e.g:

echo -e '\033[41m'; \
chafa -c 16 --symbols ascii --fg-only --bg darkred birbs.png

Weird and wonderful forum art redux

If you read Steam reviews, you may be familiar with this guy:

Oh, hello there to you too

There are layers to this, but I'll keep it brief and simply observe that people seem to like braille. Braille is popular in this context for at least four reasons. It has:

  • A luxurious 2×4 dot matrix at your fingertips.
  • Widespread font support.
  • Consistent glyph width even in variable-width fonts.
  • A special blank symbol (U+2800 BRAILLE PATTERN BLANK) for consistent spacing.

Chafa's supported this kind of output for a long time (-c none --symbols braille), but in some circumstances it could replace cells having identical foreground and background colors with a hardcoded U+0020 as an optimization. This could result in inconsistent spacing, making braille (and probably other symbol combinations) less useful. Fortunately the issue is now a thing of the past; the latest version will instead use a visually blank symbol from the user's symbol set, falling back to the lowest-coverage symbol it can find.

The GPL doesn't regulate netiquette: Please use for good, or in extreme cases, awesome.

The ever elusive practical application in the wild

hb-view screenshot
حرف‌باز

It's good to be useful. Neofetch was the first project to avail itself of Chafa's incredible power, and the latest is HarfBuzz' hb-view. And – er – I think that's all of them. For now!

⠀⠀⠀⠀⠀⠀⠀⠀⢠⣿⣶⣄⣀⡀
⠀⠀⠀⠀⠀⠀⢀⣴⣿⣿⣿⣿⣿⣿⣿⣿⣿⣶⣦⣄⣀⡀⣠⣾⡇
⠀⠀⠀⠀⠀⣴⣿⣿⣿⣿⣿⣿⣿⣿⣿⣿⣿⣿⣿⣿⣿⣿⣿⣿⡇
⠀⠀⠀⢀⣾⣿⣿⣿⣿⣿⣿⣿⣿⣿⣿⣿⣿⣿⣿⠿⠿⢿⣿⣿⡇
⣶⣿⣦⣜⣿⣿⣿⡟⠻⣿⣿⣿⣿⣿⣿⣿⡿⢿⡏⣴⣺⣦⣙⣿⣷⣄
⣯⡇⣻⣿⣿⣿⣿⣷⣾⣿⣬⣥⣭⣽⣿⣿⣧⣼⡇⣯⣇⣹⣿⣿⣿⣿
⠹⣿⣿⣿⣿⣿⣿⣿⣿⣿⣿⣿⣿⣿⣿⣿⣿⣿⣿⠸⣿⣿⣿⣿⣿⣿

September 15, 2021

Introducing Emblem 🔥

Emblem is a new design tool that generates project avatars, or emblems if you will, for your git forge or matrix room. To set a GitLab project avatar one can put a logo.png file at the root of the project, if there is no manually set project avatar it will be picked up automatically.

Emblem is powered by gtk4-rs, librsvg and libadwaita, you can get it at Flathub.

Special thanks to Federico Mena Quintero who helped me creating the svg template.

PS: The logo is only temporal, and a reference to Zelda OOT.

September 14, 2021

Insulating a suspended timber floor

In a departure from my normal blogging, this post is going to be about how I’ve retrofitted insulation to some of the flooring in my house and improved its airtightness. This has resulted in a noticeable increase in room temperature during the cold months.

Setting the scene

The kitchen floor in my house is a suspended timber floor, built over a 0.9m tall sealed cavity (concrete skim floor, brick walls on four sides, air bricks). This design is due to the fact the kitchen is an extension to the original house, and it’s built on the down-slope of a hill.

The extension was built around 1984, shortly before the UK building regulations changed to (basically) require insulation. This meant that the floor was literally some thin laminate flooring, a 5mm underlay sheet for that, 22mm of chipboard, and then a ventilated air cavity at outside temperature (which, in winter, is about 4°C).

In addition to that, there were 10mm gaps around the edge of the chipboard, connecting the outside air directly with the air in the kitchen. The kitchen is 3×5m, so that gives an air gap of around 0.16m². That’s equivalent to leaving a window open all year round. The room has been this way for about 36 years! The UK needs a better solution for ongoing improvement and retrofit of buildings.

I established all this initial information fairly easily by taking the kickboards off the kitchen units and looking into the corners of the room; and by drilling a 10mm hole through the floor and threading a small camera (borescope) into the cavity beneath.

Making a plan

The fact that the cavity was 0.9m high and in good structural shape meant that adding insulation from beneath was a fairly straightforward choice. Another option (which would have been the only option if the cavity was shallower) would have been to remove the kitchen units, take up all the floorboards, and insulate from above. That would have been a lot more disruptive and labour intensive. Interestingly, the previous owners of the house had a whole new kitchen put in, and didn’t bother (or weren’t advised) to add insulation at the same time. A very wasted opportunity.

I cut an access hatch in one of the floorboards, spanning between two joists, and scuttled into the cavity to measure things more accurately and check the state of things.

Under-floor cavity before work began (but after a bit of cleaning)

The joists are 145×45mm, which gives an obvious 145mm depth of insulation which can be added. Is that enough? Time for some calculations.

I chose several potential insulation materials, then calculated the embodied carbon cost of insulating the floor with them, the embodied financial cost of them, and the net carbon and financial costs of heating the house with them in place (over 25 years). I made a number of assumptions, documented in the workings spreadsheet, largely due to the lack of EPDs for different components. Here are the results:

Heating scenarioInsulation assemblyU-value of floor assembly (W/m2K)Energy loss to floor (W)Net cost over 25 years (£)Net carbon cost over 25 years (kgCO2e)
Current gas tariff
(3.68p/kWh, 0.22kgCO2e/kWh)
Current floor2.60382308017980
Thermojute 160mm0.22327301700
Thermoflex 160mm0.21308601450
Thermojute 300mm0.121810201190
Thermoflex 240mm0.1117910820
Mineral wool 160mm0.24355401680
ASHP estimate
(13.60p/kWh, 0.01kgCO2e/kWh)
Current floor(as above)(as above)113701140
Thermojute 160mm1420290
Thermoflex 160mm1520110
Thermojute 300mm1410410
Thermoflex 240mm128080
Mineral wool 160mm1290150
Average future estimate (hydrogen grid)
(8.40p/kWh, 0.30kgCO2e/kWh)
Current floor702025090
Thermojute 160mm10602290
Thermoflex 160mm11702010
Thermojute 300mm12001520
Thermoflex 240mm10901140
Mineral wool 160mm8902320
Costings for different floor assemblies; see the spreadsheet for full details

In retrospect, I should also have considered multi-layer insulation options, such as a 20mm layer of closed-cell foam beneath the chipboard, and a 140mm layer of vapour-open insulation below that. More on that below.

In the end, I went with 160mm of Thermojute, packed between the joists and held in place with a windproof membrane stapled to the underside of the joists. This has a theoretical U-value of 0.22W/m2K and hence an energy loss of 32W over the floor area. Over 25 years, with a new air source heat pump (which I don’t have, but it’s a likelihood soon), the net carbon cost of this floor (embodied carbon + heating loss through the floor) should be at most 290kgCO2e, of which around 190kgCO2e is the embodied cost of the insulation. Without changing the heating system it would be around 1700kgCO2e.

The embodied cost of the insulation is an upper bound: I couldn’t find an embodied carbon cost for Thermojute, but its Naturplus certification puts an upper bound on what’s allowed. It’s likely that the actual embodied cost is lower, as the jute is recycled in a fairly simple process.

Three things swung the decision: the availability of Thermojute over Thermoflex, the joist loading limiting the depth of insulation I could install, and the ease of not having to support insulation installed below the depth of the joists.

This means that the theoretical performance of the floor is not Passivhaus standard (around 0.10–0.15W/m2K), although this is partially mitigated by the fact that the kitchen is not a core part of the house, and is separated from it by a cavity wall and some tight doors, which means it should not be a significant heat sink for the rest of the house when insulated. It’s also regularly heated by me cooking things.

Hopefully the attention to detail when installing the insulation, and the careful tracing of airtightness and windtightness barriers through the design should keep the practical performance of the floor high. The windtightness barrier is to prevent wind-washing of the insulation from below. The airtightness barrier is to prevent warm, moisture-laden air from the kitchen escaping into the insulation and building structure (particularly, joists), condensing there (as they’re now colder due to the increased insulation) and causing damp problems. An airtightness barrier also prevents convective cooling around the floor area, and reduces air movement which, even if warm, increases our perception of cooling.

I did not consider thermal bridging through the joists. Perhaps I should have done?

Insulation installation

Installation was done over a number of days and evenings, sped up by the fact the UK was in lockdown at the time and there was little else to do.

Cross sections of the insulation details

The first step in installation was to check the blockwork around each joist end and seal that off to reduce draughts from the wall cavity into the insulation. Thankfully, the blockwork was in good condition so no work was necessary.

The next step was to add an airtightness seal around all pipe penetrations through the chipboard, as the chipboard was to form the airtightness barrier for the kitchen. This was done with Extoseal Magov tape.

Sealing pipe penetrations through the chipboard floor using Extoseal Magov.

The next step in installation was to tape the windproof membrane to the underside edge of the chipboard, to separate the end of the insulation from the wall. This ended up being surprisingly quick once I’d made a cutting template.

The next step was to wedge the insulation batts in the gap between each pair of joists. This was done in several layers with offset overlaps. Each batt was slightly wider than the gap between joists, so could easily be held in place with friction. This arrangement shouldn’t be prone to gaps forming in the insulation as the joists expand and contract slightly over time.

One of the positives of using jute-based insulation is that it smells of coffee and sugar (which is what the bags which the jute fibres came from were originally used to transport). One of the downsides is that the batts need to be cut with a saw and the fibres get everywhere.

Some of the batts needed to be carefully packed around (insulated) pipework, and I needed to form a box section of windproof membrane around the house’s main drainage stack in one corner of the space, since it wasn’t possible to fit insulation or the membrane behind it. I later added closed-cell plastic bubblewrap insulation around the rest of the drainage stack to reduce the chance of it freezing in winter, since the under-floor cavity should now be significantly colder.

As more of the insulation was installed, I could start to staple the windproof membrane to the underside of the joists, and seal the insulation batts in place. The room needed three runs of membrane, with 100mm taped overlaps between them.

With the insulation and membrane in place and taped, the finishing touches in the under-floor cavity were to reinstall the pipework insulation and seal it to the windproof membrane to prevent any (really minor) wind washing of the insulation from draughts through the pipe holes; to label everything; insulate the drainage stack; re-clip the mains wiring; and tie the membrane into the access hatch.

Airtightness work in the kitchen

With the insulation layer complete under the chipboard floor, the next stage in the job was to ensure a continuous airtightness layer between the kitchen walls (which are plasterboard, and hence airtight apart from penetrations for sockets which I wasn’t worried about at the time) and the chipboard floor. Each floor board is itself airtight, but the joints between each of them and between them and the walls are not.

The solution to this was to add a lot of tape: cheaper paper-based Uni tape for joining the floor boards, and Contega Solido SL for joining the boards to the walls (Uni tape is not suitable as the walls are not smooth and flat, and there are some complex corners where the flexibility of a fabric tape is really useful).

Tediously, this involved removing all the skirting board and the radiator. Thankfully, though, none of the kitchen units needed to be moved, so this was actually a fairly quick job.

Finally, with some of the leftover insulation and windproof membrane, I built an insulation plug for the access hatch. This is attached to the underside of the hatch, and has a tight friction fit with the underfloor insulation, so should be windtight. The hatch itself is screwed closed onto a silicone bead, which should be airtight and replaceable if the hatch is ever opened.

The final step was to reinstall the kitchen floor, which was fairly straightforward as it’s interlocking laminate strips. And, importantly, to print out the plans, cross-sections, data sheets, a big warning about the floor being an air tightness barrier, and a sign to point towards the access hatch, and put them in a wallet under the kitchen units for someone to find in future.

Retrospective

This was a fun job to do, and has noticeably improved the comfort of my kitchen.

I can’t give figures for how much of an improvement it’s made, or whether its actual performance matches the U-value calculations I made in planning, as I don’t have reliable measured energy loss figures from the kitchen from before installing the insulation. Perhaps I’d try and measure things more in advance of a project like this next time, although that does require an extra level of planning and preparation which can be hard to achieve for a job done in my spare time.

I’m happy with the choice of materials and installation method. Everything was easy to work with and the job progressed without any unexpected problems.

If I were to do the planning again, I might put more thought into how to achieve a better U-value while being limited by the joist height. Extending the joists to accommodate more depth of insulation was something I explored in some detail, but it hit too many problems: the air bricks would need to be ducted (as otherwise they’d be covered up), the joist loading limits might be hit, and the method for extending the joists would have to be careful not to introduce thermal bridges. The whole assembly might have bridged the damp proof course in the walls.

It might, instead, have worked to consider a multi-layer insulation approach, where a thin layer of high performance insulation was used next to the chipboard, with the rest of the joist depth taken up with the thermojute. I can’t easily change to that now, though, so any future improvements to this floor will either have to add insulation above the chipboard (and likely another airtightness layer above that), or extend below the joists and be careful about it.

Unlocking the bootloader and disabling dm-verity on Android-X86 devices

For the hw-enablement for Bay- and Cherry-Trail devices which I do as a side project, sometimes it is useful to play with the Android which comes pre-installed on some of these devices.

Sometimes the Android-X86 boot-loader (kerneflinger) is locked and the standard "Developer-Options" -> "Enable OEM Unlock" -> "Run 'fastboot oem unlock'" sequence does not work (e.g. I got the unlock yes/no dialog, and could move between yes and no, but I could not actually confirm the choice).

Luckily there is an alternative, kernelflinger checks a "OEMLock" EFI variable to see if the device is locked or not. Like with some of my previous adventures changing hidden BIOS settings, this EFI variable is hidden from the OS as soon as the OS calls ExitBootServices, but we can use the same modified grub to change this EFI variable. After booting from an USB stick with the relevant grub binary installed as "EFI/BOOT/BOOTX64.EFI" or "BOOTIA32.EFI", entering the
following command on the grub cmdline will unlock the bootloader:

setup_var_cv OEMLock 0 1 1

Disabling dm-verity support is pretty easy on these devices because they can just boot a regular Linux distro from an USB drive. Note booting a regular Linux distro may cause the Android "system" partition to get auto-mounted after which dm-verity checks will fail! Once we have a regular Linux distro running step 1 is to find out which partition is the android_boot partition to do this as root run:

blkid /dev/mmcblk?p#

Replacing the ? for the mmcblk number for the internal eMMC and then for # is 1 to n, until one of the partitions is reported as having 'PARTLABEL="android_boot"', usually "mmcblk?p3" is the one you want, so you could try that first.

Now make an image of the partition by running e.g.:

dd if=/dev/mmcblk1p3" of=android_boot.img

And then copy the "android_boot.img" file to another computer. On this computer extract the file and then the initrd like this:

abootimg -x android_boot.img
mkdir initrd
cd initrd
zcat ../initrd.img | cpio -i


Now edit the fstab file and remove "verify" from the line for the system partition. after this update android_boot.img like this:

find . | cpio -o -H newc -R 0.0 | gzip -9 > ../initrd.img
cd ..
abootimg -u android_boot.img -r initrd.img


The easiest way to test the new image is using fastboot, boot the tablet into Android and connect it to the PC, then run:

adb reboot bootloader
fastboot boot android_boot.img


And then from an "adb shell" do "cat /fstab" verify that the "verify" option is gone now. After this you can (optionally) dd the new android_boot.img back to the android_boot partition to make the change permanent.

Note if Android is not booting you can force the bootloader to enter fastboot mode on the next boot by downloading this file and then under regular Linux running the following command as root:

cat LoaderEntryOneShot > /sys/firmware/efi/efivars/LoaderEntryOneShot-4a67b082-0a4c-41cf-b6c7-440b29bb8c4f

September 11, 2021

Null Amusement

Null Amusement

Been old-school-pixel-pushin’ recently, for a project I’ll hopefully reveal soon. But because I’ve also been really keen on music recently, a little side diversion happened that I’d like to share.

It started with generating some samples using the good old SXFR. It’s a tiny sythesizer for generating cute oldschool chiptune/game sound effects. Sadly it doesn’t exist as an app, which is a shame.

SXFR

Then it was off to Polyend Tracker, even if in this case I was sitting in front of my computer so the benefit of having a physical machine to take anywhere was sort of diminished.

Polyend Tracker

In any case the included instrument editor with all its effects and filters came handy. I exported the full song as well as a single pattern to use on the Instagram loop. This time I did no mastering at all, just plain uploaded the track to soundcloud and called it done.

As for the visuals, I’ve used way many more tools than you’d expect. The icon assets were mainly done in Pixaki, a fairly polished pixel editor for iPad. I have numerous beef with it for it being premium priced, mainly in the way it does layered animation, but it absolutely delivers on the immediacy and contrasts with filesystem diving of Aseprite which otherwise beats it bar none. Usually I convert GIFs exported from Aseprite or Pixaki using ffmpeg, but this time I needed to sync the animation to the sound, so I loaded up the GIF and the exported pattern from Tracker into Blender and with the sound wave preview that somehow isn’t on by default, it was a quick job in the VSE.

Blender VSE

Previously, Previously, Previously, Previously, Previously, Previously.

September 10, 2021

Cleaning up header bars

Examples of app header bars after the redesign

You might have noticed that a lot of icons in GNOME 41 have been redrawn to be larger. They are still 16×16, but take up more of the space within the canvas. Compare:

Examples of symbolic icons in GNOME 40 and 41

This was a preparation for a larger change that has just landed in the main branch in libadwaita: buttons in header bars and a few other widgets have no background now, matching this mockup.

For example, this is how the recent GTK4 branch of GNOME Software looks like now:

GNOME Software using GTK4 and libadwaita

Making the style feel lighter and reducing visual noise is a major goal for the style refresh we’re doing for libadwaita. While we’ve done lots of smaller changes and cleanups across the stylesheet to bring us closer to that goal, this is probably the highest-impact part of it due to how prominent header bars are in GNOME apps.

This is not a new idea either — pretty much everyone else is doing it, e.g. macOS, Windows, iOS, Android, elementary OS, KDE.

In fact, we’ve been doing this for a long time in view switchers. So this just extends it to the whole header bar.

However, if applied carelessly, it can also make certain layouts ambiguous. For example, a text-only button with no background would look exactly same as a window title. To prevent that, we only remove background from buttons that we can be confident won’t look confusing without it — for example, buttons containing a single icon.

While we avoid ambiguous situations, it also means that apps will need changes to have consistent buttons. In my opinion this is a better tradeoff: since the API is not stable yet, we can break behavior, and if an app hasn’t been updated, it will just get inconsistent look and not accessibility issues.

Details

The exact rules of what has background and what doesn’t are as follows:

The following buttons get no background:

  • Buttons that contain icons (specifically the .image-button style class).
  • Buttons that contain an icon and a label, or rather, the .image-text-button style class.
  • Buttons with the .flat style class.
  • UPDATE: Any GtkMenuButtons with a visible arrow (the .arrow-button style class).
  • UPDATE: Any split buttons (more on that later).

Flat button examples: icon buttons; buttons with icons and text

The following buttons keep their default appearance:

  • Text-only buttons.
  • Buttons with custom content.
  • Buttons with .suggested-action or .destructive-action style classes.
  • Buttons inside a widget with the .linked style class.
  • A new addition: buttons with the .raised style class, as inspired by the elementary OS stylesheet.

Raised button examples: text buttons, linked buttons, custom buttons, suggested and destructive buttons

The appearance of GtkMenuButton and AdwSplitButton (more on that later) is decided as if they were regular buttons.

Icon-only, icon+text and text-only arrow and split buttons

UPDATE: menu buttons with visible arrows and split buttons don’t have a background anymore regardless of their content.

Icon-only, icon+text and text-only arrow and split buttons, updated. Text buttons are flat too now

This may look a lot like the old GtkToolbar, and in a way it is. While GTK4 doesn’t have GtkToolbar, it has the .toolbar style class to replace it, and this style is now shared with header bars and also GtkActionBar.

Special cases

While the simple icon-only buttons are easy, a lot of applications contain more complex layouts. In that case we fall back to the default appearance and apps will need changes to opt into the new style for them. Let’s look at some of those patterns and how to handle them:

Menu buttons with icons and dropdown arrows

A menu button with an icon, GTK3

This case works as is if you use the standard widgets — namely, GtkMenuButton with an icon set via icon-name and always-show-arrow set to TRUE.

A menu button with an icon

The only reason this case is special is because always-show-arrow is relatively new, having only been added in GTK 4.4, so a lot of apps will have custom menu buttons, or, if porting from GTK3, GtkMenuButton containing a GtkBox with an icon and an arrow. Since we don’t remove backgrounds from buttons with custom content, both of them will have backgrounds.

Text-only buttons

A button with text, GTK3

This is the most common case outside icon-only buttons. For these buttons the solution, rather counter-intuitively, is to add an icon. Since the icon has a label next to it, it doesn’t have to be very specific, so if an action is hard to describe with an icon, an only tangentially related icon is acceptable. If you still can’t find anything fitting — open an issue against the GNOME icon development kit.

With GTK widgetry, the only way to create such buttons is to pack a GtkBox inside, and create the icon and the label manually. Then you’ll also have to add the .image-button and .text-button style classes manually, and will need to set the mnemonic-widget property on the label so that mnemonics work.

Since this is tedious and parts like connecting the mnemonic are easy to miss, libadwaita now provides AdwButtonContent widget to do exactly that. It’s intended to be used as a child widget of GtkButton, GtkMenuButton or AdwSplitButton (more on that below), as follows:

<object class="GtkButton">
  <property name="child">
    <object class="AdwButtonContent">
      <property name="icon-name">document-open-symbolic</property>
      <property name="label" translatable="yes">_Open</property>
      <property name="use-underline">True</property>
    </object>
  </property>
</object>

A button with an icon and text

If it’s a GtkMenuButton, it would also make sense to show a dropdown arrow, as follows:

<object class="GtkMenuButton">
  <property name="menu-model">some_menu</property>
  <property name="always-show-arrow">True</property>
  <property name="child">
    <object class="AdwButtonContent">
      <property name="icon-name">document-open-symbolic</property>
      <property name="label" translatable="yes">_Open</property>
      <property name="use-underline">True</property>
    </object>
  </property>
</object>

A menu button with an icon and text

UPDATE:Menu buttons with visible arrows don’t have background by default anymore, the step above is not necessary.

Note: the child property in GtkMenuButton is fairly new, and is not in a stable release as of the time of writing. It should land in GTK 4.6.

Notice we didn’t have to add any style class to the buttons or to connect mnemonics like we would have with GtkLabel. AdwButtonContent handles both automatically.

Split buttons

Split buttons in GTK3: with text and icon

This is a fairly rare case, but also a difficult one. Historically, these were implemented as 2 buttons in a .linked box. Without a background, it’s easy to make it look too similar to a regular menu button with a dropdown arrow, resulting in an ambiguous layout.

While existing split buttons will keep their background thanks to the .linked style class, we now have a way to make consistent split buttons – AdwSplitButton.

Examples of split buttons

Whether they get a background or not depends on the content of their button part, while the dropdown part follows the suit – they will have background if it has only a label, will have no background if it has an icon, and will keep their default appearance outside header bars or toolbars. If it has no background, a separator is shown between them and they gain a shared background when hovered, pressed, or the dropdown is open:


They can be adapted the same way as regular buttons — via AdwButtonContent:

<object class="AdwSplitButton">
  <property name="menu-model">some_menu</property>
  <property name="child">
    <object class="AdwButtonContent">
      <property name="icon-name">document-open-symbolic</property>
      <property name="label" translatable="yes">_Open</property>
      <property name="use-underline">True</property>
    </object>
  </property>
</object>

A split button with an icon and text

UPDATE: split buttons with text or custom content don’t get background by default anymore, so the step above is not necessary.

Meanwhile, buttons like the list/grid selector in Files are as simple as:

<object class="AdwSplitButton">
  <property name="menu-model">some_menu</property>
  <property name="icon-name">view-list-symbolic</property>
</object>

A split button with an icon

Otherwise, AdwSplitButton API is mostly a union of GtkButton and GtkMenuButton – the button part can have a label, an icon or a custom child, an action name and target, and a clicked signal if you prefer to use that. Meanwhile, the dropdown part has a menu model or a popover, and a direction that affects where the popover will be shown, as well as where the dropdown arrow will point.

Finally, in a lot of cases layouts that were using split buttons can be redesigned not to use them – for example, to use a simple menu button for opening files like in Text Editor instead of a split button in Apostrophe).

Linked buttons

Linked buttons, GTK3

With visible frames, linking buttons is a nice way to visually group them. For example, we commonly do that for back/forward buttons, undo/redo buttons, mode switching buttons. We also use multiple groups of linked buttons to separate them from each other.

For the most part linked buttons can, well, stop being linked. For example, back/forward buttons like this:

Linked buttons

can become this:

Unlinked buttons

However, when multiple linked groups are present, just unlinking will remove the separation altogether:

Unlinked buttons without spacing, not grouped

In that case, additional spacing can be used. It can be achieved with a GtkSeparator with a new style class .spacer:

<object class="GtkSeparator">
  <style>
    <class name="spacer"/>
  </style>
</object>

Unlinked buttons with spacing, grouped

Action dialog buttons

A dialog, GTK3

This special case is less special than other special cases (or more special, if you prefer), in that apps don’t need to handle it, but I’ll mention it for the sake of completeness.

The two primary buttons in an action dialog or a similar context (for example, when changing display resolution in Settings, or the Cancel button in selection mode) should keep their current style — that is, they don’t have icons and keep their background. Meanwhile any extra buttons follow the new style.

In most situations this will already be the case so no changes are needed.

A dialog

Other

There will undoubtedly be cases not covered here. The .flat and .raised style classes can always be used to override the default appearance if need be.

Finally, not everything has to have no background. For example, the remote selector in Software is probably best kept as is until it’s redesigned to also make it adaptive.

And in rare cases, the existing layout just doesn’t work and may need a redesign.

Bundled icons

In addition to all of that, if you bundle symbolic icons, there’s a good chance there are updated larger versions in the icon library. It would be a good idea to update them to match the new system icons.

Examples

Let’s update a few apps. App Icon Preview and Obfuscate should show off most of the edge cases.

App Icon Preview

The version on Flathub is still using GTK3 as of the time of writing, but it’s GTK4 in main. So let’s start from there.

App Icon Preview, before libadwaita update

App Icon Preview, New App Icon dialog

App Icon Preview has 2 windows, each with its own header bar — the main window and the "New App Icon" dialog.

After the libadwaita update, the dialog hasn’t changed, meanwhile the main window looks like this:

App Icon Preview, no adjustments

It has a custom split button, as well as a text-only Export button when a file is open.

First, let’s replace the split button with an AdwSplitButton:

<object class="GtkBox">
  <child>
    <object class="GtkButton">
      <property name="label" translatable="yes">_Open</property>
      <property name="use_underline">True</property>
      <property name="tooltip_text" translatable="yes">Open an icon</property>
      <property name="action_name">win.open</property>
    </object>
  </child>
  <child>
    <object class="GtkMenuButton" id="recents_btn">
      <property name="tooltip_text" translatable="yes">Recent</property>
      <property name="icon_name">pan-down-symbolic</property>
    </object>
  </child>
  <style>
    <class name="linked"/>
  </style>
</object>

This will become:

<object class="AdwSplitButton" id="open_btn">
  <property name="label" translatable="yes">_Open</property>
  <property name="use_underline">True</property>
  <property name="tooltip_text" translatable="yes">Open an icon</property>
  <property name="action_name">win.open</property>
</object>

Since we’ve changed the class and the GtkBuilder id, we also need to update the code using it. Hence this:

#[template_child]
pub recents_btn: TemplateChild<gtk::MenuButton>,

becomes this:

#[template_child]
pub open_btn: TemplateChild<adw::SplitButton>,

and the other recents_btn occurences are replaced accordingly.

App Icon Preview, using AdwSplitButton

UPDATE: after the menu button and split button change, the Open and Export buttons don’t get background anymore, so only the previous step is necessary.

Now we need to actually remove the background. For that we’ll add an icon, and it’s going to be just document-open-symbolic.

So we’ll remove the label and use-underline and instead add an AdwButtonContent child with the same lines together with icon-name inside it:

<object class="AdwSplitButton" id="open_btn">
  <property name="tooltip_text" translatable="yes">Open an icon</property>
  <property name="action_name">win.open</property>
  <child>
    <object class="AdwButtonContent">
      <property name="icon_name">document-open-symbolic</property>
      <property name="label" translatable="yes">_Open</property>
      <property name="use_underline">True</property>
    </object>
  </child>
</object>

App Icon Preview with an icon on the open button

Now, let’s look at the Export button. It needs an icon as well, but adwaita-icon-theme doesn’t have anything fitting for it. So instead, let’s check out Icon Library (which doesn’t have a lot of edge cases itself).

While it doesn’t have icons for export either, it has a share icon instead:

Icon Library showing the share icon

So that’s what we’ll use. We’ll need to bundle it in the app, and let’s rename it to export-symbolic while we’re here. Now we can do the same thing as for the Open button:

<object class="GtkMenuButton" id="export_btn">
  <property name="always_show_arrow">True</property>
  <child>
    <object class="AdwButtonContent">
      <property name="icon_name">export-symbolic</property>
      <property name="label" translatable="yes">_Export</property>
      <property name="use_underline">True</property>
    </object>
  </child>
</object>

App Icon Preview with an icon on the export button

So far so good. See the merge request for the complete changes.

Obfuscate

This app has only one header bar, but it can change its state depending on if there’s a file open:

Obfuscate, with no open file, before libadwaita update

Obfuscate, with an open file, before libadwaita update

After building with newer libadwaita, we see there’s quite a lot to update.

First, we need to add an icon to the Open button. It’s done exactly the same way as in App Icon Preview, so I won’t repeat it.

Obfuscate, with no open file, adapted

Instead, let’s look at the other buttons:

Obfuscate, with an open file, after libadwaita update

Here we have two groups of linked buttons — so .linked is used both to group related actions together, and to separate the 2 groups.

So, first we need to unlink those buttons. Since it’s just removing the 2 GtkBox widgets and instead putting the buttons directly into a header bar, I won’t go in details.

Obfuscate, with an open file, with unlinked buttons, no spacing

However, now we’ve lost the separation between the undo/redo group and the tools. So let’s add some spacing:

<object class="GtkSeparator">
  <style>
    <class name="spacer"/>
  </style>
</object>

And the end result is the following:

Obfuscate, with an open file, with unlinked buttons and spacing


This information is also present in the libadwaita migration guide, and will be in the stylesheet documentation once all changes are finalized.

For now, happy hacking!


UPDATE (on the same day as published): Menu buttons with visible arrows and split buttons don’t get background by default anymore. The steps and examples have been updated accordingly.

September 09, 2021

Software 41: Context Tiles

GNOME 41 is going to be released in a few weeks, and as you may have heard it will come with a major refresh to Software’s interface.

Our goals for this initiative included making it a more appealing place to discover and install new apps, exposing app information more clearly, and making it more reliable overall. We’ve made big strides in all these areas, and I think you’ll be impressed how much nicer the app feels in 41.

There’s a lot of UI polish all across the app, including a cleaner layout for app cards, more consistent list views, a new simplified set of categories, a better layout for category pages, and much more.

Most of the groundwork for adaptiveness is also in place now. There are still a few views in need of additional tweaks, but for the most part the app is adaptive in 41.

However, the most visible change in this release is probably the near-complete overhaul of the app details pages. This includes a prettier header section, a more prominent screenshot carousel, and an all-new way of displaying app metadata.

Introducing Context Tiles

For the app details page we wanted to tackle a number of long-standing tricky questions about how to best communicate information about apps. These include:

  • Communicating app download size in a more nuanced way, especially for Flatpak apps where downloading additional shared runtimes may be required as part of installing an app
  • Showing the benefits of software freedom in a tangible way rather than just displaying the license
  • Making it clearer which files, devices, and capabilities apps have access to on the system
  • Incentivizing app developers to use portals rather than poking holes in the sandbox
  • Warning people about potential security problems
  • Providing information on whether the app will work on the current hardware (especially relevant for mobile)
  • Exposing age ratings more prominently and with more context

The solution we came up with is what we call context tiles. The idea is that each of these tiles provides the most important information about a given area at a glance, and clicking it opens a dialog with the full details.

Context tiles on the app details page

Storage

The storage tile has two different states: When the app is not installed, it shows the download size of the app, as well as any additional required downloads (e.g. runtimes). When the app is installed it changes to show the size the app is taking up on disk.

Safety

The Safety tile combines information from a number of sources to give people an overall idea of how safe an app is to install and use.

At the most basic level this is about how technically secure an app is. Two important questions here are whether an app is sandboxed (i.e. whether it’s flatpaked or running on the host), and whether it uses Wayland.

However, even if an app is sandboxed it can still have unlimited access to e.g. your home folder or the webcam, if these are defined as static permissions in the Flatpak manifest.

While for some apps there is no alternative to this (e.g. IDEs are probably always going to need access to the file system), in many cases there are more secure portal APIs through which people can allow limited one-time access to various resources.

For example, if you switch an app from using the old GtkFileChooser to the portal-based GtkFileChooserNative you can avoid requiring a sandbox hole for the file system.

All of the above is of course a lot worse if the app also has internet access, since that can make security issues remotely exploitable and allows malicious apps to potentially exfiltrate user data.

While very important, sandboxing is not the entire story here though. Public auditability of the code is also very important for ensuring the security of an app, especially for apps which have a lot of permissions. This is also taken into consideration to assess the overall safety of an app, as a practical advantage of software freedom.

Folding all of these factors into a single rating at scale isn’t easy. I expect we’ll continue to iterate on this over the next few cycles, but I think what we have in 41 is a great step in the right direction.

Hardware Support

With GNOME Mobile progressing nicely and large parts of our app ecosystem going adaptive it’s becoming more important to be able to check whether an app is adaptive before installing it. However, while adaptiveness is the most prominent use case for the hardware support tile at the moment, it’s not the only one.

The hardware support tile is a generic way to display which input and output devices an app supports or requires, and whether they match the currently available hardware. For example, this can also be used to communicate whether an app is fully keyboard-accessible or requires a gamepad.

Age Rating

Age ratings (via OARS) have been in Software for years, but we’ve wanted to present this information in a better way for some time.

The context tile we’re introducing in 41 shows the reasons for the rating at a glance, rather than just a rating.

The dialog shows more information on the exact types of content the app includes, though the current implementation is not quite the design we’d like here eventually. Due to technical constraints we currently list every single type of content and whether or not the app contains it, but ideally it would only show broad categories for things the app doesn’t contain. This will hopefully be improved next cycle to make the list easier to scan.

Metadata Matters

No matter how good an app store itself is, its appeal for people ultimately comes from the apps within it. Luckily GNOME has a sizable ecosystem of cool third party apps these days, exactly the kinds of apps people are looking to discover when they open Software.

However, not all of these apps look as good as they could in Software currently due to incomplete, outdated, or low quality metadata.

If the version of Adwaita on your screenshots is so old that people get nostalgic it’s probably time to take new ones ;)

Additionally, Software 41 comes with some changes to how app metadata is presented (e.g. context tiles, larger screenshots), which make it more prominently visible than before.

This means now is the perfect moment to review and update your app metadata and make a new release ahead of the GNOME 41 release in a few weeks.

Lucky for you I already wrote a blog post walking you through the different kinds of metadata your app needs to really shine in Software 41. Please check it out and update your apps!

Conclusion

Software 41 was a real team effort, and I’d like to thank everyone who helped make it happen, especially Philip Withnall, Phaedrus Leeds, Adrien Plazas, and Milan Crha for doing most of the implementation work, but also Allan Day and Jakub Steiner for helping with various aspects of the design.

This is also a cool success story for cross-company upstream collaboration with people from Endless, Purism, and Red Hat all working together on an upstream-first product initiative. High fives all around!