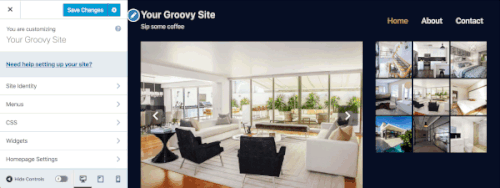
Customizer
The Customizer is where you will go to take your site’s Theme to the next level. From this section, you can change your Site Title and Tagline, add Widgets to a Sidebar or Footer, create Menus, change your Homepage Settings, and more.
Some options found in the Customizer will be different based on different themes. The most common features are covered below.


Navigating the Customizer
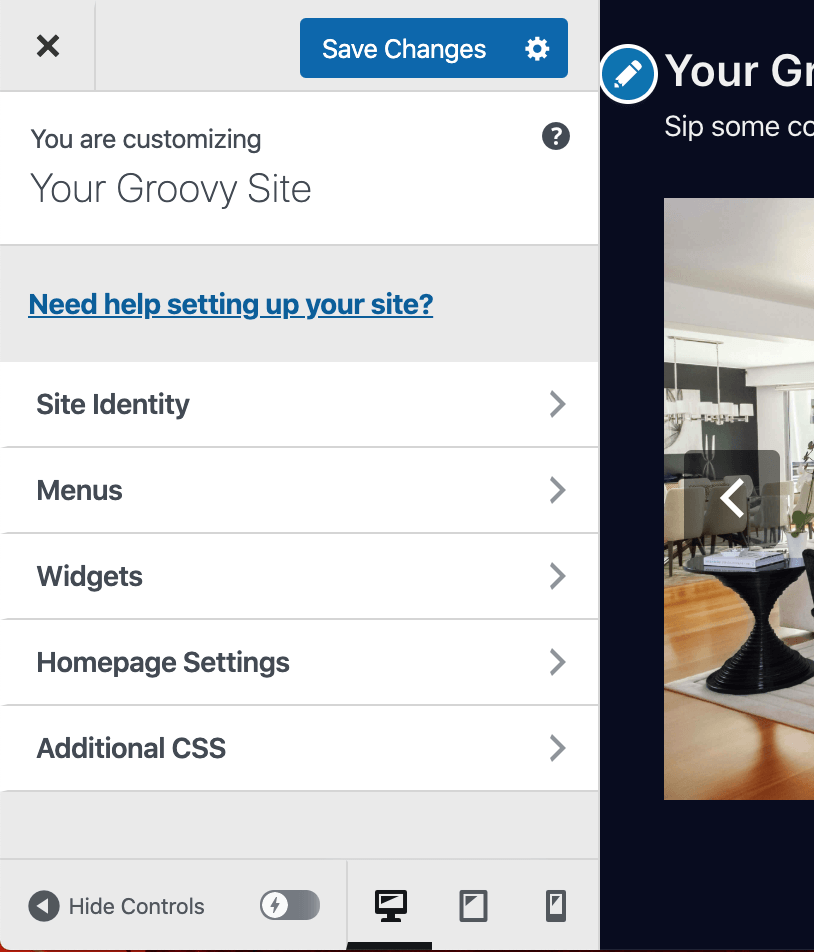
- Click the X in the top left corner to exit the Customizer.
- Click the blue button to the right of the X to Save Changes or Save Draft.
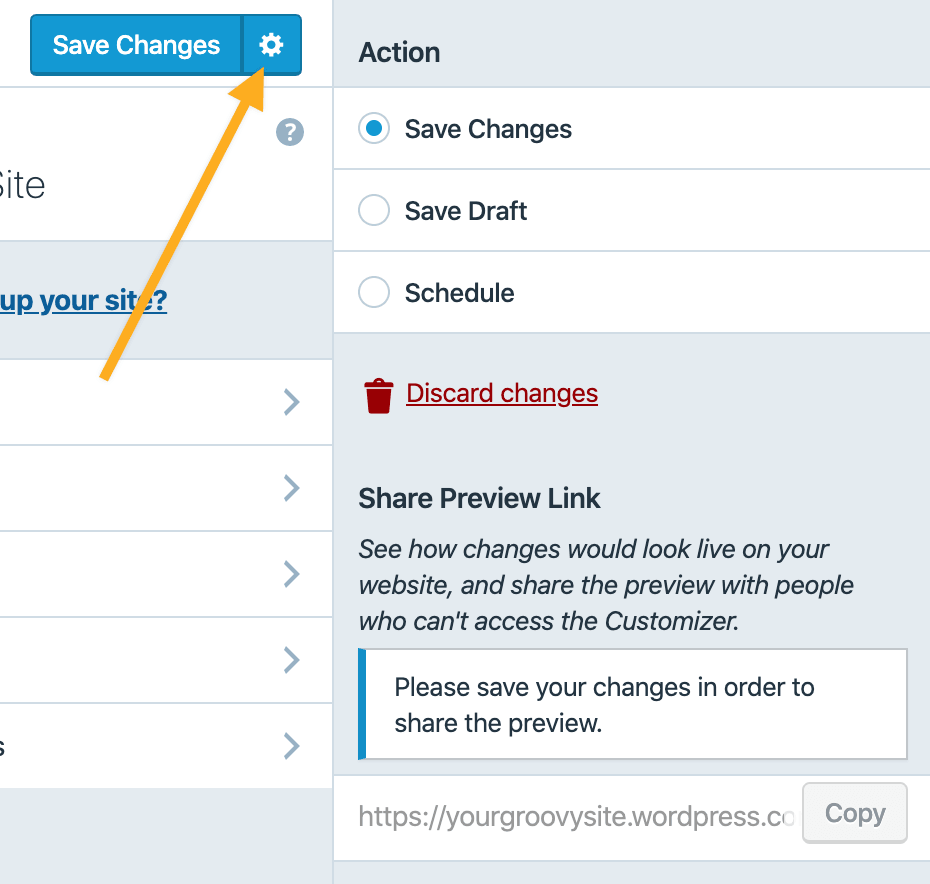
- Click the Settings icon next to the blue button to change the action to Save Changes, Save Draft, or Schedule a date for your customizer changes to go live. Once you Save Draft you will have the option to Share a Preview Link with people who do not have access to your Customizer.
- Additional menu options may be displayed depending on which theme you are using.
- At the bottom of the Customizer menu, you can hide the customizer controls, or, view your site in a desktop, tablet, or mobile simulator.
Customizer Controls
The Customizer Controls are buttons you can click on to hide the Customizer and preview your site/blog as it would appear on a desktop, a tablet, or a mobile device.
The Pencil Icon
Some elements in the customizer preview will have a pencil icon next to the element. This is a shortcut to the customizer controls for editing that specific element.
Your visitors will not see these icons. They only appear to the site owners or administrators.
The Need help setting up your site? link at the top of the Customizer Controls is a link to the theme’s Overview and Setup instructions.
Draft, Schedule, & Share Preview
The Customizer also allows an administrator to create changes and save them as drafts before saving the changes to the live site. This is a great feature when used in conjunction with the scheduling functionality of the Customizer drafts.
After you make changes to your Customizer settings, a gear icon will appear next to the Publish button.
- Save Changes – This is chosen by default, selecting this will let you Publish the changes to your live site
- Save Draft – This option will change the blue Save Changes button to a Save Draft button, selecting this button saves the Customizer changes without publishing them to the live site. The button will then say Draft Saved in grayed out lettering.
- Schedule – You can choose to push the changes live at a date and time of your choice.
- Share Preview Link – Once the Customizer is saved as a draft or scheduled, a preview of the changes can be shared with collaborators by sharing the link at the bottom of the Action panel.
Site Identity
Logo – Add a logo once and it will automatically display in every theme that supports logos.
Site Title – Your site title appears at the top of your site in the Header. This is a great place to put your business or blog name.
Tagline – The tagline will show in a more subdued style near your Site Title. A tagline is useful for a quote or brief mission statement (one sentence).
Site Icon – Site Icons are what you see in browser tabs, bookmark bars, and within the WordPress mobile apps.
Footer Credit – This is a link back to WordPress.com. You can select how it displays.
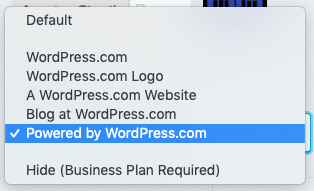
The Footer Credit can be removed with the WordPress.com Business plan or higher.
Colors & Backgrounds
Different themes have different color options. Some have a very basic option of changing the primary color, while others provide color palettes and background image options.
Since not all themes are the same, your Colors & Backgrounds section may have different settings than what shows here on the right.
One of the many themes with the options shown on the right is the Sketch theme.
Did you know you can change the Color Settings of different blocks within the Block Editor? So, even if your theme doesn’t have a Colors & Backgrounds section, you can add color to your pages and posts using the Color Settings under Block settings for specific blocks.

Fonts & Header Images
Some themes also include different Font and Header Image options.
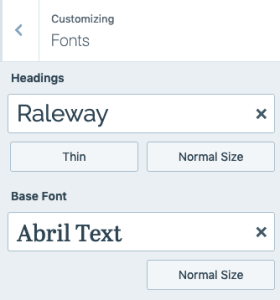
Fonts
When a Font menu option is present in the Customizer, you can use this to change the Headings and Base Font.
Headings font styles can be changed to different font-faces, weight, and size.
Base Font refers to the font used in the body of your site. The font-face and size of the base font can be changed.
If you don’t see the Fonts menu option in the Customizer, you may be using one of our newer Block Editor optimized themes.
Instead, to change the global fonts for your site, go to My Site → Pages/Posts and edit any page or post on your site.
In the top section of the Block Editor look for the Aa button.
This button will give you font options for your default Heading Font and Base Font, as well as some suggestions on ideal font pairings.
If you don’t see the Fonts menu in the Customizer or the Global Styles option in the Block Editor, the theme you’ve selected does not include default font changes. However, if you’re comfortable with CSS and have the WordPress.com Premium plan or higher, you can modify the font of any theme through Appearance → Customize → Additional CSS.
Additional CSS Resources:
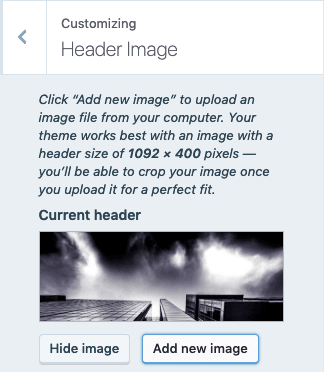
Header Images
If you have a theme that supports adding an image to the header of your site, you can select an image through Appearance →Customize → Header Image.
Themes that support headers generally include information in this section on what the best size is for your header to fit in the theme seamlessly.
Menus
This Customizer option is used for managing navigation menus for content you have already published on your site. You can create menus and add items for existing content such as pages, posts, categories, tags, formats, or custom links.
Menus can be displayed in locations defined by your theme or in widget areas by adding a “Navigation Menu” widget.
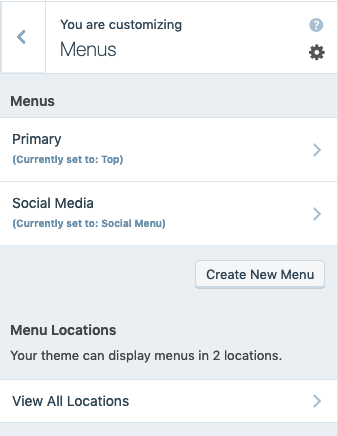
If you’ve created a new page or post and it’s not showing up in your navigation menu, Appearance → Customize → Menus is the first place to check. Select a menu to edit and from here you can add new pages or posts. Also, you can check the option to Automatically add new top-level pages to this menu to have new pages automatically added to your menu.
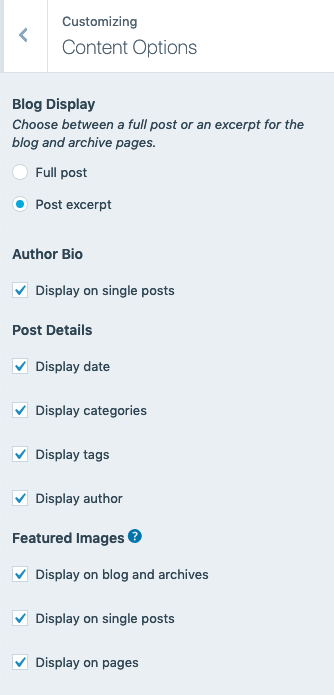
Content Options
Some themes include a Content Options menu. Content Options allow you to change how your content is displayed on specific pages.
Outlined below are some of the common choices found in Content Options, however they can differ for each theme that has this feature.
- Blog Display – Choose between a full post or an excerpt for the blog and archive pages.
- Author Bio – Whether or not to display your bio on single posts.
- Post Details – Decide what specific details about the post to display (date, categories, tags, author).
- Featured Images – Where featured images should, or should not display (blog and archives, single posts, pages).
Additional CSS
CSS stands for Cascading Style Sheets. It is a markup language that controls the appearance of HTML elements on a web page. Custom CSS can be added to sites with the WordPress.com Premium plan or higher.
Additional CSS Resources
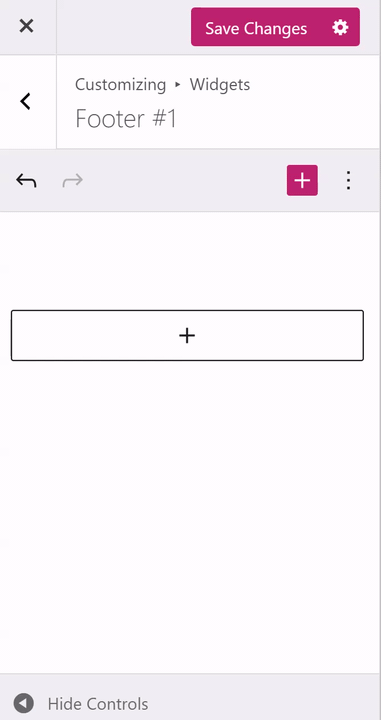
Widgets
A widget is a tool that you can add to the sidebars and footers of your site.
Some themes have multiple widget areas while others just offer a Sidebar or Footer widget area.
You can read more about how to add and configure widgets here.
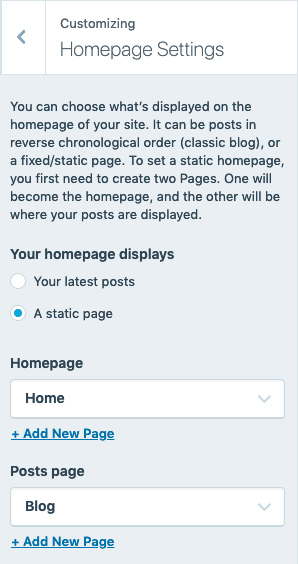
Homepage Settings
By default, your site is set up to show your latest posts on your homepage. In the Homepage Settings menu, you can change what visitors see when they first access your site.
If you don’t have any published pages you will not have the “Homepage Settings” option.
You can set your site to private, and still publish your page without worry that people will see your site and the page you just published.
Your homepage displays…
Your latest posts
A classic blog style, where posts show in reverse chronological order (newest to oldest).
A static page
A fixed, or static, site page. Many themes use this option to display featured content. You can also use this option if you do not want to have a blog page.
Select your Homepage from the list of pages you created through My Site → Pages. Then, select your Posts page if you want to have a page that shows blog posts.
Other Options
Different themes include additional options in the Customizer controls. Themes that are designed for Portfolios may have an additional Portfolio menu for customizing how your portfolio displays. Others will have Theme Options for specific customization options for the theme.
Was this guide helpful?
Versatile plans and pricing
-
Free

Best for students
-
Personal

Best for hobbyists
-
Premium

Best for freelancers
-
Business

Best for small businesses
