Blocks » Payments
The Payments feature lets you accept credit and debit card payments for goods, services, subscriptions, memberships, donations, and more. The Payments feature can be used to create recurring revenue or one-time payments to your site.
The Payments feature is available for all sites with a WordPress.com plan (Personal, Premium, Business, or eCommerce.) The feature is also available for self-hosted sites on a paid Jetpack plan.
- About the Payments Block
- Add a Payments Button
- Creating your First Payment Plan
- Payment Block Settings
- Payments Management
- Selling Physical Products
- Selling Digital Products/Sending Emails to Subscribers
- Checking your Revenue and Subscriber list
- Canceling Subscriptions and Issuing Refunds
- Related Fees
- Frequently Asked Questions
- Video Tutorial
About the Payments Block
- The block uses Stripe to collect payments. You can set up a new Stripe account or connect to an existing one. Stripe ensures that the credit card data is encrypted.
- It automatically sends receipts to subscribers.
- For recurring subscriptions:
- Automatically bills subscribers at the end of their Renewal Period and transfers the funds to your Stripe account.
- It allows the buyer to cancel the subscription at any time.
- Payment information does not transfer to other tools that use Stripe payments, such as WooCommerce.
Add a Payments Button
The Payments button is a block that you can insert into posts and pages.
- Go to My Site → Pages/Posts
- Edit the Page or Post you want to add the Payment button to
- Add a new block by clicking the ( + ) icon, or type `/` to start searching for blocks
- Search for “payments”

The first time you add a Payments block you will be prompted to connect your WordPress.com account to Stripe. Stripe is the payment processor used to take payments for the Payments feature.
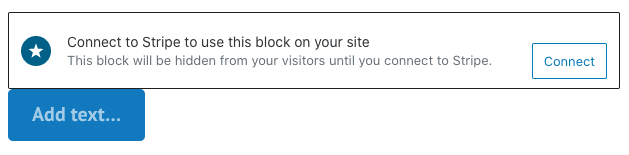
Click the Connect button to be taken to Stripe’s website to connect your WordPress.com account. If you already have a Stripe account, you can log in at the top of the screen. Otherwise, fill out the form to create your new Stripe account.

Any money you earn using WordPress.com Payments will go into your Stripe account. From there, you can move it to the personal bank account of your choice. WordPress.com never has any access to the money you earn.
Once you fill out the Stripe form and connect it to your WordPress.com account, you’ll be taken back to your WordPress.com account and you’ll see “Congrats! Your site is now connected to Stripe. You can start making money by adding your first subscription!”

Creating your First Payment Plan
After adding the payment button, your next step is to create a payment plan. This plan can be for a one-time payment, monthly recurring payments, or yearly recurring payments. In each plan, you can manage the price, subscribers, and emails which are all described in this tutorial.
You can also select a payment plan you created previously.
To create your first plan, follow these steps:
- Add the Payments block following the steps in the previous section.
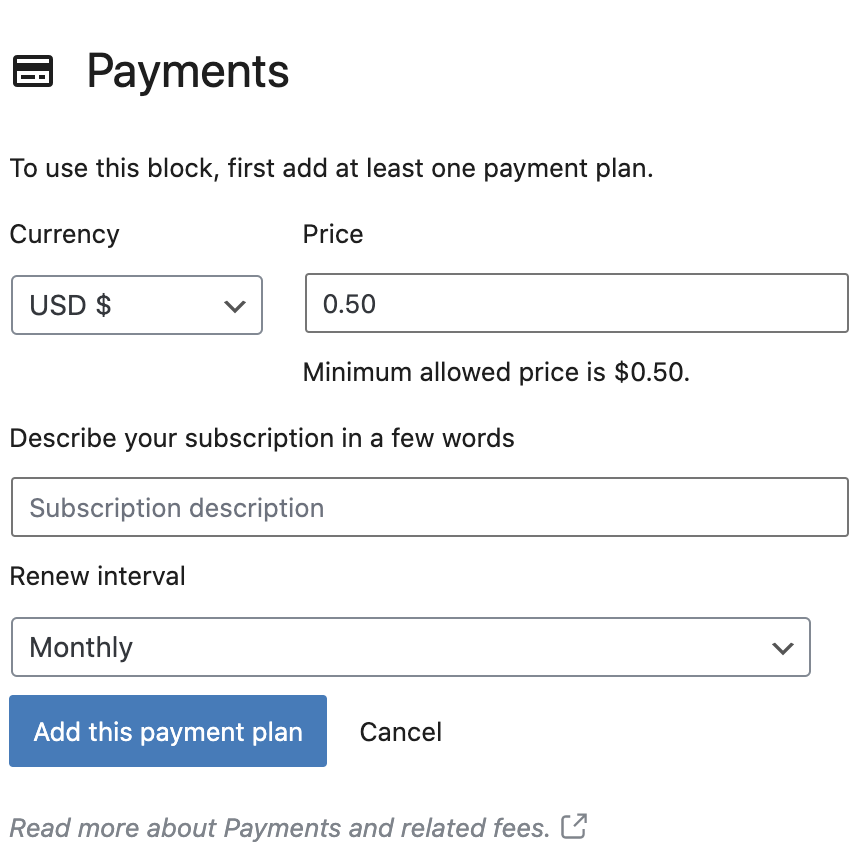
- Click Add a payment plan and fill in the following details:
- Price – how much the payment will be for
- Currency – what currency the payment will be collected in
- Describe your subscription in a few words – this description will appear on the emails your customers receive
- Renewal interval – the frequency in which your subscribers are billed. This can be either monthly, yearly, or a one-time payment.
- Click Add this payment plan when you’re done.
- Where it says Add text… type the text you want your button to display, such as “Buy Now”, “Purchase”, or “Click to Buy”.
💡
You can add multiple Payment buttons to a page if you’d like to offer a range of price points.
Payment Block Settings
The Payments block has additional settings on your sidebar that can help you manage your plans and edit your button color settings.
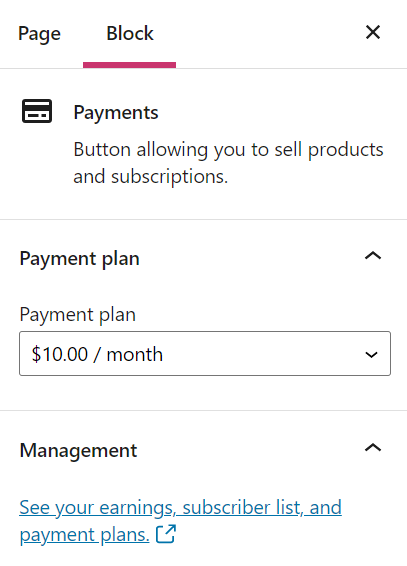
Once you add a plan, click the Payments button and you can see the following options on the sidebar:
- Payment plan: change the payment plan associated with the specific button.
- Management – a quick link to your earnings, subscriber list, and products
- Advanced – add CSS classes for styling buttons using CSS
📌
When you select a Payments block to make it reusable, make sure you select the whole block that groups all the features that you want.
Payments Management
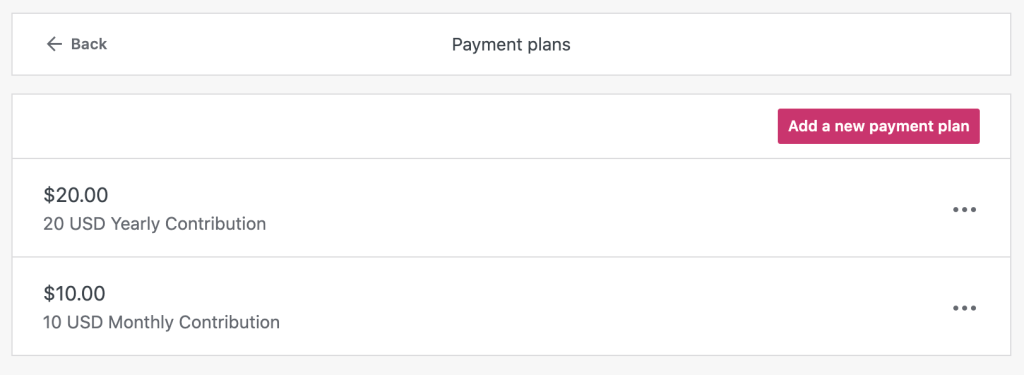
You can manage your Plans by visiting My Site(s) → Tools → Earn → Collect Payments. Payments provide a suite of tools to help you monitor and grow your subscription base.
Under your Customers and Subscriber list, you’ll find options for editing your payment plans. You can modify their price, renewal frequency, and other options detailed below.
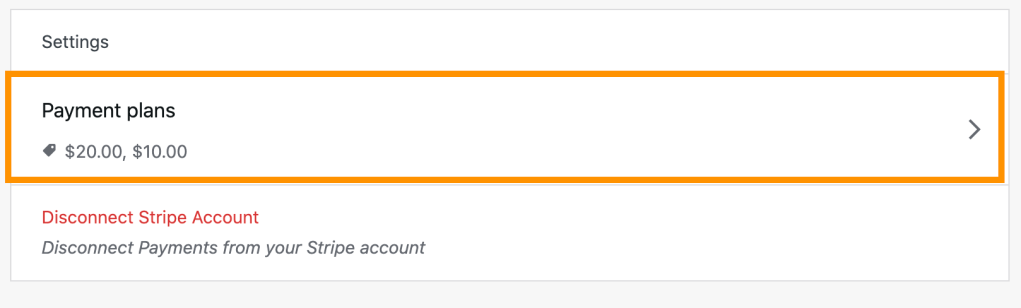
After clicking the arrow on the right of that section, you’ll see your list of plans.
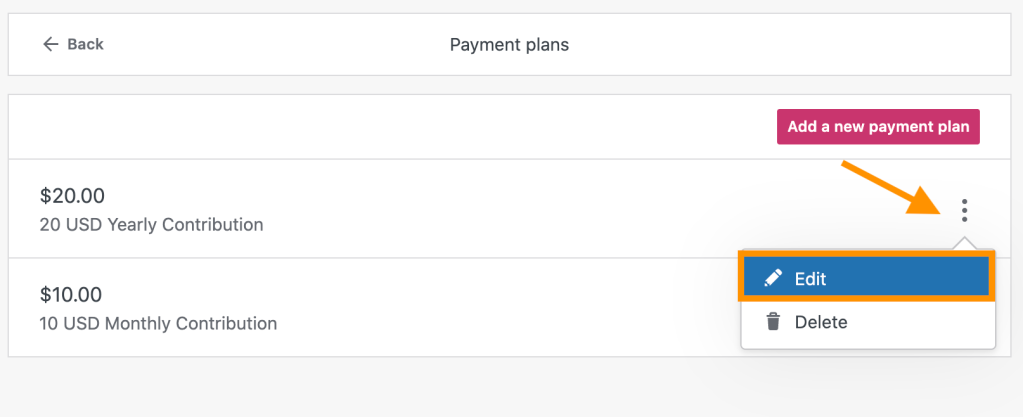
To edit the details of an existing plan, click the three dots to the right of the plan and click Edit.
When you edit a plan, you can set up:
- Currency
- Price
- Renewal schedule
- Description
- Enable the “Pay what you want” option. This option allows your contributors/paid subscribers to customize the “contribution amount” during checkout. The default price will be the one selected by you, but it will be possible to change it during the checkout process.
- Enable the option to allow the same customer to sign up multiple times to the same plan.
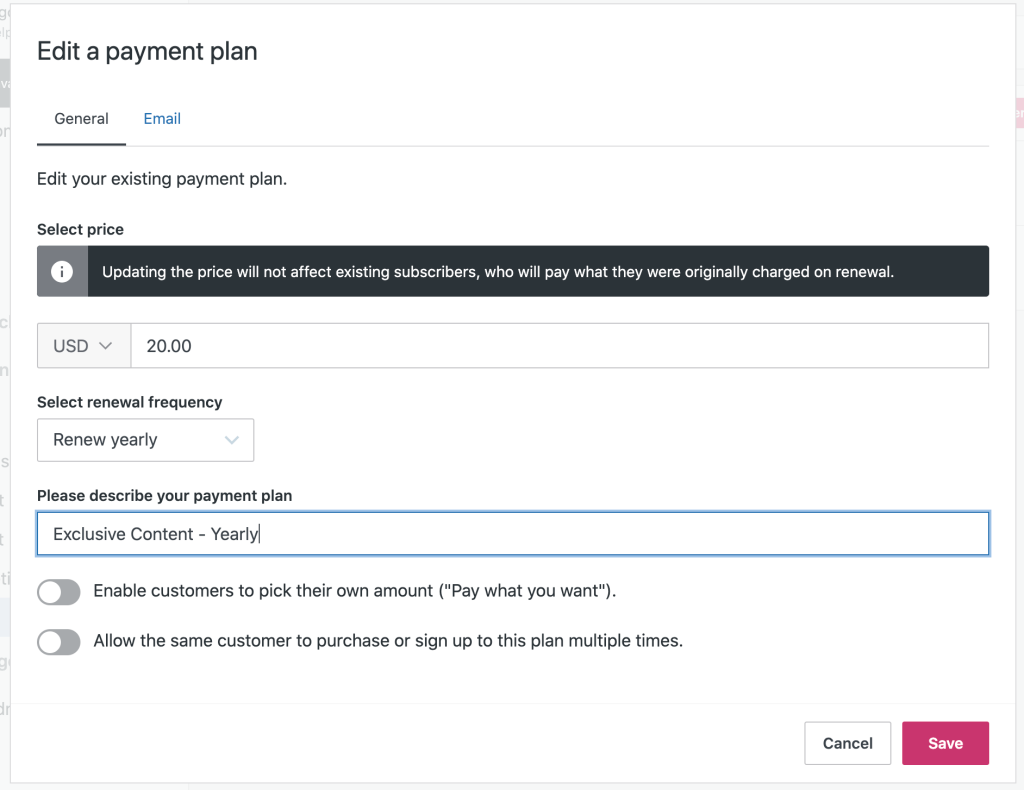
⚠️
If you change any prices, existing subscriptions will not be affected. They will continue renewing at the same rate they started with.
To delete an existing plan, click the three dots to the right of the plan and click Delete.

⚠️
Any existing subscriptions will continue. If you want to stop subscriptions for existing customers, please contact a Happiness Engineer.
Selling Physical Products
By now, you can accept payments. If you are selling a physical product, you will need a way to collect your customers’ shipping details. You can do this using the Form block. We suggest this process:
- Publish the page that has the Payments block on it.
- Create a new page and add a Form block. Customize your form to collect information from your customers (name, address, phone, etc.)
- Change the form’s submit button text to something like “Next” or “Proceed to Payment”.
- Make sure to set up this form to redirect to another webpage on Submission. The page you should redirect to is the page where you added your Payments block.
In other words, your customers will follow this process:
- Fill in the form with their details
- Click the button to submit their information and then be redirected to the page with the payment button
- Submit their payment.
Selling Digital Products/Sending Emails to Subscribers
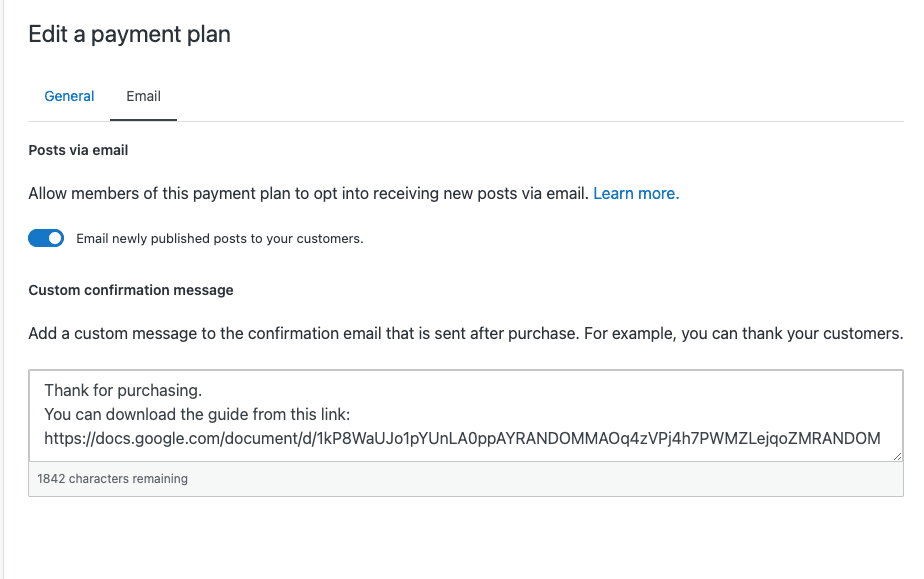
If you wish to deliver a digital product to your customers, such as a PDF file, you can do so with the Payments block.
Your subscribers will receive a confirmation message when they purchase from your site. You can use this option to:
- Send additional information
- Include a downloadable link to your digital products
You can edit this in the Email tab of your payment plan settings (see previous section.)
Checking your Revenue and Subscriber list
You can view a detailed breakdown of your revenue by visiting My Site(s) → Tools → Earn → Collect Payments.
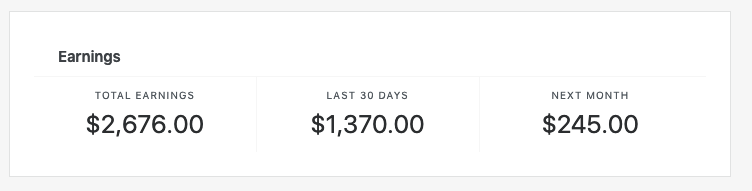
- Total earnings: shows all charges collected by Payments buttons on your site.
- Last 30 days: shows the revenue you’ve earned over the last 30 days.
- Next month: shows upcoming charges in the next 30 days. This assumes that nobody unsubscribes, and does not include any new subscribers.
Below this section, you’ll find the list of your subscribers as well:

At the end of the list is a link for downloading a CSV file containing a list of your subscribers with their email addresses, subscription data, and other information. You can use that file to connect payments to any accounting or fulfillment systems you use.
Canceling Subscriptions and Issuing Refunds
Your subscribers can cancel any time from their WordPress.com accounts. You can also cancel their subscriptions from the subscriber list. To manage your subscribers, go to My Site(s) → Tools → Earn → Collect Payments
On the right side of the subscriber list, there is an ellipsis (three dots) menu where you can find this option:
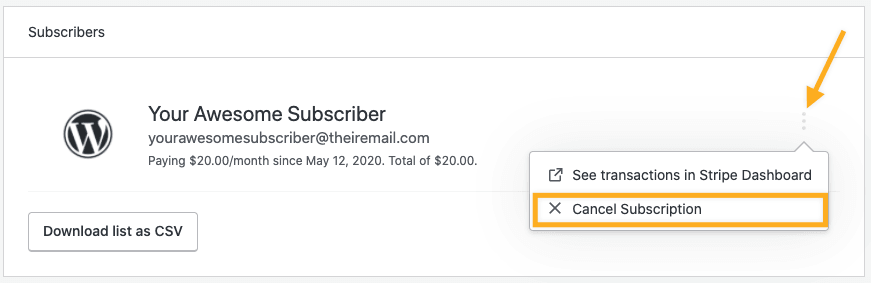
Once you click Cancel Subscription, your subscriber will not be billed again. However, canceling will not refund the customer. To issue refunds, you have to do this from your Stripe Dashboard. Follow the instructions here to issue a full or partial refund.
Related Fees
| WordPress.com Plan | Related Fees |
|---|---|
| WordPress.com eCommerce | 0 |
| WordPress.com Business | 2% |
| WordPress.com Premium | 4% |
| WordPress.com Personal | 8% |
| WordPress.com free | Feature Unavailable |
| Jetpack Plan | Related Fees |
|---|---|
| Jetpack Security Real-time and Jetpack Complete | 2% |
| Jetpack Security Daily | 4% |
| Jetpack free | Feature Unavailable |
In addition to the fees listed above, Stripe collects 2.9% + US$0.30 for each payment made to your Stripe account. Not in the USA? Check Stripe’s fees in your currency.
This system allows you to offer Payments with minimal upfront investment. As you collect more subscribers, it may make sense to move to a higher plan to retain more revenue.
Frequently Asked Questions
How do I disconnect the Stripe account?
You can disconnect Stripe by going to My Site(s) → Tools → Earn → Payments section. When you scroll to the very bottom of the page, you will see Disconnect Stripe Account. Disconnecting your Stripe account here will remove Stripe from all your WordPress.com and Jetpack sites, prevent visitors from purchasing a subscription, and block renewals of any existing payments subscribers.
How do I limit access to content?
Use the Premium Content block in the WordPress editor to create subscriber-only content or a specific call to action (Subscribe/Login) for non-subscribers.
How do I reuse the same plan?
Some visitors will become subscribers right away, while others might need multiple reminders. That’s why it’s common practice to repeat offers multiple times across your site and in multiple posts and pages.
To simplify the process of adding the same Payments button in multiple locations, each new button includes all the price points you’ve already added. When you insert a new Payments block into your post, you can select one of your previously-added payment plans.
How do I keep my subscribers engaged?
People who decided to support your site expect to get something in return for their support along with your great content out there. We’ve noticed the most successful creators focus on providing added value and on keeping their supporters engaged by:
- sending emails to their community.
- publish videos or other art for their subscribers.
- remind their fans that all of this is possible because of their support.
And above all: continue creating.
In which countries is Stripe supported?
In order to start accepting payments using a Stripe account, you must be a citizen or own a company in one of the following countries. Your customers can pay using a credit card issued anywhere in the world.
Countries
- Australia
- Austria
- Belgium
- Brazil
- Bulgaria
- Canada
- Cyprus
- Czech Republic
- Denmark
- Estonia
- Finland
- France
- Germany
- Greece
- Hong Kong
- Ireland
- Italy
- Japan
- Latvia
- Lithuania
- Luxembourg
- Malaysia
- Malta
- Mexico
- Netherlands
- New Zealand
- Norway
- Poland
- Portugal
- Romania
- Singapore
- Slovakia
- Slovenia
- Spain
- Sweden
- Switzerland
- United Kingdom
- United States
Currencies
- USD
- AUD
- BRL
- CAD
- CHF
- DKK
- EUR
- GBP
- HKD
- INR
- JPY
- MXN
- NOK
- NZD
- PLN
- SEK
- SGD
Video Tutorial
Depending on your goal, you may benefit from one of these video tutorials to learn how to use Payments for specific situations:
- How to Add Memberships
- How to Get Started With Memberships on WordPress.com
- Create a Premium Membership Blog
- Create a Membership Website
- How to Create a Paid Newsletter
- Create a Crowdfunding Campaign
Versatile plans and pricing
-
Free

Best for students
-
Personal

Best for hobbyists
-
Premium

Best for freelancers
-
Business

Best for small businesses
