Add Email » Add Email through Office 365
If you have a custom domain powering your WordPress.com site (say justanothersitename.com, for example) and you’d like to have an email address that is customized for that domain (like [email protected]), one option is to create this type of email address using Microsoft Office 365. We’ll show you how.
Create an Office 365 Account
First, you’ll need to create an account by going to office.microsoft.com and sign up for a Microsoft 365 Business plan to be able to use their business email service.
If you already have an Office 365 account, you can sign in to your account using your log in information by going to login.microsoftonline.com.
If you have purchased Office 365 via a reseller such as GoDaddy, the instructions in this guide may not apply. Please refer to where you purchased Office 365 for help with setting up.
Add Your Domain Name to Office 365
Once you’ve logged in to your Microsoft account, you need to tell Office 365 which domain you want to use for your email. To do this, click the Domains option from the Admin menu inside your Office 365 account.

From there, you’ll be able to enter your domain name into the text box provided and click the Next button to continue.
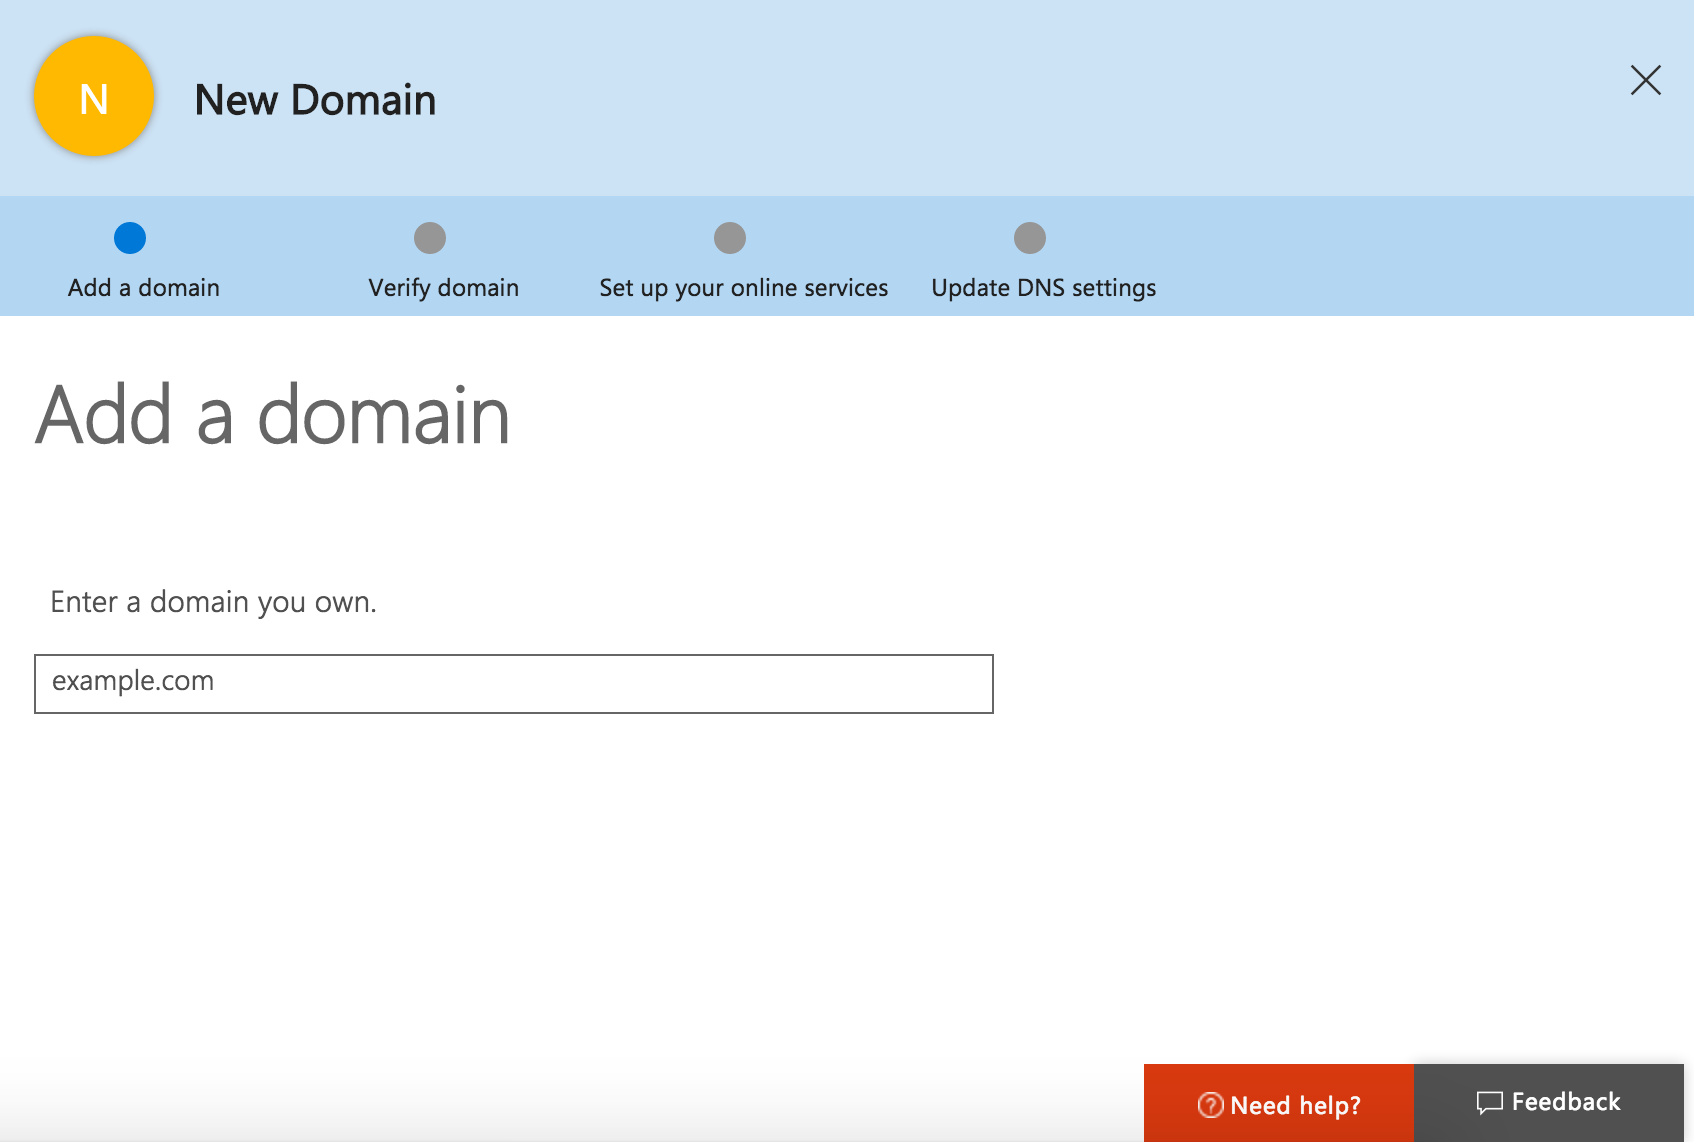
Once you’ve done that you’ll be asked to verify your domain using a TXT record.

Verify Your Domain Name
- The first step is to confirm that you own the domain name you’re trying to use for your email.
- You’ll see that you are provided a TXT record type or the MX record type. Select the TXT record option.
- Copy the value of the record (
MS=XXXXX) so we have it in our clipboard. You will enter this value when you use the setup Office 365 button in the next step.
Set Up Your DNS Records On WordPress.com
While it is possible to add your own DNS records to set up your Office 365 email, the most straightforward method is to use the Domain Connect option.
Add DNS Records through Domain Connect
If your domain uses the WordPress.com Name Servers you can enable the _domainconnect record that allows Office 365 to automatically add the appropriate DNS records for your email.
- Go to My Site(s) → Upgrades → Domains and click on the domain you’d like to use with Office 365.

2. Click Change your name servers & DNS records
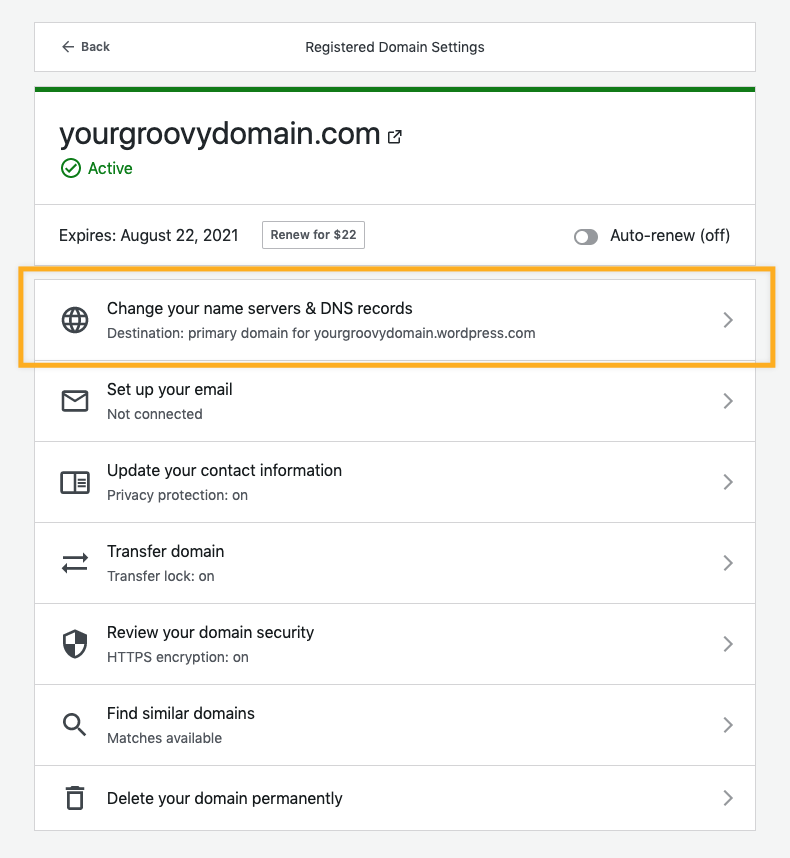
3. Click DNS records

On the DNS Records screen, click the toggle next to the grayed out TXT record _domainconnect.yourgroovydomain.com to enable Domain Connect.

Next, go back one screen to the DNS Records screen. Here you’ll see some buttons for setting up different email services.

Click on the Office 365 button. Then, add the TXT record token you copied from your Office 365 account into the text field.
If your domain is already verified, you can set up your DNS records by using this verification token:
MS=ms12345678

After adding the TXT record, click Set up Office 365.
A green verification message will appear at the top of the screen to confirm the records were created.
Continue back to Office 365 to complete the final steps.
Completing the Office 365 Setup
✅
If you’ve previously verified your domain in Office 365, you may not see the option to verify again. If this is the case, please add MS=ms12345678 in that verification section.
Back in the Office 365 Admin screen, we’ll see a button which says Verify. When you click this button, Office 365 will check your domain to see if it has been verified.
It can take a little while before Office 365 is able to find the record to verify your domain so don’t worry if it doesn’t find it right away. You can try again in 15-30 minutes when the record has had time to update.
Set Up Your Online Services
The third step of the Office 365 setup wizard is to set up your online services. The first option requires you to change the name server records at your domain registrar, which is WordPress.com. We don’t want to do this, because it means your custom domain name will no longer work with your blog.
Instead, we need to choose the second option to manage your own DNS. Click Next after choosing this option to continue.

Because you already set up the DNS records in the previous step, Office 365 will check the updated records and let you know which records if any, haven’t been found yet.

These records will take a few minutes to update and in some cases, they can take up to 72 hours to completely update.
You can click Verify again to check whether the records have now been updated.

When the records have successfully been updated, you’ll see a confirmation message on the screen which says that from now on any emails sent to addresses using your custom domain name will arrive in your Office 365 account.
Just click Finish and then you’ll be all done completing the setup of your custom domain email.
Test Your New Office 365 Email Address
You can test that your new Office 365 email address is working by sending an email to your new address from another email address that you own.
When you’ve done that, click Outlook in your Office 365 menu bar to access your new inbox. When you receive that email in Office 365, send a reply back just to make sure you can send from your new email address as well.
And that’s it! You should now be able to send and receive emails through Office 365 by using your custom domain name here at WordPress.com.
Versatile plans and pricing
-
Free

Best for students
-
Personal

Best for hobbyists
-
Premium

Best for freelancers
-
Business

Best for small businesses
