About gists
Every gist is a Git repository, which means that it can be forked and cloned. If you are signed in to GitHub when you create a gist, the gist will be associated with your account and you will see it in your list of gists when you navigate to your gist home page.
Gists can be public or secret. Public gists show up in Discover, where people can browse new gists as they're created. They're also searchable, so you can use them if you'd like other people to find and see your work.
Secret gists don't show up in Discover and are not searchable. Secret gists aren't private. If you send the URL of a secret gist to a friend, they'll be able to see it. However, if someone you don't know discovers the URL, they'll also be able to see your gist. If you need to keep your code away from prying eyes, you may want to create a private repository instead.
After creating a gist, you cannot convert it from public to secret.
You'll receive a notification when:
- You are the author of a gist.
- Someone mentions you in a gist.
- You subscribe to a gist, by clicking Subscribe at the top of any gist.
You can pin gists to your profile so other people can see them easily. For more information, see "Pinning items to your profile."
You can discover public gists others have created by going to the gist home page and clicking All Gists. This will take you to a page of all gists sorted and displayed by time of creation or update. You can also search gists by language with Gist Search. Gist search uses the same search syntax as code search.
Since gists are Git repositories, you can view their full commit history, complete with diffs. You can also fork or clone gists. For more information, see "Forking and cloning gists".
You can download a ZIP file of a gist by clicking the Download ZIP button at the top of the gist. You can embed a gist in any text field that supports Javascript, such as a blog post. To get the embed code, click the clipboard icon next to the Embed URL of a gist. To embed a specific gist file, append the Embed URL with ?file=FILENAME.
Gist supports mapping GeoJSON files. These maps are displayed in embedded gists, so you can easily share and embed maps. For more information, see "Working with non-code files."
Creating a gist
Follow the steps below to create a gist.
You can also create a gist using the GitHub CLI. For more information, see "gh gist create" in the GitHub CLI documentation.
Alternatively, you can drag and drop a text file from your desktop directly into the editor.
-
Sign in to GitHub.
-
Navigate to your gist home page.
-
Type an optional description and name for your gist.
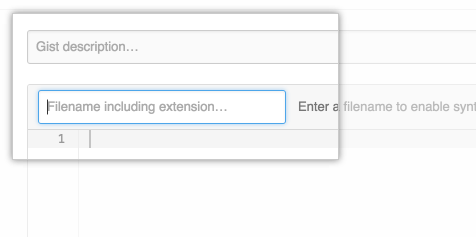
-
Type the text of your gist into the gist text box.

-
Optionally, to create a public gist, click , then click Create public gist.
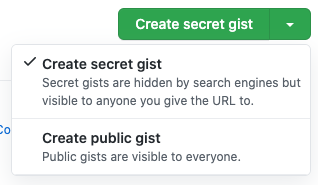
-
Click Create secret Gist or Create public gist.
