The Test Team helps manage testing and triage across the WordPress ecosystem. They focus on user testing of the editing experience and WordPress dashboard, replicating and documenting bug reports, and supporting a culture of review and triage across the project.
If you’d like to help test Full Site Editing, please join the FSE Outreach Program. You can find current calls for testing for this program here and you can join the fun in #fse-outreach-experiment.
The team gathers in #core-test. Please drop by any time with questions or to help out.
In comparison with previous calls for testing, this one is even more community driven with the suggestion to do a Higher Education themed call for testing coming from @blake. If you’d like to suggest an idea for a call for testing, know it’s very welcomed and all ideas will be weighed against current project priorities to figure out what makes the most sense to pursue. You can share ideas directly in the slackSlackSlack is a Collaborative Group Chat Platform https://slack.com/. The WordPress community has its own Slack Channel at https://make.wordpress.org/chat/. channel or via DM to me (@annezazu).
Feature Overview
To ground this test in a real-world example, we’re going to go back to school as an administrator and recreate a customized headerHeaderThe header of your site is typically the first thing people will experience. The masthead or header art located across the top of your page is part of the look and feel of your website. It can influence a visitor’s opinion about your content and you/ your organization’s brand. It may also look different on different screen sizes. to welcome students, parents, and teachers alike to our hypothetical university. For inspiration, check out the following sample of university sites or just look up some near you! Since this test is focused on building out the header portion, focus in on that aspect and take note of what is done on each site:
As you can imagine, this test is going to enable us to go deep into the Navigation BlockBlockBlock is the abstract term used to describe units of markup that, composed together, form the content or layout of a webpage using the WordPress editor. The idea combines concepts of what in the past may have achieved with shortcodes, custom HTML, and embed discovery into a single consistent API and user experience.. As a refresher, it’s a powerful, new block that unlocks the ability to edit a site’s navigation menuNavigation MenuA theme feature introduced with Version 3.0. WordPress includes an easy to use mechanism for giving various control options to get users to click from one place to another on a site., both in terms of structure and design. To help prepare it for inclusion in a future WordPress release, this test is meant to explore the edges of what this block can do.
Similar to prior tests, if you choose to get super creative, please share a screenshot in your comment so we can celebrate what you’ve made. For inspiration, here’s my example below with the multiple layers of sub-menu items displayed:
Testing Environment
While there’s more information below to ensure you get everything set up properly, here are the key aspects to have in place with your testing environment:
Use a test site. Do not use a production/live site. You can follow these instructions to set up a local installLocal InstallA local install of WordPress is a way to create a staging environment by installing a LAMP or LEMP stack on your local computer. or use a tool like this to set up a development site.
Use the latest version of WordPress (downloadable here).
Use the latest version of GutenbergGutenbergThe Gutenberg project is the new Editor Interface for WordPress. The editor improves the process and experience of creating new content, making writing rich content much simpler. It uses ‘blocks’ to add richness rather than shortcodes, custom HTML etc. https://wordpress.org/gutenberg/ (11.2.1 as of writing this).
Download and import the demo Gutenberg content (open the link and select “Download) created especially for this test via the WordPress importer under Tools > Import.
Generally speaking, please use the latest versions of each part of the setup and keep in mind that versions might have changed since this post was shared.
Known issues
While creating this call for testing, a few issues popped up that you, too, might experience as you go through this. Rest assured they have been reported. Here’s a nonexhaustive list of the most important items:
This section is for those who want to follow specific steps to create a header and might not have a lot of time to take the test further.
While this call for testing is focused on testing a specific feature, you’ll likely find other bugs in the process of testing with such a betaBetaA pre-release of software that is given out to a large group of users to trial under real conditions. Beta versions have gone through alpha testing in-house and are generally fairly close in look, feel and function to the final product; however, design changes often occur as part of the process. feature! Please know any bugs you find are welcome in your report for testing, even if they aren’t directly applicable to the tested feature.
Create structure (template part, columns, etc)
Navigate to the “Site Editor (beta)” view. This will automatically open the site editor to the template powering your homepage.
Upon opening your homepage, remove the Navigation Block found inside the Header Template Part. This is to help reset the header to add more to it later on.
Select the parent Columns Block and, using the Block Settings in the sidebarSidebarA sidebar in WordPress is referred to a widget-ready area used by WordPress themes to display information that is not a part of the main content. It is not always a vertical column on the side. It can be a horizontal rectangle below or above the content area, footer, header, or any where in the theme., change the columns from 2 to 3 columns.
Return to the Columns Block and, using the Block Toolbar settings, make sure it’s set to Full Width.
Build out site branding
In the first column, add the Site Logo Block and upload/use a site logo. You can use this free logo from logodust.com if you’d like.
From there, customize the Site Title, Site Tagline, and Site Logo blocks to your liking (change font, change color, change alignment, etc).
In the second column, add a Buttons block to add a warning about COVID by linking to the August COVID Update post. You can do this by searching for the post title. If you haven’t yet imported the necessary demo content, please do so now using this export file (open the link and select the “Download” option).
Create a simple menu for high level items
In the third column, add a Navigation Block and select the “Start Empty” option.
From there, use the Page Link Block to add in the following pages from the imported content: Contact, Directions, Make a Donation. To do this, just start typing the title of each page. You will likely notice this spacing bug at this point that’s slated to be fixed in Gutenberg 11.3.
Rename menu item Make a Donation to Donate to make it shorter by simply editing the text of that Page Link Block.
To finalize the menu, add in a Search Block and, using the sidebar settings, customize it to your liking (picking background color, text colors, width, etc).
Once the main menu items are in place, select the overall Navigation Block once more and, in the sidebar settings under “Display Settings”, toggle on the Enable responsive menu option. You can also customize the block styles at this point as you like.
Create a more complex menu for specifics
Select the overall Columns Block that contains your three columns (this is where you might find the List View helpful). Using the More Settings menu option, select “Insert After” to add a block after.
Add another Columns Block and select the 30/70 option.
From there, select the overall Columns Block again and, using the Block Toolbar settings, make sure it’s set to Full Width.
Add a Navigation Block to the larger 70% width column and select the “Start Empty” option.
From there, use the Page Link Block to add in the following pages from the imported content: About, Admissions, Student Life, Research, and News. To do this, just start typing the title of each page.
Once the main menu items are in place, select the overall Navigation Block once more and, in the sidebar settings under “Display Settings”, toggle on the Enable responsive menu option.
From there, add in sub-menu items to About, Admissions, Student Life, and Research. In case you need a hint, here’s a screenshot of the icon for adding sub menu items.
About should have the following sub-menu items: Distinguished Alumni, Diversity and Inclusion, Faculty, History, Leadership.
Admissions should have the following sub-menu items: Career Paths, Undergraduate Graduate Admissions, Scholarship & Financial Aid, Tuition.
Research should have the following sub-menu items: Awards & Honors, Partnerships, Undergraduate Research, Graduate Research.
Student Life should have the following sub-menu items: Athletics, Tutoring Services, FAQs, Study Abroad Opportunities, Tutoring, Services.
At this point, add sub menu items under Admissions > Career: Business, Design, Technology.
Once the sub menu items are added, rearrange and rename various sub-menu items to your liking. You can rearrange using the Block Navigation option when selecting the entire Navigation Block as shown in this GIF.
If you want to add more pages that don’t exist yet, you can do so by typing a title that doesn’t currently exist on your site. From there, you’ll see an option to create a draft page. Do this for at least one menu item. Remember to have fun with this and make it HigherEd-themed!
From there, customize the overall Navigation block as you’d like (change alignment, color, font size, etc). Remember that for sub-menu items you can use the Overlay color settings to set the colors you want.
Save your work & customize further
Select “Save” to save your changes and view your site on the front end. Note any differences in what you see in the editor vs what you see on the front end. If you have any drafted pages, you’ll want to publish them in order to see them listed in the menu.
Try viewing your site on mobile and checking to see whether the menus appear responsive with a hamburger menu.
From there, continue to customize as you’d like by changing any alignment, color, font size, removing/renaming/rearranging items, and more. You can also add additional blocks to either Navigation Block including Spacer or Social Icons.
Advanced testing steps
This section is for those who have the time to take the test further and who are comfortable venturing into the site editor without much guidance.
The steps for this section are simple: find a university site’s header and try to recreate all or part of it. You’re welcome to continue to use TT1 Blocks or to use the block theme of your choosing (please note if you use a different theme). You can use the universities listed above or you can find your own. When leaving a comment, please share a screenshot of what you were attempting and a screenshot of what you were able to do. It’s very helpful to see what folks would like to be able to do so don’t hesitate to share different designs you see.
What to notice:
Remember to share a screenshot of what you created if you’re up for it!
Did the experience crash at any point?
Did the saving experience work properly?
Did you find any features missing while creating the header? Please be as specific as possible, especially if you followed the Advanced steps.
What did you find particularly confusing or frustrating about the experience?
What did you especially enjoy or appreciate about the experience?
Did you find that what you created in the Site Editor matched what you saw on your site?
How did you find the Navigation block worked when viewed on smaller screen sizes?
Please leave feedback in the comments of this post. If you’d prefer, you’re always welcome to create issues in this GitHub repo directly for Gutenberg and in this GitHub repo for TT1 Blocks. If you leave feedback in GitHubGitHubGitHub is a website that offers online implementation of git repositories that can can easily be shared, copied and modified by other developers. Public repositories are free to host, private repositories require a paid subscription. GitHub introduced the concept of the ‘pull request’ where code changes done in branches by contributors can be reviewed and discussed before being merged be the repository owner. https://github.com/, please do still comment below with the link. If you see that someone else has already reported a problem, please still note your experience with it below, as it’ll help give those working on this experience more well-rounded insight into what to improve.
Props to @daisyo and @jffng for the massive amount of help in writing and perfecting this call for testing.
Important note: Compared to previous calls for testing for the FSE Outreach program, this is intentionally targeting a more developer-centric audience compared to site builders or end users in order to bring high impact feedback for theme.jsonJSONJSON, or JavaScript Object Notation, is a minimal, readable format for structuring data. It is used primarily to transmit data between a server and web application, as an alternative to XML., a new tool for extenders. You can read more about what to expect with upcoming efforts here.
Feature Overview
At the highest level, theme.json is a configuration file used to enable or disable features and set default styles for both a website and blocks. Rather than dealing with a ton of theme support flags or alternative methods, theme.json provides a consolidated and canonical way to manage it all. These settings include options like:
What customization options should be made available or hidden from the user.
What are the default colors, font sizes, etc available to the user.
Defines the default layout of the editor (widths and available alignments).
This configuration file is a big part of what makes blockBlockBlock is the abstract term used to describe units of markup that, composed together, form the content or layout of a webpage using the WordPress editor. The idea combines concepts of what in the past may have achieved with shortcodes, custom HTML, and embed discovery into a single consistent API and user experience. themes so powerful as it allows for finer-grained control, and introduces the first step in “managing styles” for future WordPress releases. Here are a few of the top benefits of using this new mechanism:
It allows themes to provide settings per block which wasn’t possible before since add_theme_support targets settings for the entire editor.
Themes using theme.json will automatically get classes and CSSCSSCSS is an acronym for cascading style sheets. This is what controls the design or look and feel of a site. Custom Properties enqueued for the presets they declare instead of needing to handle this themselves. Plus, this means translations of preset names are also managed for them!
Theme.json will coordinate coreCoreCore is the set of software required to run WordPress. The Core Development Team builds WordPress., theme, and user styles in a way that reduces the amount of CSS that needs to ship as well as help resolve specificity problems.
While block themes won’t work with WordPress 5.8 without the GutenbergGutenbergThe Gutenberg project is the new Editor Interface for WordPress. The editor improves the process and experience of creating new content, making writing rich content much simpler. It uses ‘blocks’ to add richness rather than shortcodes, custom HTML etc. https://wordpress.org/gutenberg/pluginPluginA plugin is a piece of software containing a group of functions that can be added to a WordPress website. They can extend functionality or add new features to your WordPress websites. WordPress plugins are written in the PHP programming language and integrate seamlessly with WordPress. These can be free in the WordPress.org Plugin Directory https://wordpress.org/plugins/ or can be cost-based plugin from a third-party due to some theme blocks being left out of the release that weren’t quite ready to ship, it’s still an important feature coming to 5.8 that needs testing and exploration. If you’ve been curious about the world of block themes or have started building your own, this call for testing is for you and should help you to continue to explore what’s possible with theme.json while giving you a chance to share what else you’d like to see.
This section is for those wanting to get a sense of what theme.json can control and what the output will look like.
Head to https://gutenberg-theme.xyz/. This is a tool that can help generate the settings section of the theme.json file.
From there, try toggling on and off various theme supports. This will help you explore just a few settings that are possible to control with theme.json. For example, you can toggle on and off Custom Colors or Custom Link controls. Notice that the output in the browser changes based on your selection.
Use the + button next to Palette, Gradients, or Font Sizes to explore adding customizations. Keep in mind that you can edit both the slug and specific variables, like color name or font size.
Add a few customizations and review the output! If you want to go a step further and use what you’ve created, check out the intermediate steps.
Intermediate Testing Steps
This section is for those wanting to dig deeper into theme.json by writing their own file and exploring the various settings it can control.
Note: this mainly focuses on just theme supports and presets for blocks in the settings section of theme.json rather than Global Styles.
Navigate to the TT1 Blocks Theme directory and open the theme.json file in a text editor or IDE.
Replace the theme.json file with this gist before starting the next steps. It’s expected that this will really simplify what the theme looks like so don’t panic if you see a lot of options removed. This is intentional to simplify the settings you’re changing.
Generally speaking, please use the latest versions of each part of the setup and keep in mind that versions might have changed since this post was shared.
Layout
Create a new post.
Add a cover block with a solid colored background and several lines of content in an inner paragraph block to the post.
Add another cover block with a solid colored background and several lines of content in an inner paragraph block. Set this block to “Wide Width”.
Add a third cover block with a solid colored background and several lines of content to the post and set the block to “Full Width”.
Publish Post.
Load the post on the front end and note the width of the cover blocks.
Change the contentSize value to a different pixel value in the layout section of theme.json.
Change wideSize value to a different pixel value in the Layout section of theme.json.
Load the edit view of the previously created post and confirm that new widths are reflected in the editor
Load the post on the front end and confirm that the new widths are reflected on the front end of the site
Extra Credit: Try setting the width values to something other than “px” such as “em”, “rem”, “vh”, “vw”, or “%”.
Typography
Set the following typography settings to true in theme.json:
customFontWeight (Heading Block)
customFontSize (Paragraph Block)
customLineHeight (Paragraph Block)
dropCap (Paragraph Block)
Test the visibility of typography settings in a paragraph block (font size, line height and drop cap).
Test the visibility of typography settings in a Heading block (font size, font weight, line height).
Test that each of settings apply to the block on the front end.
Change the typography settings to false in theme.json.
Confirm that each of the custom typography settings in the paragraph block are no longer present in the block editor (Note the typography settings applied previously may still apply to existing blocks).
Extra credit: Add one or more font families and font sizes to the typography section of the theme.json file. Test your custom font families and sizes using a Button block.
Border
Set the following border settings to true in theme.json:
"customColor": true
"customRadius": true
"customStyle": true
"customWidth": true
Create a group block with an inner paragraph block with several lines of text.
Test visibility of border settings in a group block (Style, Width, Radius, Custom Color).
Test that settings apply to the block on the front end.
Change the above border settings to false in theme.json.
Confirm that border settings in group block are no longer present in the block editor.
Color
Set the following color settings for custom and customGradient to true in theme.json:
"custom": true
"customGradient": true
"link": true
Add a cover block with a custom gradient background and several lines of content in an inner paragraph block to the post.
Add a link to the paragraph block and set the link color to a custom color.
Add another cover block with an image background and several lines of content in an inner paragraph block to the post. Set the cover background to use a duotone preset.
Change the duotone colors for the background image to use custom colors for the duotone shadows and highlights settings.
Extra Credit: Add one or more additional colors to the palette and duotone or gradient presets. For more information about CSS gradients check these resources from CSS Tricks and CSS Gradient. Keep in mind that for duotone presets, you’ll need to use RGB, Hex or specifically named colors when adding custom colors.
(Very) Advanced Testing Steps
This section is for those looking to create a more robust block theme using theme.json and who are experienced theme developers. This isn’t for everyone!
If you feel more comfortable with block themes and have ample time to dig into theme.json, try replicating a classic theme. Here are two options that should be fun to dig into but keep in mind any default theme should work well:
As you try to do this, write down what gaps remain, what proves to be the most difficult to do, and what feels surprisingly easy! Share in the comments below so we can learn from your experience. This is intentionally extremely open ended and advanced so don’t worry if you don’t feel up for the challenge. If you want to follow along while someone else explores doing this, check out @mkaz‘s exploration video on learning to create a block theme.
What to notice:
These questions are specifically for the Intermediate and Advanced sections:
Do the colors added to the theme.json file appear with the assigned names visible on hover in the color palette for various blocks?
Do the font sizes added to the theme.json file appear with the assigned names and sizes in the font size dropdowns in blocks?
Do the colors and font sizes appear correctly when used with blocks in the editor?
Do the colors and font sizes appear correctly when used with blocks on the front end?
What did you find particularly confusing or frustrating about the experience?
What did you especially enjoy or appreciate about the experience?
Leave Feedback by July 14th
Please leave feedback (questions, comments, concerns) in the comments of this post and be sure to note which section you followed. If you’d prefer, you’re always welcome to create issues in this GitHub repo directly for Gutenberg but, for this test, it’s unlikely you’ll need to. However, if you do leave feedback in GitHubGitHubGitHub is a website that offers online implementation of git repositories that can can easily be shared, copied and modified by other developers. Public repositories are free to host, private repositories require a paid subscription. GitHub introduced the concept of the ‘pull request’ where code changes done in branches by contributors can be reviewed and discussed before being merged be the repository owner. https://github.com/, please comment below with the link.
Join a hallway hangout for theme.json testing on July 7th
To help those who might want to explore this test and theme.json in a group, @daisyolsen will be hosting a hallway hangout specifically for this exercise. If you have never attended a hallway hangout, you can read more about them here. Ultimately, they are meant to be casual and collaborative sessions to bring like minds together.
Not many blocks get an entire milestone dedicated to them but the Query Block did! As the name implies, this is a pretty powerful blockBlockBlock is the abstract term used to describe units of markup that, composed together, form the content or layout of a webpage using the WordPress editor. The idea combines concepts of what in the past may have achieved with shortcodes, custom HTML, and embed discovery into a single consistent API and user experience. allowing you to display posts/pages on your site and customize them as you see fit. For example, you could easily use this block to show off all of your favorite recipes by setting it up to show a specific categoryCategoryThe 'category' taxonomy lets you group posts / content together that share a common bond. Categories are pre-defined and broad ranging. of posts. In the long run, you can expect this to be more of a theme author tool used when building a block theme with block variations, like the Post List Block, being more of what users will interact with. For now though, let’s be adventurous and go on a Query Quest to explore what this block can do.
If you find yourself interested in the future of this block, check out this recent GitHub issue asking for new ideas for the bundled Query Block patterns that come with the current iteration of the block and get excited about Gutenberg 10.5 which will offer more patterns to choose from.
Testing Environment
While there’s more information below to ensure you get everything set up properly, here are the key aspects to have in place with your testing environment:
Use a test site. Do not use a production/live site. You can follow these instructions to set up a local installLocal InstallA local install of WordPress is a way to create a staging environment by installing a LAMP or LEMP stack on your local computer. or use a tool like this to set up a development site.
Use the latest version of WordPress (downloadable here).
Use the latest version of GutenbergGutenbergThe Gutenberg project is the new Editor Interface for WordPress. The editor improves the process and experience of creating new content, making writing rich content much simpler. It uses ‘blocks’ to add richness rather than shortcodes, custom HTML etc. https://wordpress.org/gutenberg/ (10.4 as of writing this).
Generally speaking, please use the latest versions of each part of the setup and keep in mind that versions might have changed since this post was shared.
Testing FlowFlowFlow is the path of screens and interactions taken to accomplish a task. It’s an experience vector. Flow is also a feeling. It’s being unselfconscious and in the zone. Flow is what happens when difficulties are removed and you are freed to pursue an activity without forming intentions. You just do it.
Flow is the actual user experience, in many ways. If you like, you can think of flow as a really comprehensive set of user stories. When you think about user flow, you’re thinking about exactly how a user will perform the tasks allowed by your product.Flow and Context
Important Note:
While this call for testing is focused on testing a specific feature, you’ll likely find other bugs in the process of testing with such a betaBetaA pre-release of software that is given out to a large group of users to trial under real conditions. Beta versions have gone through alpha testing in-house and are generally fairly close in look, feel and function to the final product; however, design changes often occur as part of the process. feature! Please know any bugs you find are welcome in your report for testing, even if they aren’t directly applicable to the tested feature.
Setup Instructions:
Have a test site using the latest version of WordPress. It’s important this is not a production/live site.
Install the TT1 Blocks theme by going to Appearances > Themes > Add New. Once installed, activate the theme.
Create eight posts with two different categories and featured images of your choosing. Alternatively, you can download and import the demo Gutenberg content created especially for this test via the WordPress importer under Tools > Import.
Go to the website’s admin.
Install and activate the Gutenberg pluginPluginA plugin is a piece of software containing a group of functions that can be added to a WordPress website. They can extend functionality or add new features to your WordPress websites. WordPress plugins are written in the PHP programming language and integrate seamlessly with WordPress. These can be free in the WordPress.org Plugin Directory https://wordpress.org/plugins/ or can be cost-based plugin from a third-party from Plugins > Add New. If you already have it installed, make sure you are using at least Gutenberg 10.4.
You should now see a navigation item titled “Site Editor (beta).” If you don’t see that in your sidebarSidebarA sidebar in WordPress is referred to a widget-ready area used by WordPress themes to display information that is not a part of the main content. It is not always a vertical column on the side. It can be a horizontal rectangle below or above the content area, footer, header, or any where in the theme., you aren’t correctly using the Site Editing experiment. From there, make sure you are in the Index template (this should be the default upon opening).
General Testing Instructions:
Using the List View, select the parent Query Block and then remove this entire block. This will allow us to start fresh! Here’s a GIF that shows how to do this.
From there, where the Query Block used to be, add in a Columns Block and set up 2 columns with 50/50 spacing.
In the first column, add a Heading Block with the name of one of the Categories of posts. If you used the demo content, this will be either “Hikes” or “Travel”.
Add a Query Block just below the Heading Block. During the setup, select whichever option you want from the various sizing options.
Once inserted, open the Block Settings and under “Settings” turn off the “Inherit query from URLURLA specific web address of a website or web page on the Internet, such as a website’s URL www.wordpress.org”.
From there, you should see options to customize what posts this Query Block includes. Under “Filters”, please select one of the categories to display. If you used the demo content, this will be either “Hikes” or “Travel”.
After the Query Block is showing the posts from just one category, proceed to customize the Query Block as you’d like! For example, you can add in additional blocks like Post Author and customize it using the Block Settings option. If you get stuck here, please jump down to the “Customization Instructions/Ideas” for help.
Follow the same process with the second column and customize the additional Query Block. Make sure to select the second category of posts to display so you see new posts there!
View your site and see if what you created matches the Site Editor view.
If you’re looking for more ways to customize the experience, try changing the width of the columns, adding in additional relevant blocks, changing colors, and more.
Customization Instructions/Ideas:
Because this is a more advanced block, here are some additional instructions to help clarify how customization of this block works in case you’re getting stuck. To start, keep in mind that part of the beauty of the Query Block system is that any change you make to one of the posts/pages being queried will be made to the entire set being displayed. This might be confusing at first but it allows for consistency across each post. With that in mind, here are some additional ways to customize your Query Block:
Here’s a quick video showing how you can change the width of the column that the Featured ImageFeatured imageA featured image is the main image used on your blog archive page and is pulled when the post or page is shared on social media. The image can be used to display in widget areas on your site or in a summary list of posts. block is in to make the image larger or smaller.
Of note, each of these videos are done using the Small size option but you can choose whatever size option you’d like!
What to notice:
Remember to share a screenshot of what you created if you’re up for it!
Did the experience crash at any point?
Did the saving experience work properly?
Did you find any features missing?
What did you find particularly confusing or frustrating about the experience?
What did you especially enjoy or appreciate about the experience?
Did you find that what you created in the Site Editor matched what you saw on your site?
Did it work using Keyboard only?
Did it work using a screen reader?
Leave Feedback by May 5th, 2021
While other calls for testing have been open for two weeks, this is open for three weeks in order to see if it causes more feedback to come in. If you can help test, please amplify by sharing this post!
Please leave feedback in the comments of this post. If you’d prefer, you’re always welcome to create issues in this GitHub repo directly for Gutenberg and in this GitHub repo for TT1 Blocks. If you leave feedback in GitHubGitHubGitHub is a website that offers online implementation of git repositories that can can easily be shared, copied and modified by other developers. Public repositories are free to host, private repositories require a paid subscription. GitHub introduced the concept of the ‘pull request’ where code changes done in branches by contributors can be reviewed and discussed before being merged be the repository owner. https://github.com/, please do still comment below with the link. If you see that someone else has already reported a problem, please still note your experience with it below, as it’ll help give those working on this experience more well-rounded insight into what to improve.
Creating an intuitive headerHeaderThe header of your site is typically the first thing people will experience. The masthead or header art located across the top of your page is part of the look and feel of your website. It can influence a visitor’s opinion about your content and you/ your organization’s brand. It may also look different on different screen sizes. is a key piece to get right when building a site. It helps orient visitors to what your site is about and, ideally, should help them take the actions you want them to. With the Site Editor, there are now brand new opportunities to customize this to your liking! This test will explore doing exactly that by creating a slightly more complex and layered header using various FSE blocks. To better focus this test, we’re going to pretend we’re restaurant owners and try to create an experience that nudges someone to order online while still showing them the information they need.
Like the last test, if you choose to get super creative, please share a screenshot in your comment so we can celebrate what you’ve made. For inspiration, here’s my example:
Testing Environment
While there’s more information below to ensure you get everything set up properly, here are the key aspects to have in place with your testing environment:
Use a test site. Do not use a production/live site. You can follow these instructions to set up a local installLocal InstallA local install of WordPress is a way to create a staging environment by installing a LAMP or LEMP stack on your local computer. or use a tool like this to set up a development site.
Use GutenbergGutenbergThe Gutenberg project is the new Editor Interface for WordPress. The editor improves the process and experience of creating new content, making writing rich content much simpler. It uses ‘blocks’ to add richness rather than shortcodes, custom HTML etc. https://wordpress.org/gutenberg/ 10.2.1 (latest version).
Testing FlowFlowFlow is the path of screens and interactions taken to accomplish a task. It’s an experience vector. Flow is also a feeling. It’s being unselfconscious and in the zone. Flow is what happens when difficulties are removed and you are freed to pursue an activity without forming intentions. You just do it.
Flow is the actual user experience, in many ways. If you like, you can think of flow as a really comprehensive set of user stories. When you think about user flow, you’re thinking about exactly how a user will perform the tasks allowed by your product.Flow and Context
: Creating a restaurant header
Here’s a basic flow to follow when testing this specific feature. If anything doesn’t make sense, comment below! If you want to take the test further, know that you’re welcome to do so as the instructions are meant to help guide you, not constrain you.
Important Note:
While this call for testing is focused on testing a specific feature, you’ll likely find other bugs in the process of testing with such a betaBetaA pre-release of software that is given out to a large group of users to trial under real conditions. Beta versions have gone through alpha testing in-house and are generally fairly close in look, feel and function to the final product; however, design changes often occur as part of the process. feature! Please know any bugs you find are welcome in your report for testing, even if they aren’t directly applicable to the tested feature.
Known Issues:
While creating this call for testing, a few issues popped up that you too might experience as you go through this. Rest assured they have been reported. Here’s a non exhaustive list of the most serious items:
If you try to drag & drop the Navigation Block from one column to another, it will crash the Site Editing experience. There is a fix in place and it’s slated for the next Gutenberg release.
Have a test site using WordPress 5.7. It’s important this is not a production/live site.
Install the TT1 Blocks theme by going to Appearances > Themes > Add New. Once installed, activate the theme.
Go to the website’s admin.
Install and activate the Gutenberg pluginPluginA plugin is a piece of software containing a group of functions that can be added to a WordPress website. They can extend functionality or add new features to your WordPress websites. WordPress plugins are written in the PHP programming language and integrate seamlessly with WordPress. These can be free in the WordPress.org Plugin Directory https://wordpress.org/plugins/ or can be cost-based plugin from a third-party from Plugins > Add New. If you already have it installed, make sure you are using at least Gutenberg 10.2.1.
You should now see a navigation item titled “Site Editor (beta).” If you don’t see that in your sidebarSidebarA sidebar in WordPress is referred to a widget-ready area used by WordPress themes to display information that is not a part of the main content. It is not always a vertical column on the side. It can be a horizontal rectangle below or above the content area, footer, header, or any where in the theme., you aren’t correctly using the Site Editing experiment.
Testing Instructions:
Helpful Hint: As you go through this test, you might find the List View helpful while navigating between content.
Setting up your columns:
Navigate to the “Site Editor (beta)” view. This will automatically open the site editor to the template powering your homepage.
Upon opening your homepage, remove the Navigation BlockBlockBlock is the abstract term used to describe units of markup that, composed together, form the content or layout of a webpage using the WordPress editor. The idea combines concepts of what in the past may have achieved with shortcodes, custom HTML, and embed discovery into a single consistent API and user experience. found inside the Header Template Part. This is to help reset the header to add more to it later on.
Select the parent Columns Block and, using the Block Settings in the sidebar, change the columns from 2 to 3 columns.
Return to the Columns Block and using the Block Toolbar settings make sure it’s set to Full Width.
In the first column, customize your Site Title and tagline as you wish! This could mean changing the text, font size, font family, and more.
In the second column, use a Paragraph Block to add in the hours of operation for your pretend restaurant and edit to your liking once more.
In the third column, add a Navigation Block and select the “Start Empty” option.
From there, use the Link Block to add a few links, even if they are to pages that don’t exist yet. To do this, just start typing a title that doesn’t currently exist on your site. For example, “Menu”. You’ll then see an option to create a draft page. Do this for at least one menu item. Remember to have fun with this and make it restaurant-themed!
At this point, select “Update Design” to save the changes you made.
Creating a nudge to order online:
Once your three columns have the content in place, add another Columns Block above it and select two columns to show using the 70/30 option. You can do this by selecting the Columns Block using List View and using the three-dot menu to select “Insert Before.”
Using the Block Toolbar, make the columns full width, so it stretches across the entire site.
In the larger column, add a Paragraph Block with text encouraging users to order online.
In the smaller column, add a Button Block that says “Order Online”. If you want to, feel free to quickly create a page to link to, but it’s okay for this test not to have a link for the purposes of this test.
At this point, select “Update Design” to save the changes you made.
Customize your colors & publish any page drafts:
From here, customize your colors and anything else with your design! You can do this by selecting the entire Header Template and adjusting the color settings in the sidebar. As you do this, keep note of anything you wish you could do but can’t.
When things are satisfactory, select “Update Design” to save the changes you made.
Finally, open the Navigation Toggle > Dashboard to view your wp-admin dashboard. Head to Page > All Pages and publish any that need to be.
View your site and check to make sure that what you created matches what you see there.
Share your experience in the comments below or in GitHub directly. You’re welcome to run through the experience multiple times to capture any additional feedback!
Testing Video:
This video doesn’t go into great detail in terms of customizing the colors but does walk through each step to get a sense of the major actions to take. Feel free to take the test further as you see fit!
What to notice:
Remember to share a screenshot of what you created if you’re up for it!
Did the experience crash at any point?
Did the saving experience work properly?
Did you find any features missing while creating the header?
What did you find particularly confusing or frustrating about the experience?
What did you especially enjoy or appreciate about the experience?
Did you find that what you created in the Site Editor matched what you saw on your site?
Did it work using Keyboard only?
Did it work using a screen reader?
Leave Feedback by April 12th, 2021 (previously April 8th)
Please leave feedback in the comments of this post. If you’d prefer, you’re always welcome to create issues in this GitHub repo directly for Gutenberg and in this GitHub repo for TT1 Blocks. If you leave feedback in GitHubGitHubGitHub is a website that offers online implementation of git repositories that can can easily be shared, copied and modified by other developers. Public repositories are free to host, private repositories require a paid subscription. GitHub introduced the concept of the ‘pull request’ where code changes done in branches by contributors can be reviewed and discussed before being merged be the repository owner. https://github.com/, please do still comment below with the link. If you see that someone else has already reported a problem, please still note your experience with it below, as it’ll help give those working on this experience more well-rounded insight into what to improve.
Have you ever experienced a particularly delightful 404 page? Maybe it made you laugh or it was built in a way that made it super easy to find your way back to where you needed to be on the site. Currently, this is a part of one’s site that can only be altered with code and provided by the theme causing many of us to be unable to add some extra joy into the universe with helpful, fun 404 pages.
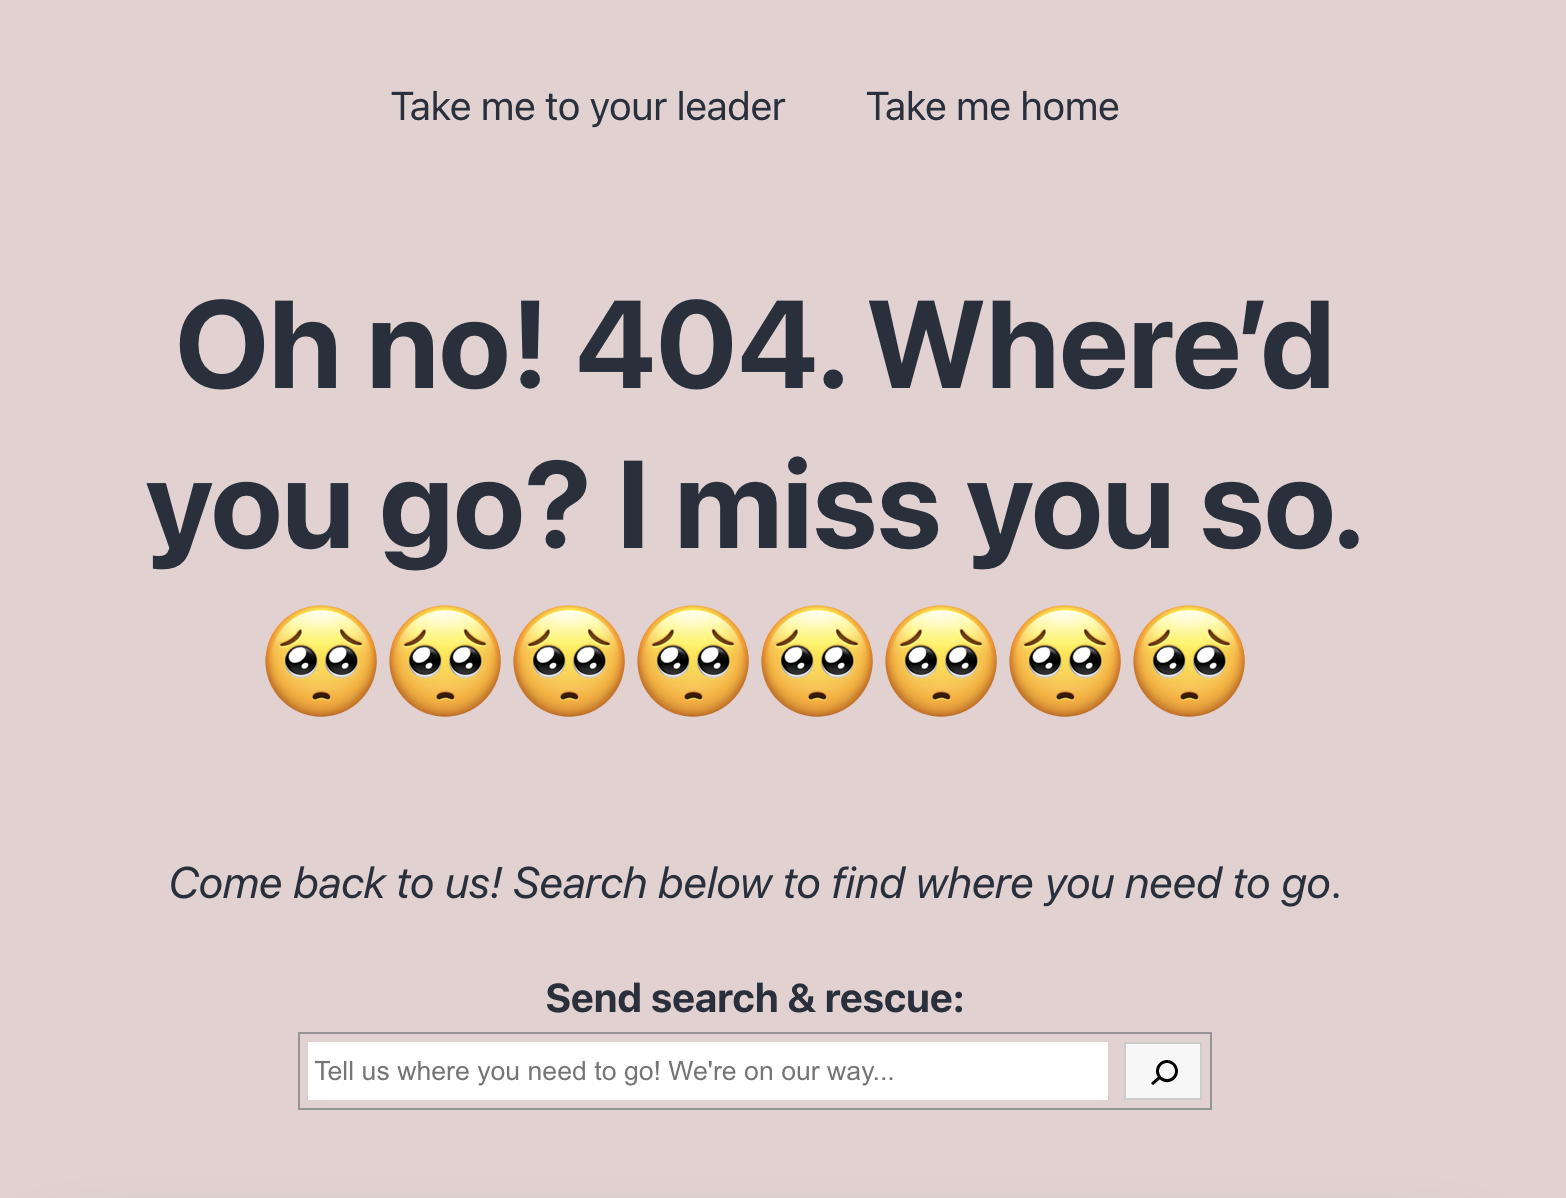
With Full Site Editing though, this is now within our grasps to make our own. This test explores doing exactly that with the option to build a simple 404 page through template editing or to really dive in to make something unique. If you choose to get super creative, please share a screenshot in your comment so we can all marvel at what you’ve made. For inspiration, here’s an example I made:
Testing Environment
While there’s more information below to ensure you get everything set up properly, here are the key aspects to have in place with your testing environment:
Use a test site. Do not use a production/live site. You can follow these instructions to set up a local installLocal InstallA local install of WordPress is a way to create a staging environment by installing a LAMP or LEMP stack on your local computer. or use a tool like this to set up a development site.
Use the TT1 Blocks Theme. If you followed the first call for testing, you’ll need to double-check to make sure you’re using this theme!
Use GutenbergGutenbergThe Gutenberg project is the new Editor Interface for WordPress. The editor improves the process and experience of creating new content, making writing rich content much simpler. It uses ‘blocks’ to add richness rather than shortcodes, custom HTML etc. https://wordpress.org/gutenberg/ 10.1.1 (latest version).
Testing FlowFlowFlow is the path of screens and interactions taken to accomplish a task. It’s an experience vector. Flow is also a feeling. It’s being unselfconscious and in the zone. Flow is what happens when difficulties are removed and you are freed to pursue an activity without forming intentions. You just do it.
Flow is the actual user experience, in many ways. If you like, you can think of flow as a really comprehensive set of user stories. When you think about user flow, you’re thinking about exactly how a user will perform the tasks allowed by your product.Flow and Context
Here’s a basic flow to follow when testing this specific feature. If anything doesn’t make sense, just comment below!
Important Note:
While this call for testing is focused on testing a specific feature, you’ll likely find other bugs in the process of testing with such a betaBetaA pre-release of software that is given out to a large group of users to trial under real conditions. Beta versions have gone through alpha testing in-house and are generally fairly close in look, feel and function to the final product; however, design changes often occur as part of the process. feature! Please know any bugs you find are welcome in your report for testing, even if they aren’t directly applicable to the tested feature.
Setup Instructions:
Have a test site using WordPress 5.7. It’s important this is not a production/live site.
Install the TT1 Blocks theme by going to Appearances > Themes > Add New. Once installed, activate the theme.
Go to the website’s admin.
Install and activate the Gutenberg pluginPluginA plugin is a piece of software containing a group of functions that can be added to a WordPress website. They can extend functionality or add new features to your WordPress websites. WordPress plugins are written in the PHP programming language and integrate seamlessly with WordPress. These can be free in the WordPress.org Plugin Directory https://wordpress.org/plugins/ or can be cost-based plugin from a third-party from Plugins > Add New. If you already have it installed, make sure you are using at least Gutenberg 10.1.1.
You should now see a navigation item titled “Site Editor (beta).” If you don’t see that in your sidebarSidebarA sidebar in WordPress is referred to a widget-ready area used by WordPress themes to display information that is not a part of the main content. It is not always a vertical column on the side. It can be a horizontal rectangle below or above the content area, footer, header, or any where in the theme., you aren’t correctly using the Site Editing experiment.
Testing Instructions:
Helpful Hint: As you go through this test, you might find the List View helpful while navigating between content.
Exploring the 404 template
Navigate to the “Site Editor (beta)” view. This will automatically open the site editor to the template powering your homepage.
Open the Navigation Toggle and head to Templates > 404. This will take you to your site’s 404 page template.
Using the List View, select the HeaderHeaderThe header of your site is typically the first thing people will experience. The masthead or header art located across the top of your page is part of the look and feel of your website. It can influence a visitor’s opinion about your content and you/ your organization’s brand. It may also look different on different screen sizes. Template Part and, using the three-dot toolbar menu, select “Remove BlockBlockBlock is the abstract term used to describe units of markup that, composed together, form the content or layout of a webpage using the WordPress editor. The idea combines concepts of what in the past may have achieved with shortcodes, custom HTML, and embed discovery into a single consistent API and user experience.” to delete this.
From there, select the default Header Block that says “Nothing Here” and, using the three-dot toolbar menu, use the “Insert Before” option to add a block above.
Using your preferred method to insert a block, insert a Template Part Block and select the “New Template Part” option.
Open the Block Settings for the new Template Part block and, under Advanced > “Title”, add in a custom title. For example, “404 Header”.
When you’re done making the changes you want, select “Update Design” and go through the saving flow to save all changes. This should cause the new Template Part to reflect the title you chose.
Adding navigation and getting creative
From there, make sure your focus is still within the new Template Part and add in a Navigation Block. You can choose whether to create a new menu or re-use a previous one.
Add a few links including a link to a page that doesn’t currently exist. To do this, just start typing a title that doesn’t currently exist on your site. For example, “Help”. You’ll then see an option to create a draft page. Do this for at least one menu item. Remember to have fun with this!
Outside of the Navigation Block, add any additional blocks you’d like to in this new Template Part. For example, you can use the Social Icons Block, Search Block, Site Title, and more. Try to add anything that would help orient someone who got lost on your site.
From there, edit the “Nothing Found” Header Block and Search Block to whatever you’d like. You can then add in anything you’d like including images, GIFs, etc.
When you’re done making the changes you want, select “Update Design” and go through the saving flow to save all changes.
View your 404 page on your site by going to yoursiteurl.com/404 (replace yoursiteurl.com with your test site URLURLA specific web address of a website or web page on the Internet, such as a website’s URL www.wordpress.org). Notice that any items you added to the Navigation Block that are page drafts appear but are broken links. You should be able to still view the drafts since you are logged in as an admin. Note: this has been logged as a bug.
Return to the Site Editor and open the Navigation Toggle > Dashboard to view your wp-admin dashboard. Note: there’s a current bug that makes it so you can’t view Page Drafts meaning in the future this will be easier.
Publish, review, and share
Head to Page > All Pages and publish any that need to be.
Once more, View your 404 page on your site by going to yoursiteurl.com/404 and confirm any prior draft Pages now show up properly with correct permalinks.
Share your experience in the comments below or in GitHub directly. You’re welcome to run through the experience multiple times to capture any additional feedback!
If you want to take this further, here are some extra items to explore:
Try adding in columns to your content! Columns are a powerful tool and it would be helpful to get feedback on the experience of using them in a real life scenario with site building.
Create a custom footer template part to replicate the process of creating a custom header template part.
Deeply customize the appearance of the page with custom colors, font sizes, and more. Here’s a quick video demonstrating some of what you can try.
Testing Video:
This video shows the testing flow after the initial testing setup is in place. Of note, this video purposefully does not go into depth in building out a 404 page in order to keep it concise. Don’t let this stop you from getting creative though when you’re testing!
What to notice:
Remember to share a screenshot of what you created if you’re up for it!
Did the experience crash at any point?
Did the saving experience work properly?
Did the saving experience make sense when making changes to the Template Part vs the general content?
What did you find particularly confusing or frustrating about the experience?
What did you especially enjoy or appreciate about the experience?
Did you find that what you created in the Site Editor matched what you saw when you viewed your 404 page?
Did it work using Keyboard only?
Did it work using a screen reader?
Leave Feedback by March 23rd, 2021
Please leave feedback in the comments of this post. If you’d prefer, you’re always welcome to create issues in this GitHub repo directly for Gutenberg and in this GitHub repo for TT1 Blocks. If you leave feedback in GitHubGitHubGitHub is a website that offers online implementation of git repositories that can can easily be shared, copied and modified by other developers. Public repositories are free to host, private repositories require a paid subscription. GitHub introduced the concept of the ‘pull request’ where code changes done in branches by contributors can be reviewed and discussed before being merged be the repository owner. https://github.com/, please do still comment below with the link. If you see that someone else has already reported a problem, please still note your experience with it below, as it’ll help give those working on this experience more well-rounded insight into what to improve.
Before diving into the testing details, let’s pause to talk about the focus of this call for testing. With Full Site Editing unlocking the ability to edit all parts of your site, there comes a need for new blocks to help facilitate the experience. You might have seen some of these blocks already! For example, there’s a Site Title blockBlockBlock is the abstract term used to describe units of markup that, composed together, form the content or layout of a webpage using the WordPress editor. The idea combines concepts of what in the past may have achieved with shortcodes, custom HTML, and embed discovery into a single consistent API and user experience. that you can embed anywhere and update automatically any time you change your Site Title.
For this specific test, we’re going to explore using a few of these blocks to build a basic homepage with a sidebarSidebarA sidebar in WordPress is referred to a widget-ready area used by WordPress themes to display information that is not a part of the main content. It is not always a vertical column on the side. It can be a horizontal rectangle below or above the content area, footer, header, or any where in the theme.:
Site Title Block
Site Logo Block
Post Lists Block
Post Tags Block
Navigation Block
Template Part Block
Think of this as a chance to both explore what’s possible currently to build something simple and as a chance to get more familiar with these new blocks. Eventually, these blocks will specifically be categorized in the Inserter as defined for Site Editing.
Testing Environment
While there’s more information below to ensure you get everything set up properly, here are the key aspects to have in place with your testing environment:
Use a test site. Do not use a production/live site. You can follow these instructions to set up a local installLocal InstallA local install of WordPress is a way to create a staging environment by installing a LAMP or LEMP stack on your local computer. or use a tool like this to set up a development site.
Use WordPress 5.6.1 and above (downloadable here).
Use the TT1 Blocks Theme. If you followed the last call for testing, you’ll need to double-check to make sure you’re using this theme!
Use GutenbergGutenbergThe Gutenberg project is the new Editor Interface for WordPress. The editor improves the process and experience of creating new content, making writing rich content much simpler. It uses ‘blocks’ to add richness rather than shortcodes, custom HTML etc. https://wordpress.org/gutenberg/ 10.0 (latest version).
Testing FlowFlowFlow is the path of screens and interactions taken to accomplish a task. It’s an experience vector. Flow is also a feeling. It’s being unselfconscious and in the zone. Flow is what happens when difficulties are removed and you are freed to pursue an activity without forming intentions. You just do it.
Flow is the actual user experience, in many ways. If you like, you can think of flow as a really comprehensive set of user stories. When you think about user flow, you’re thinking about exactly how a user will perform the tasks allowed by your product.Flow and Context
Here’s a basic flow to follow when testing this specific feature. If anything doesn’t make sense, just comment below!
Important Note:
While this call for testing is focused on testing a specific feature, you’ll likely find other bugs in the process of testing with such a betaBetaA pre-release of software that is given out to a large group of users to trial under real conditions. Beta versions have gone through alpha testing in-house and are generally fairly close in look, feel and function to the final product; however, design changes often occur as part of the process. feature! Please know any bugs you find are welcome in your report for testing, even if they aren’t directly applicable to the tested feature.
Setup Instructions:
Have a test site using WordPress 5.6.1. It’s important this is not a production/live site.
Install the TT1 Blocks theme by going to Appearances > Themes > Add New. Once installed, activate the theme.
Create either three fake posts with a few tags OR use the demo Gutenberg content found here. Here’s a short video explaining how to set up this content.
Go to the website’s admin.
Install and activate the Gutenberg pluginPluginA plugin is a piece of software containing a group of functions that can be added to a WordPress website. They can extend functionality or add new features to your WordPress websites. WordPress plugins are written in the PHP programming language and integrate seamlessly with WordPress. These can be free in the WordPress.org Plugin Directory https://wordpress.org/plugins/ or can be cost-based plugin from a third-party from Plugins > Add New. If you already have it installed, make sure you are using at least Gutenberg 10.0.
You should now see a navigation item titled “Site Editor (beta).” If you don’t see that in your sidebar, you aren’t correctly using the Site Editing experiment.
Testing Instructions:
Helpful Hint: As you go through this test, you might find the List View helpful while navigating between content.
Navigate to the “Site Editor (beta)” view. This will automatically open the site editor to the template powering your homepage.
Using the List View, see if the Query Block is present. If so, select and delete it. This is just a housekeeping step to keep things contained :).
Make changes to your headerHeaderThe header of your site is typically the first thing people will experience. The masthead or header art located across the top of your page is part of the look and feel of your website. It can influence a visitor’s opinion about your content and you/ your organization’s brand. It may also look different on different screen sizes.:
You’ll likely see a Header created for you that you can edit directly. Update the text in the Site Title block. Have fun with it! Some ideas to get you started: Pick a new heading size, change the content, or alter the block settings directly.
When you’re done making the changes you want, select “Update Design” and go through the saving flow to save all changes.
Open the Navigation Toggle and head to Template Parts > Select “Header.” This will show you an isolated view of just the Header portion of your site. While in this view, add a Site Logo Block and configure it to your liking.
When you’re done making the changes you want, select “Update Design” and go through the saving flow to save all changes.
Open the Navigation Toggle again and head to Template > Index to return to your homepage.
Once there, head to the Navigation Block that’s powering the menu in the Header (this is where you might find the List View helpful!). Explore the Navigation Block by making changes directly to the menu items or in the Block Settings to change the font, color, etc.
Using the List View, select the Header Template Part and, using the three-dot toolbar menu, use the “Insert After” option to add a block outside of the Header.
Add your content:
Add either a 70/30 or 30/70 column block. In the larger column, use the Heading Block to write “My Content.” In the smaller column, use the Heading Block to write “My Sidebar.”
In the larger column, add a Posts Lists Block and select the configuration you would like (Title & Date, Title & ExcerptExcerptAn excerpt is the description of the blog post or page that will by default show on the blog archive page, in search results (SERPs), and on social media. With an SEO plugin, the excerpt may also be in that plugin’s metabox., etc.).
From there, add a Post Tags Block to one of the posts displayed in the Posts Lists Block. Notice how if you add it to one post, it adds it to all of them!
Repeat the previous step with the Post Author Block before deciding whether you’d like to keep or remove either additional block.
Create a sidebar:
In the smaller column, build out your sidebar how you’d like! For inspiration, try out the Social Icons Block, Latest Posts Block, or a simple Image block.
When you’re done making the changes you want, select “Update Design” and go through the saving flow to save all changes.
Share your experience in the comments below or in GitHub directly. You’re welcome to run through the experience multiple times to capture any additional feedback!
Testing Walkthrough Video:
This video shows the testing flow after the initial testing setup is in place and is using Gutenberg demo content found here. Make the flow you’re on though with your own unique changes and adjustments!
What to notice:
Did the experience crash at any point?
Did the saving experience work properly?
Did you ever want to do something with a specific block that wasn’t possible?
What did you find particularly confusing or frustrating about the experience?
What did you especially enjoy or appreciate about the experience?
Did you find that what you created in the Site Editor matched what you see when you view your homepage?
Did it work using Keyboard only?
Did it work using a screen reader?
Leave Feedback by March 5th, 2021
Please leave feedback in the comments of this post. If you’d prefer, you’re always welcome to create issues in this GitHub repo directly for Gutenberg and in this GitHub repo for TT1 Blocks. If you leave feedback in GitHubGitHubGitHub is a website that offers online implementation of git repositories that can can easily be shared, copied and modified by other developers. Public repositories are free to host, private repositories require a paid subscription. GitHub introduced the concept of the ‘pull request’ where code changes done in branches by contributors can be reviewed and discussed before being merged be the repository owner. https://github.com/, please do still comment below with the link. If you see that someone else has already reported a problem, please still note your experience with it below, as it’ll help give those working on this experience more well-rounded insight into what to improve.
To better expand the reach of the FSE Outreach Program, I am exploring creative ways to engage the wider community. In the #fse-outreach-experimentslackSlackSlack is a Collaborative Group Chat Platform https://slack.com/. The WordPress community has its own Slack Channel at https://make.wordpress.org/chat/. channel (join us!), I recently shared an idea to create better connections between the program’s work and local polyglot communities. Since then, I’ve had the chance to work with @mimi who is a part of the Japanese WordPress community. I wanted to share how our work is evolving so others can join in.
Here are a few ways that someone who is a part of a local polyglot community can help with the FSE Outreach Program:
Translate future Calls for Testing and share your community’s feedback in the FSE Outreach Program.
Facilitate testing in your community by following the Calls for Testing and translating the feedback into English either to share on GitHubGitHubGitHub is a website that offers online implementation of git repositories that can can easily be shared, copied and modified by other developers. Public repositories are free to host, private repositories require a paid subscription. GitHub introduced the concept of the ‘pull request’ where code changes done in branches by contributors can be reviewed and discussed before being merged be the repository owner. https://github.com/ or on the official Call for Testing post.
If this seems like too much, try to find someone else in your local community to work with. For example, you could divide the work so one person translates the Calls for Testing, while another person translates the feedback that’s received to share on the official Call for Testing post.
If you’re interested in working on these ideas in your local community, please comment below or message me on slack (@annezazu).
I want to make this easier for anyone interested in any of the above ideas so let me know if this is an area you want to help with. Feedback is always welcome so please pingPingThe act of sending a very small amount of data to an end point. Ping is used in computer science to illicit a response from a target server to test it’s connection. Ping is also a term used by Slack users to @ someone or send them a direct message (DM). Users might say something along the lines of “Ping me when the meeting starts.” me or share your thoughts in the #fse-outreach-experiment.
Finally, big props and thank you to @mimi who has kindly started helping here and has been giving me feedback along the way.
Currently, there are a few areas lined up for testing in the future for the FSE Outreach Program, but none are quite ready to be launched for a round of testing. Let’s use this time to dig into any general questions you all might have around Full Site Editing!
You are welcome to submit questions using the form below or to leave them as a comment on this post by February 15th:
Keep in mind that because this work is still heavily in progress, it’s likely that some answers might take the form of “people are working to figure this out and feedback is welcome here,” rather than a definitive answer.
Where will you share the answers?
I’ll share a recap post on this blog (Make Test). Questions will be grouped with corresponding answers for easy review. I will track down answers to every question and share my work as I go by creating a collaborative Google doc where people can help find answers or simply see how the work evolves.
While the main result will be a lovely list of answers, this collective effort will also be useful for future documentation updates and potential tutorials. Once the post is published, I will follow up via email with everyone who left their email and a question in the form. For anyone who leaves a question as a comment on this post, I will @ your username in the recap post so you don’t miss out too!
For more information about this experimental program, please review this FAQ for helpful details. To properly join the fun, please head to #fse-outreach-experiment in Make Slack for future testing announcements, helpful posts, and more will be shared there.
To help frame what we’re going to be testing (and ideally build some excitement!), I wanted to give a brief context on the feature at the center of this call for testing. With Full Site Editing, people are able to edit both an individual post’s content and, with the release of Gutenberg 9.6, the template that an individual post uses. This call for testing is designed to explore the interaction between the two editing experiences (post vs. template editing) to make sure it’s clear when you’re editing each, granular saving works properly, etc. Ultimately, being able to edit templates like index, single, or archive directly is a huge leap forward compared to what’s been possible in the past! Unlocking this level of customization gives you far more control to build the site you want and this call for testing is to help ensure it’s as intuitive as possible.
While there’s more information below to ensure you get everything setup properly, here are the key aspects to have in place with your testing environment:
Use a test site. Do not use a production/live site. You can follow these instructions to set up a local installLocal InstallA local install of WordPress is a way to create a staging environment by installing a LAMP or LEMP stack on your local computer. or you can use a tool like this to set up a development site.
Use the TT1 Blocks Theme (formerly called Twenty Twenty-One BlockBlockBlock is the abstract term used to describe units of markup that, composed together, form the content or layout of a webpage using the WordPress editor. The idea combines concepts of what in the past may have achieved with shortcodes, custom HTML, and embed discovery into a single consistent API and user experience. Based Theme) by following these instructions.
Use GutenbergGutenbergThe Gutenberg project is the new Editor Interface for WordPress. The editor improves the process and experience of creating new content, making writing rich content much simpler. It uses ‘blocks’ to add richness rather than shortcodes, custom HTML etc. https://wordpress.org/gutenberg/ 9.6 (latest version).
Testing FlowFlowFlow is the path of screens and interactions taken to accomplish a task. It’s an experience vector. Flow is also a feeling. It’s being unselfconscious and in the zone. Flow is what happens when difficulties are removed and you are freed to pursue an activity without forming intentions. You just do it.
Flow is the actual user experience, in many ways. If you like, you can think of flow as a really comprehensive set of user stories. When you think about user flow, you’re thinking about exactly how a user will perform the tasks allowed by your product.Flow and Context
Here’s a basic flow to follow when testing this specific feature. If anything doesn’t make sense, just comment below!
Important Note:
While this call for testing is focused on testing a specific feature, it’s extremely likely you’ll find other bugs in the process of testing with such a betaBetaA pre-release of software that is given out to a large group of users to trial under real conditions. Beta versions have gone through alpha testing in-house and are generally fairly close in look, feel and function to the final product; however, design changes often occur as part of the process. feature! Please know any bugs you find are welcome in your report for testing, even if they aren’t directly applicable to the tested feature.
Setup Instructions:
Have a test site using WordPress 5.6. It’s important this is not a production/live site.
Install the TT1 Blocks Theme (formerly called Twenty Twenty-One Block Based Theme) by following these instructions and activate it under Appearances > Themes.
Go to the website’s admin.
Install and activate the Gutenberg pluginPluginA plugin is a piece of software containing a group of functions that can be added to a WordPress website. They can extend functionality or add new features to your WordPress websites. WordPress plugins are written in the PHP programming language and integrate seamlessly with WordPress. These can be free in the WordPress.org Plugin Directory https://wordpress.org/plugins/ or can be cost-based plugin from a third-party from Plugins > Add New. If you already have it installed, make sure you are using at least Gutenberg 9.6.
You should now see a navigation item titled “Site Editor (beta)”. If you don’t see that in your sidebarSidebarA sidebar in WordPress is referred to a widget-ready area used by WordPress themes to display information that is not a part of the main content. It is not always a vertical column on the side. It can be a horizontal rectangle below or above the content area, footer, header, or any where in the theme., you aren’t properly using the Site Editing experiment.
Testing Instructions:
Create a new post by going to Posts > Add New.
Add in a post title and brief content before hitting “Save Draft” or “Publish”. Either way, saving of some sort needs to happen.
While in the editor for the post, navigate to the Post Tab of the Settings Sidebar (previously called Document). Under “Status & visibility,” you should see “Template” with the template name and the option to edit.
Click on “edit” to move into template editing mode. You should see a notice indicating you’ve switched to editing the template.
Make a few changes to the template wherever you like. For example, you can try out the “Site Title,” “Site Logo,” Site Tagline,” and “Navigation” blocks or changing font sizes and color settings for different blocks. Here’s a screenshot of a simple headerHeaderThe header of your site is typically the first thing people will experience. The masthead or header art located across the top of your page is part of the look and feel of your website. It can influence a visitor’s opinion about your content and you/ your organization’s brand. It may also look different on different screen sizes. for inspiration.
When you’re done making the changes you want, select “Apply” and go through the saving flow by selecting “Save”. This will return you to editing the post itself.
Once saved, try editing the post once more before following steps 7 & 8 to edit the template specifically.
Make changes to the template. This might mean making minor editorial changes to the content or adding in new blocks.
When you’re done making the changes you want, select “Apply” and go through the saving flow this time opting to not save the template changes. This is a way to test the saving functionality.
Share your experience in the comments below or in GitHub directly. You’re welcome to run through the experience multiple times to capture any additional feedback!
What to notice:
Did it crash at any point?
Was it clear that when you were editing blocks in the Template that it would impact every page/post using that same Template?
Was it intuitive for you to switch between editing a Template for all posts vs. an individual post?
Was the saving process intuitive? Meaning, did you easily know what each option was saving?
Did the right content save when you selected saving the template part vs. when you left it unselected?
Did you get stuck at any point in the testing process?
What did you especially enjoy or appreciate about the experience?
Did it work using Keyboard only?
Did it work using a screen reader?
Leave Feedback by January 13th, 2021
Please leave feedback in the comments of this post. If you’d prefer, you’re always welcome to create issues in this GitHub repo directly for Gutenberg and in this GitHub repo for TT1 Blocks Theme (formerly called Twenty Twenty-One Block Based Theme). If you leave feedback in GitHubGitHubGitHub is a website that offers online implementation of git repositories that can can easily be shared, copied and modified by other developers. Public repositories are free to host, private repositories require a paid subscription. GitHub introduced the concept of the ‘pull request’ where code changes done in branches by contributors can be reviewed and discussed before being merged be the repository owner. https://github.com/, please do still comment below with the link. If you see that someone else has already reported a problem, please still note your experience with it below, as it’ll help give those working on this experience more well-rounded insight into what to improve.


You must be logged in to post a comment.