Requiring two-factor authentication for organizations in your enterprise account
Enterprise owners can require that organization members, billing managers, and outside collaborators in all organizations owned by an enterprise account use two-factor authentication to secure their personal accounts.
Before you can require 2FA for all organizations owned by your enterprise account, you must enable two-factor authentication for your own account. For more information, see "Securing your account with two-factor authentication (2FA)."
Warnings:
- When you require two-factor authentication for your enterprise account, members, outside collaborators, and billing managers (including bot accounts) in all organizations owned by your enterprise account who do not use 2FA will be removed from the organization and lose access to its repositories. They will also lose access to their forks of the organization's private repositories. You can reinstate their access privileges and settings if they enable two-factor authentication for their personal account within three months of their removal from your organization. For more information, see "Reinstating a former member of your organization."
- Any organization owner, member, billing manager, or outside collaborator in any of the organizations owned by your enterprise account who disables 2FA for their personal account after you've enabled required two-factor authentication will automatically be removed from the organization.
- If you're the sole owner of a enterprise account that requires two-factor authentication, you won't be able to disable 2FA for your personal account without disabling required two-factor authentication for the enterprise account.
Before you require use of two-factor authentication, we recommend notifying organization members, outside collaborators, and billing managers and asking them to set up 2FA for their accounts. Organization owners can see if members and outside collaborators already use 2FA on each organization's People page. For more information, see "Viewing whether users in your organization have 2FA enabled."
-
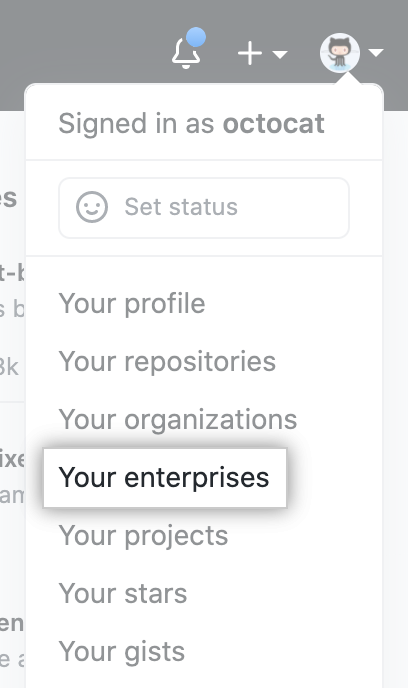
In the top-right corner of GitHub, click your profile photo, then click Your enterprises.
-
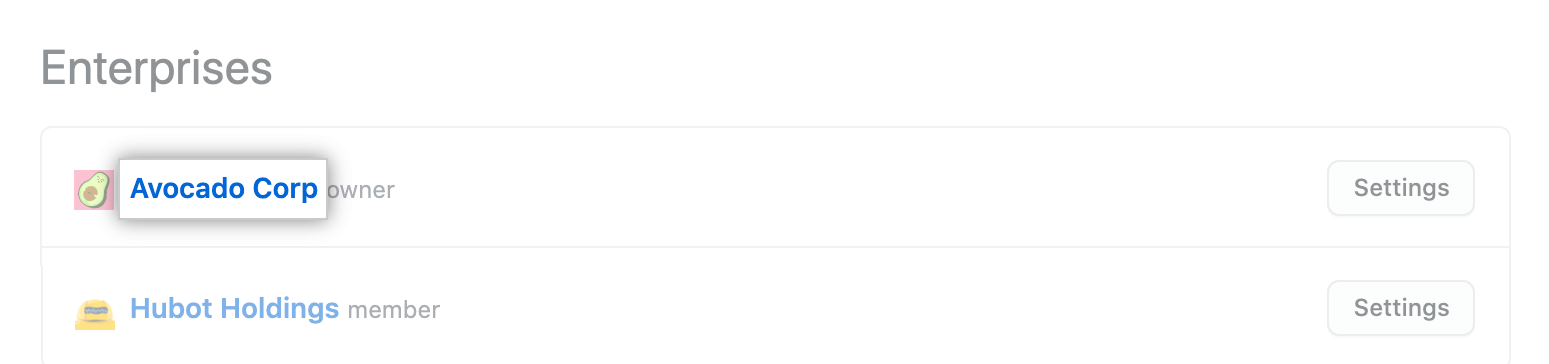
In the list of enterprises, click the enterprise you want to view.
-
In the enterprise account sidebar, click Settings.

-
In the left sidebar, click Security.

-
Under "Two-factor authentication", review the information about changing the setting. Optionally, to view the current configuration for all organizations in the enterprise account before you change the setting, click View your organizations' current configurations.

-
Under "Two-factor authentication", select Require two-factor authentication for all organizations in your business, then click Save.

-
If prompted, read the information about members and outside collaborators who will be removed from the organizations owned by your enterprise account. To confirm the change, type your enterprise account's name, then click Remove members & require two-factor authentication.

-
Optionally, if any members or outside collaborators are removed from the organizations owned by your enterprise account, we recommend sending them an invitation to reinstate their former privileges and access to your organization. Each person must enable two-factor authentication before they can accept your invitation.
Managing allowed IP addresses for organizations in your enterprise account
Enterprise owners can restrict access to assets owned by organizations in an enterprise account by configuring an allow list for specific IP addresses. For example, you can allow access from only the IP address of your office network. The allow list for IP addresses will block access via the web, API, and Git from any IP addresses that are not on the allow list.
You can approve access for a single IP address, or a range of addresses, using CIDR notation. For more information, see "CIDR notation" on Wikipedia.
To enforce the IP allow list, you must first add IP addresses to the list, then enable the IP allow list. You must add your current IP address, or a matching range, before you enable the IP allow list. When you enable the allow list, the IP addresses you have configured are immediately added to the allow lists of organizations in your enterprise. If you disable the allow list, the addresses are removed from the organization allow lists.
You can choose to automatically add to your allow list any IP addresses configured for GitHub Apps installed in your enterprise. The creator of a GitHub App can configure an allow list for their application, specifying the IP addresses at which the application runs. By inheriting their allow list into yours, you avoid connection requests from the application being refused. For more information, see "Allowing access by GitHub Apps."
You can also configure allowed IP addresses for an individual organization. For more information, see "Managing allowed IP addresses for your organization."
Adding an allowed IP address
-
In the top-right corner of GitHub, click your profile photo, then click Your enterprises.
-
In the list of enterprises, click the enterprise you want to view.
-
In the enterprise account sidebar, click Settings.
-
In the left sidebar, click Security.
-
At the bottom of the "IP allow list" section, enter an IP address, or a range of addresses in CIDR notation.

-
Optionally, enter a description of the allowed IP address or range.

-
Click Add.

Allowing access by GitHub Apps
If you're using an allow list, you can also choose to automatically add to your allow list any IP addresses configured for GitHub Apps that are installed in your enterprise.
If you select Enable IP allow list configuration for installed GitHub Apps in your allow list settings, then IP addresses from installed GitHub Apps are added to your allow list. This happens irrespective of whether your allow list is currently enabled. If you install a GitHub App and then the creator of that application changes the addresses in its allow list, your allow list is automatically updated with those changes.
You can identify the IP addresses that have been automatically added from GitHub Apps by reviewing the description field. The description for these IP addresses is: "Managed by the NAME GitHub App." Unlike addresses you add manually, you cannot edit, delete, or disable IP addresses that are automatically added from GitHub Apps.
Note: The addresses in the IP allow list of a GitHub App only affect requests made by installations of the GitHub App. The automatic addition of a GitHub App's IP address to an organization's allow list does not allow access to a GitHub user who connects from that IP address.
For more information about how to create an allow list for a GitHub App you have created, see "Managing allowed IP addresses for a GitHub App."
To enable automatic addition of IP addresses for GitHub Apps:
-
In the top-right corner of GitHub, click your profile photo, then click Your enterprises.
-
In the list of enterprises, click the enterprise you want to view.
-
In the enterprise account sidebar, click Settings.
-
In the left sidebar, click Security.
-
Under "IP allow list", select Enable IP allow list configuration for installed GitHub Apps.

-
Click Save.
Enabling allowed IP addresses
-
In the top-right corner of GitHub, click your profile photo, then click Your enterprises.
-
In the list of enterprises, click the enterprise you want to view.
-
In the enterprise account sidebar, click Settings.
-
In the left sidebar, click Security.
-
Under "IP allow list", select Enable IP allow list.

-
Click Save.
Editing an allowed IP address
-
In the top-right corner of GitHub, click your profile photo, then click Your enterprises.
-
In the list of enterprises, click the enterprise you want to view.
-
In the enterprise account sidebar, click Settings.
-
In the left sidebar, click Security.
-
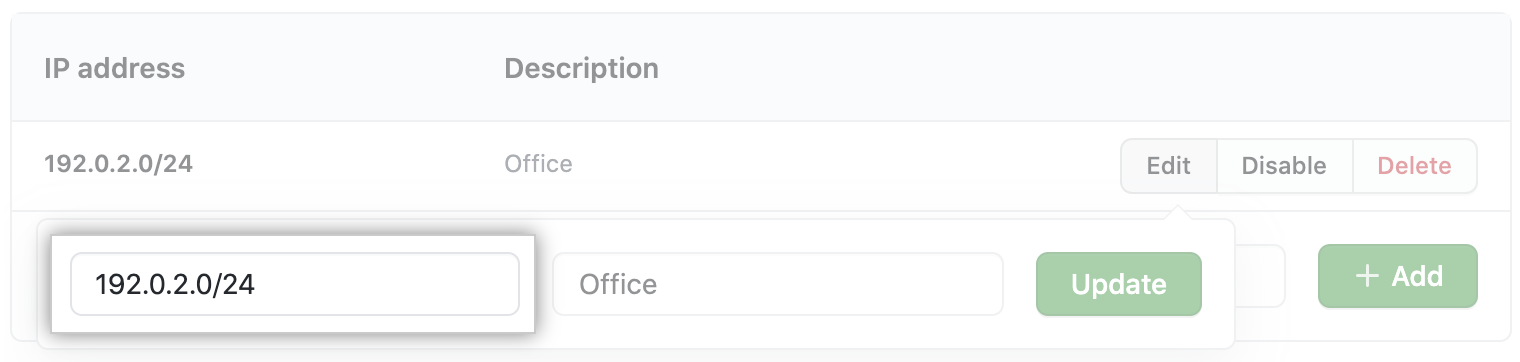
Under "IP allow list", to the right of the entry you want to edit, click Edit.

-
Type an IP address, or range of addresses, in CIDR notation.
-
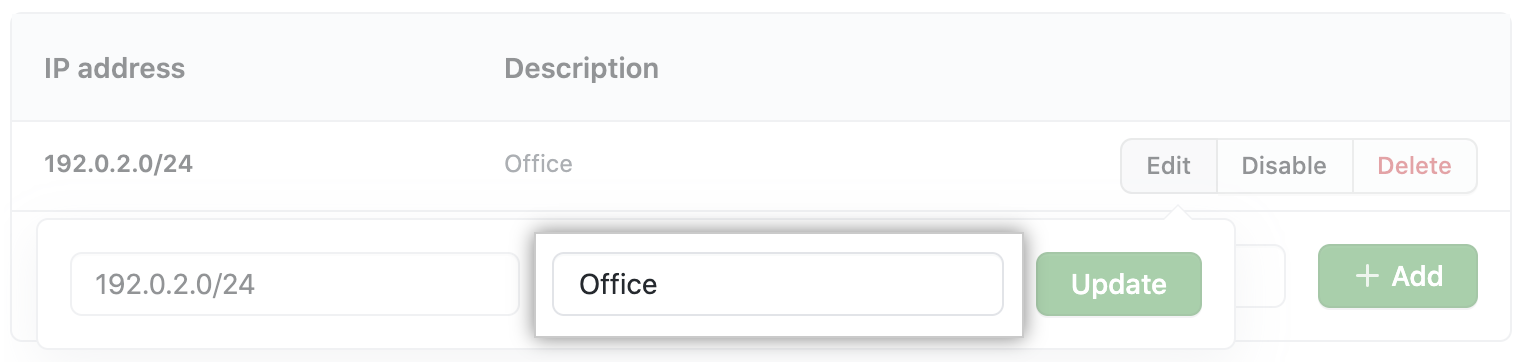
Type a description of the allowed IP address or range.
-
Click Update.
Deleting an allowed IP address
-
In the top-right corner of GitHub, click your profile photo, then click Your enterprises.
-
In the list of enterprises, click the enterprise you want to view.
-
In the enterprise account sidebar, click Settings.
-
In the left sidebar, click Security.
-
Under "IP allow list", to the right of the entry you want to delete, click Delete.

-
To permanently delete the entry, click Yes, delete this IP allow list entry.

Using GitHub Actions with an IP allow list
Warning: If you use an IP allow list and would also like to use GitHub Actions, you must use self-hosted runners. For more information, see "Hosting your own runners."
To allow your self-hosted runners to communicate with GitHub, add the IP address or IP address range of your self-hosted runners to the IP allow list. For more information, see "Adding an allowed IP address."
Managing your enterprise account's SSH certificate authorities
Enterprise owners can add and delete an enterprise account's SSH certificate authorities (CA).
By adding an SSH CA to your enterprise account, you can allow members of any organization owned by your enterprise account to access that organization's repositories using SSH certificates you provide. You can require that members use SSH certificates to access organization resources, unless SSH is disabled in your repository. For more information, see "About SSH certificate authorities."
Adding an SSH certificate authority
When you issue each client certificate, you must include an extension that specifies which GitHub user the certificate is for. For more information, see "About SSH certificate authorities."
-
In the top-right corner of GitHub, click your profile photo, then click Your enterprises.
-
In the list of enterprises, click the enterprise you want to view.
-
In the enterprise account sidebar, click Settings.
-
In the left sidebar, click Security.
-
To the right of "SSH Certificate Authorities", click New CA.

-
Under "Key," paste your public SSH key.

-
Click Add CA.
-
Optionally, to require members to use SSH certificates, select Require SSH Certificates, then click Save.

Deleting an SSH certificate authority
Deleting a CA cannot be undone. If you want to use the same CA in the future, you'll need to upload the CA again.
-
In the top-right corner of GitHub, click your profile photo, then click Your enterprises.
-
In the list of enterprises, click the enterprise you want to view.
-
In the enterprise account sidebar, click Settings.
-
In the left sidebar, click Security.
-
Under "SSH Certificate Authorities", to the right of the CA you want to delete, click Delete.
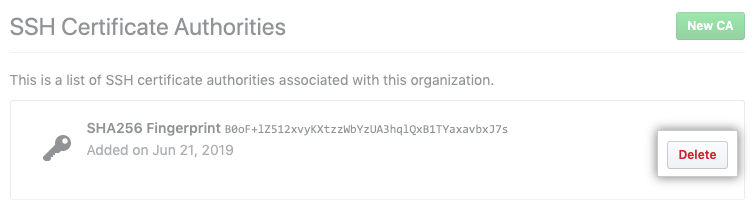
-
Read the warning, then click I understand, please delete this CA.
