About classrooms
A classroom in GitHub Classroom is where teachers and students interact during a course. Teachers can create a student roster for the classroom, then create, assign, review, and grade assignments within the classroom.

About management of classrooms
GitHub Classroom uses organization accounts on GitHub to manage permissions, administration, and security for each classroom that you create. Each organization can have multiple classrooms.
After you create a classroom, GitHub Classroom will prompt you to invite teaching assistants (TAs) and admins to the classroom. Each classroom can have one or more admins. Admins can be teachers, TAs, or any other course administrator who you'd like to have control over your classrooms on GitHub Classroom.
Invite TAs and admins to your classroom by inviting the user accounts on GitHub to your organization as organization owners and sharing the URL for your classroom. Organization owners can administer any classroom for the organization. For more information, see "Permission levels for an organization" and "Inviting users to join your organization."
When you're done using a classroom, you can archive the classroom and refer to the classroom, roster, and assignments later, or you can delete the classroom if you no longer need the classroom.
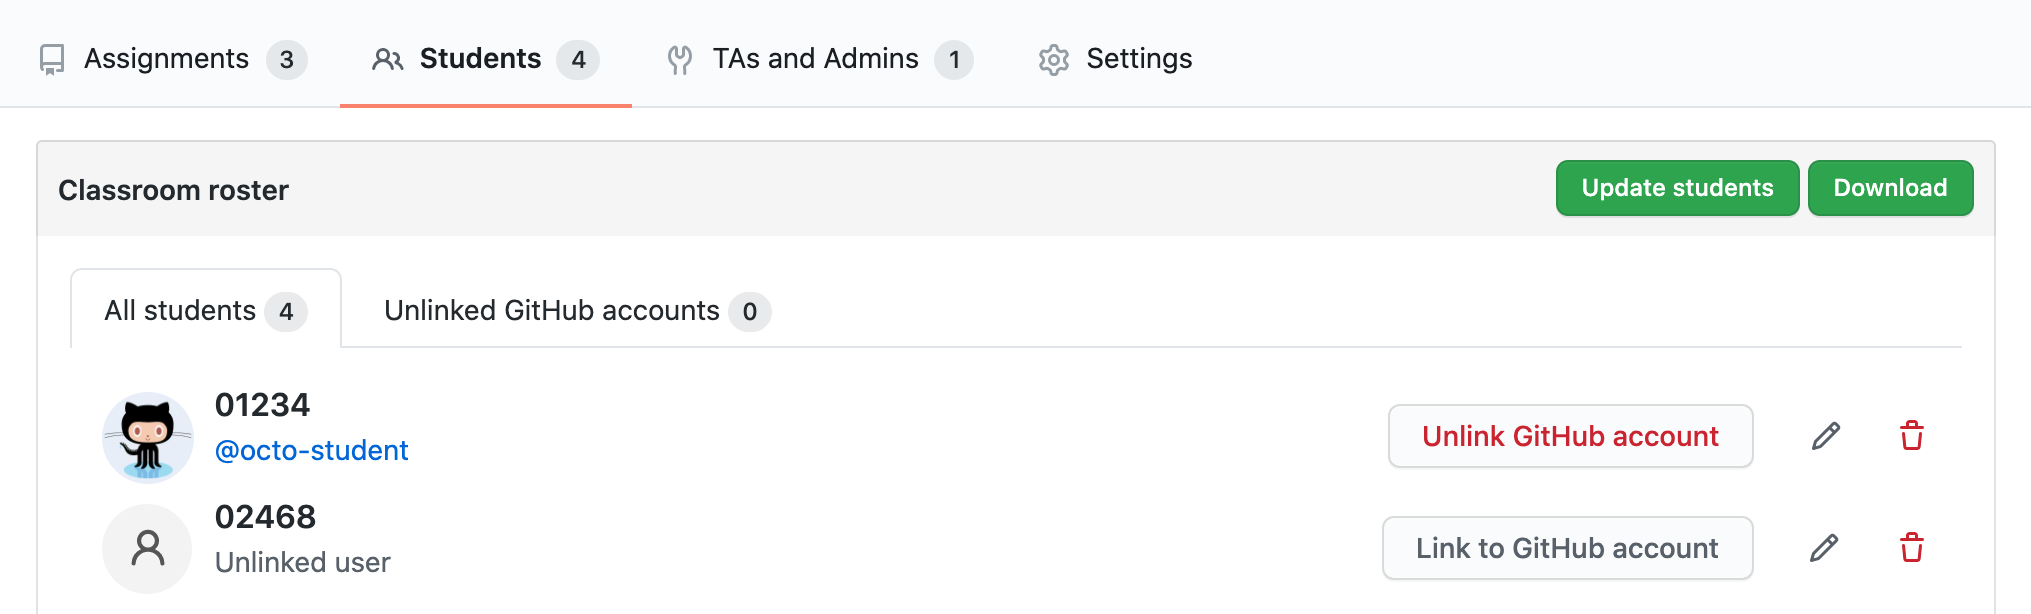
About classroom rosters
Each classroom has a roster. A roster is a list of identifiers for the students who participate in your course.
When you first share the URL for an assignment with a student, the student must sign into GitHub with a user account to link the user account to an identifier for the classroom. After the student links a user account, you can see the associated user account in the roster. You can also see when the student accepts or submits an assignment.
Prerequisites
You must have an organization account on GitHub to manage classrooms on GitHub Classroom. For more information, see "Types of GitHub accounts" and "Creating a new organization from scratch."
You must authorize the OAuth app for GitHub Classroom for your organization to manage classrooms for your organization account. For more information, see "Authorizing OAuth Apps."
Creating a classroom
- Sign into GitHub Classroom.
- Click New classroom.
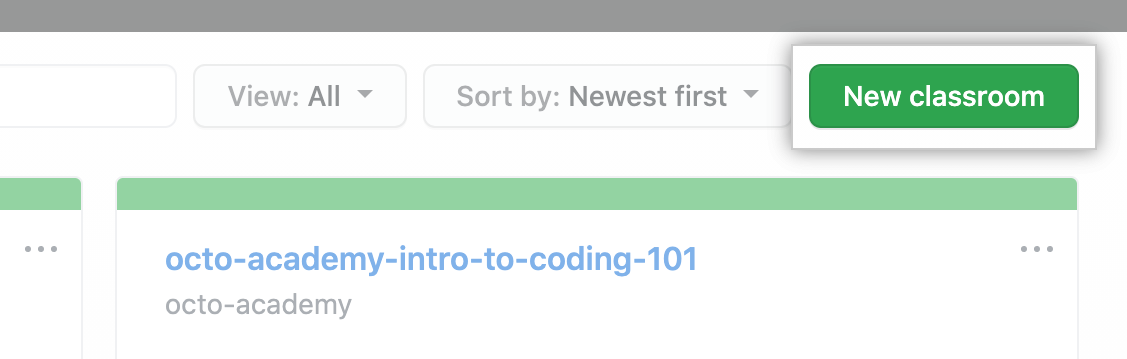
- In the list of organizations, click the organization you'd like to use for your classroom. Optionally, you can create a new organization. For more information, see "Creating a new organization from scratch."

- Type the name for your classroom.

- Click Create classroom.

After you create a classroom, you can begin creating assignments for students. For more information, see "Use the Git and GitHub starter assignment," "Create an individual assignment," or "Create a group assignment."
Creating a roster for your classroom
You can create a roster of the students who participate in your course.
If your course already has a roster, you can update the students on the roster or delete the roster. For more information, see "Adding a student to the roster for your classroom" or "Deleting a roster for a classroom."
- Sign into GitHub Classroom.
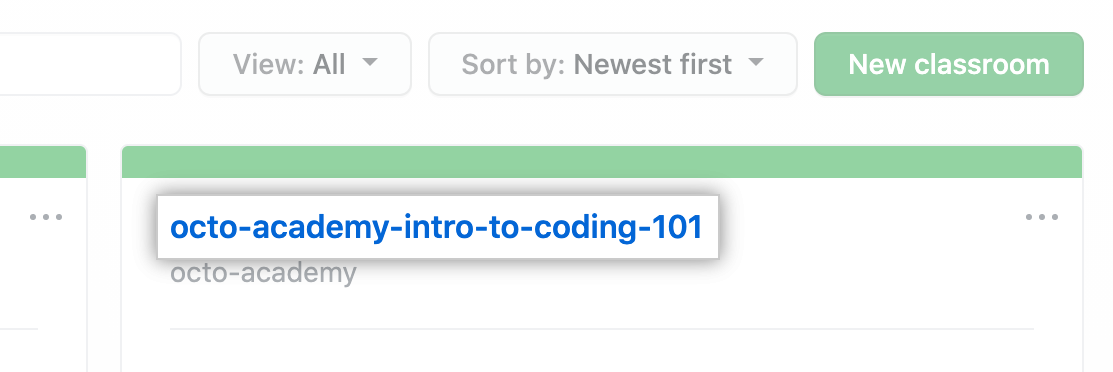
- In the list of classrooms, click the classroom you want to view.
- Under the classroom name, click Students.

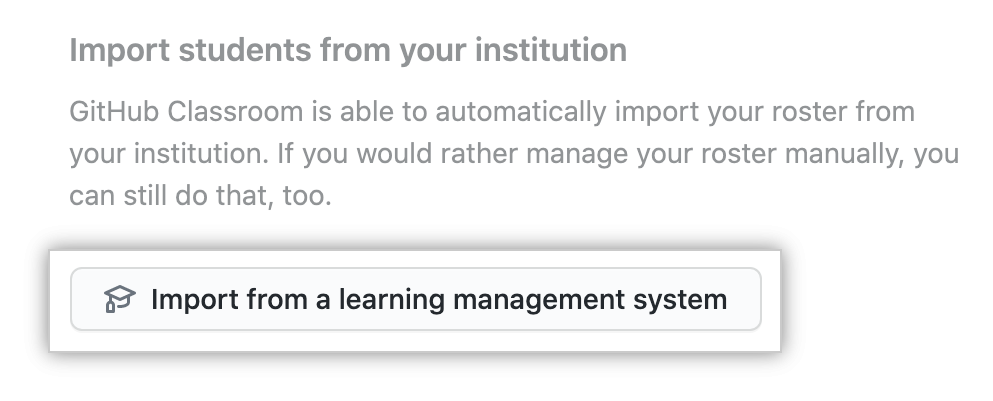
- To connect GitHub Classroom to your LMS and import a roster, click Import from a learning management system and follow the instructions. For more information, see "Connect a learning management system to GitHub Classroom."
- Provide the student identifiers for your roster.
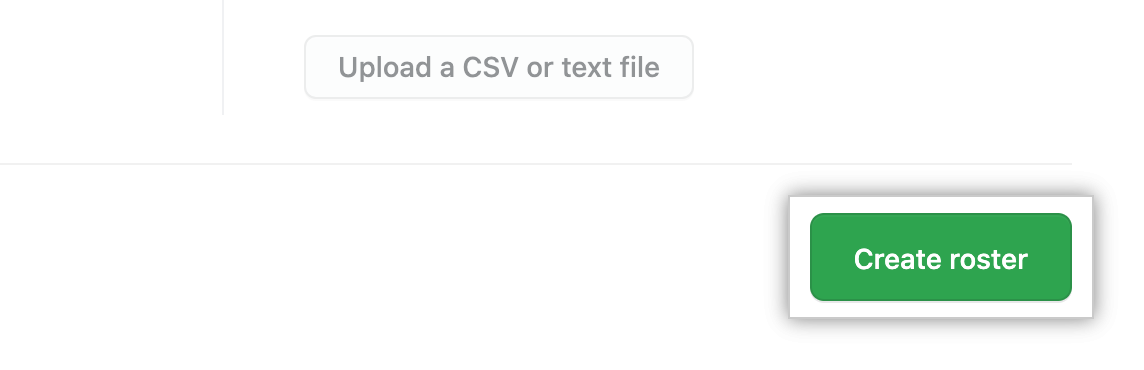
- To import a roster by uploading a file containing student identifiers, click Upload a CSV or text file.
- To create a roster manually, type your student identifiers.

- Click Create roster.
Adding students to the roster for your classroom
Your classroom must have an existing roster to add students to the roster. For more information about creating a roster, see "Creating a roster for your classroom."
- Sign into GitHub Classroom.
- In the list of classrooms, click the classroom you want to view.
- Under the classroom name, click Students.
- To the right of "Classroom roster", click Update students.

- Follow the instructions to add students to the roster.
- To import students from an LMS, click Sync from a learning management system. For more information about importing a roster from an LMS, see "Connect a learning management system to GitHub Classroom."
- To manually add students, under "Manually add students", click Upload a CSV or text file or type the identifiers for the students, then click Add roster entries.

Renaming a classroom
- Sign into GitHub Classroom.
- In the list of classrooms, click the classroom you want to view.
- Under the classroom name, click Settings.

- Under "Classroom name", type a new name for the classroom.

- Click Rename classroom.

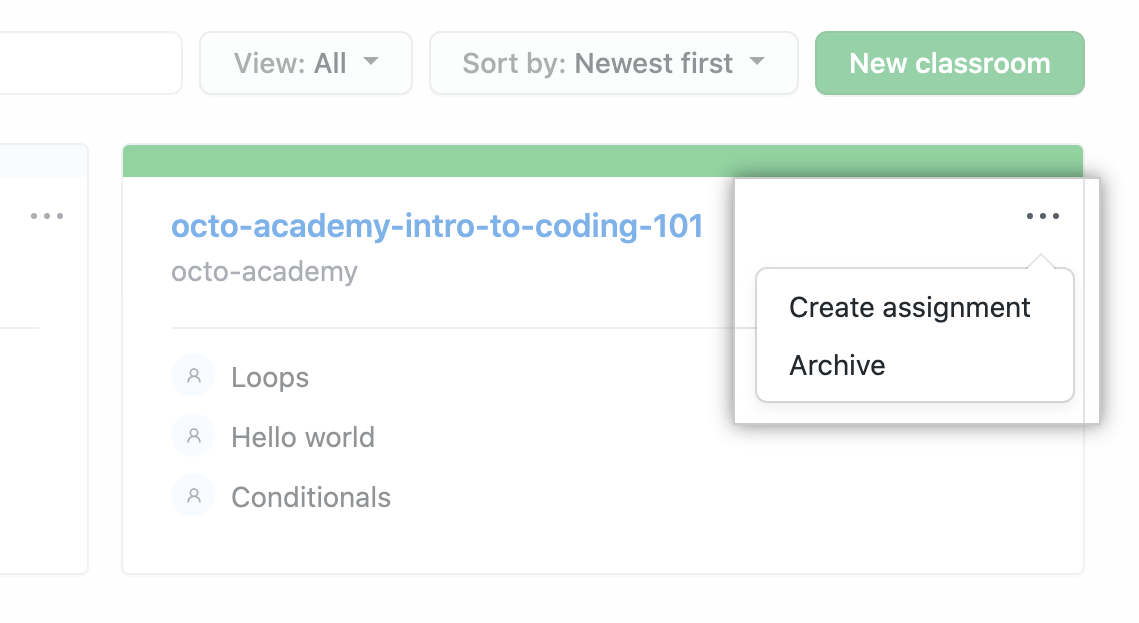
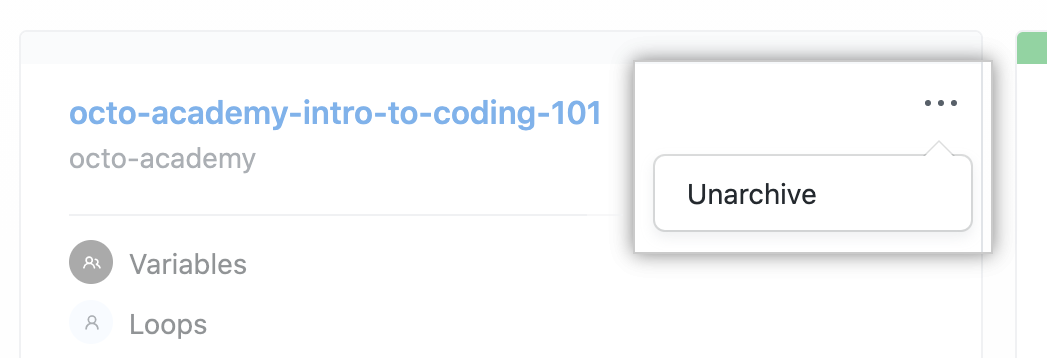
Archiving or unarchiving a classroom
You can archive a classroom that you no longer use on GitHub Classroom. When you archive a classroom, you can't create new assignments or edit existing assignments for the classroom. Students can't accept invitations to assignments in archived classrooms.
- Sign into GitHub Classroom.
- To the right of a classroom's name, select the drop-down menu, then click Archive.
- To unarchive a classroom, to the right of a classroom's name, select the drop-down menu, then click Unarchive.
Deleting a roster for a classroom
- Sign into GitHub Classroom.
- In the list of classrooms, click the classroom you want to view.
- Under the classroom name, click Students.
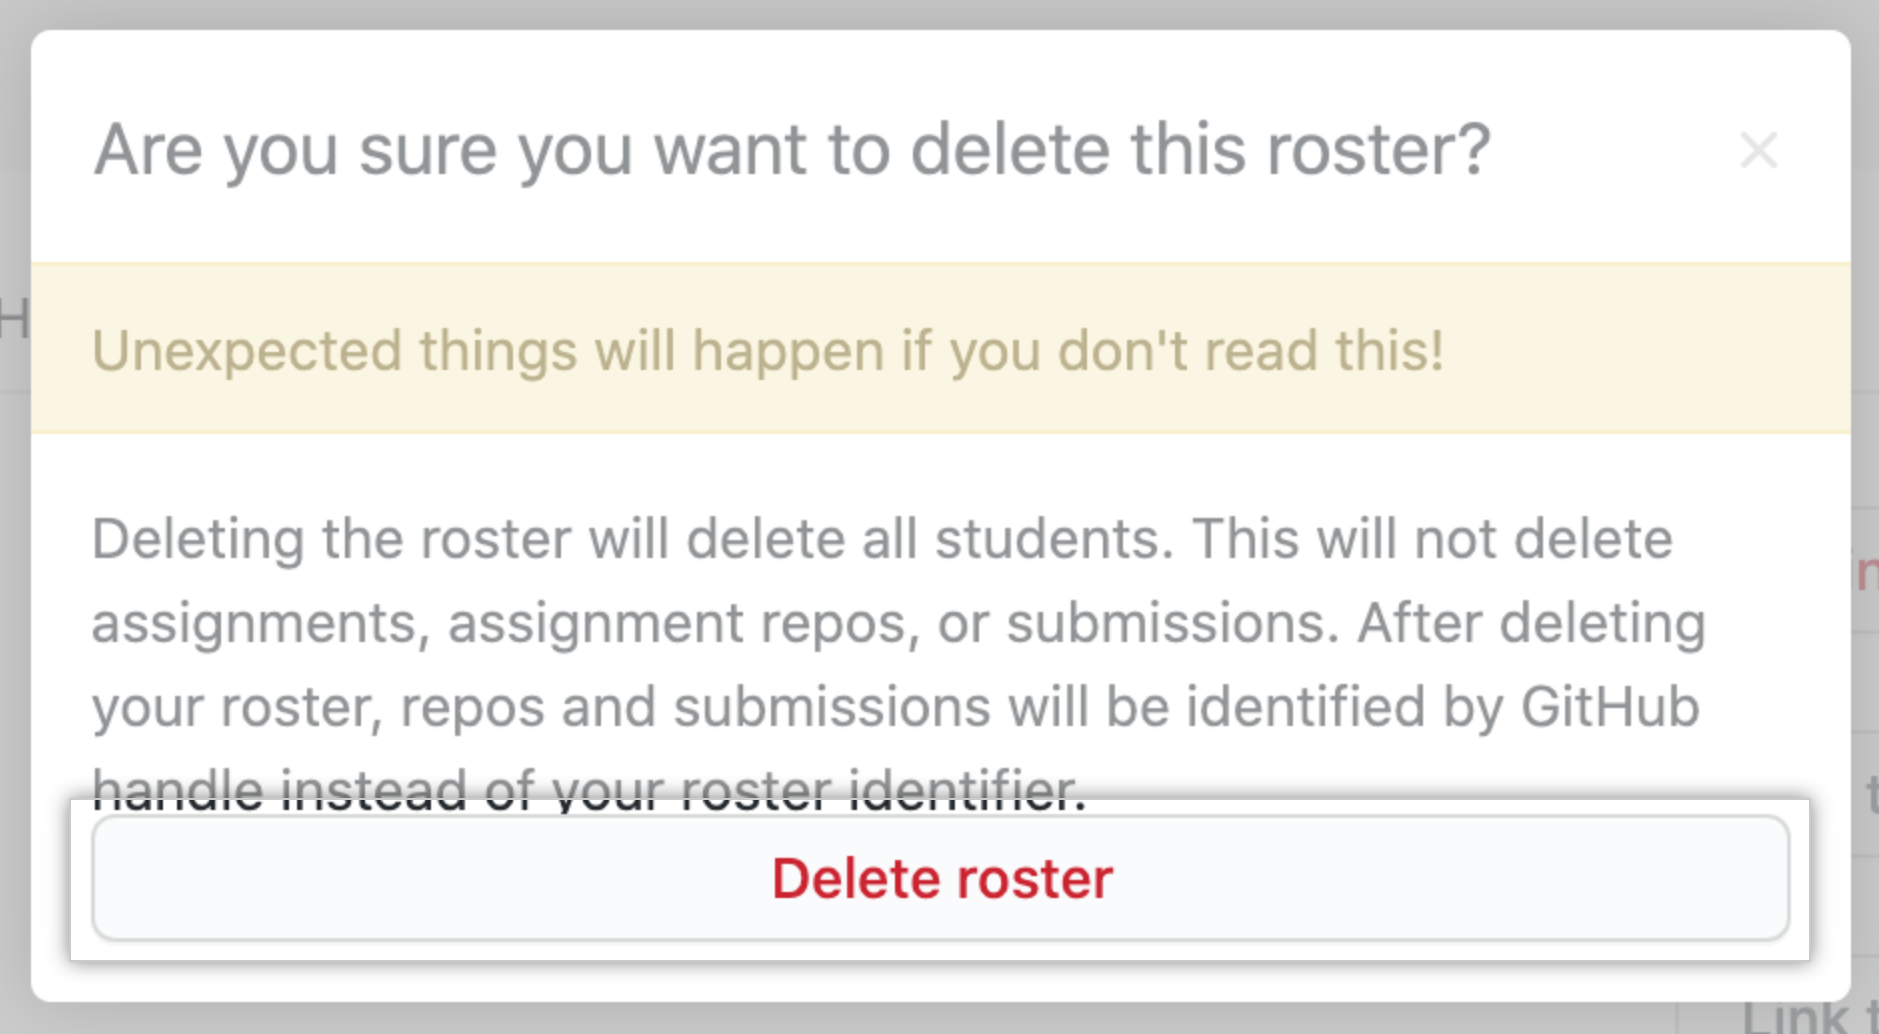
- Under "Delete this roster", click Delete roster.

- Read the warnings, then click Delete roster.
Deleting a classroom
- Sign into GitHub Classroom.
- In the list of classrooms, click the classroom you want to view.
- Under the classroom name, click Settings.
- To the right of "Delete this classroom", click Delete classroom.

- Read the warnings.
- To verify that you're deleting the correct classroom, type the name of the classroom you want to delete.

- Click Delete classroom.
