About SAML and SCIM with Okta
You can control access to your GitHub organization and other web applications from one central interface by configuring the organization to use SAML SSO and SCIM with Okta, an Identity Provider (IdP).
SAML SSO controls and secures access to organization resources like repositories, issues, and pull requests. SCIM automatically adds, manages, and removes members' access to your GitHub organization when you make changes in Okta. For more information, see "About identity and access management with SAML single sign-on" and "About SCIM."
After you enable SCIM, the following provisioning features are available for any users that you assign your GitHub Enterprise Cloud application to in Okta.
| Feature | Description |
|---|---|
| Push New Users | When you create a new user in Okta, the user will receive an email to join your GitHub organization. |
| Push User Deactivation | When you deactivate a user in Okta, Okta will remove the user from your GitHub organization. |
| Push Profile Updates | When you update a user's profile in Okta, Okta will update the metadata for the user's membership in your GitHub organization. |
| Reactivate Users | When you reactivate a user in Okta, Okta will send an email invitation for the user to rejoin your GitHub organization. |
Prerequisites
You must use the "Classic UI" in Okta. For more information, see Organized Navigation on the Okta blog.

Adding the GitHub Enterprise Cloud application in Okta
-
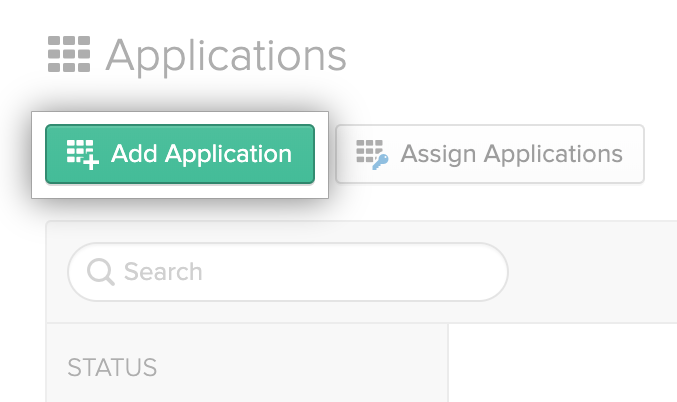
In the Okta Dashboard, click Applications.

-
Click Add application.
-
In the search field, type "GitHub Enterprise Cloud".

-
To the right of "Github Enterprise Cloud - Organization", click Add.

-
In the GitHub Organization field, type the name of your GitHub organization. For example, if your organization's URL is https://github.com/octo-org, the organization name would be
octo-org.
-
Click Done.
Enabling and testing SAML SSO
- In the Okta Dashboard, click Applications.
- In the list of applications, click the label for the application you created for the organization that uses GitHub Enterprise Cloud.

- Assign the application to your user in Okta. For more information, see Assign applications to users in the Okta documentation.
- Under the name of the application, click Sign on.

- Under "SIGN ON METHODS", click View Setup Instructions.

- Enable and test SAML SSO on GitHub using the sign on URL, issuer URL, and public certificates from the "How to Configure SAML 2.0" guide. For more information, see "Enabling and testing SAML single sign-on for your organization."
Configuring access provisioning with SCIM in Okta
-
In the Okta Dashboard, click Applications.
-
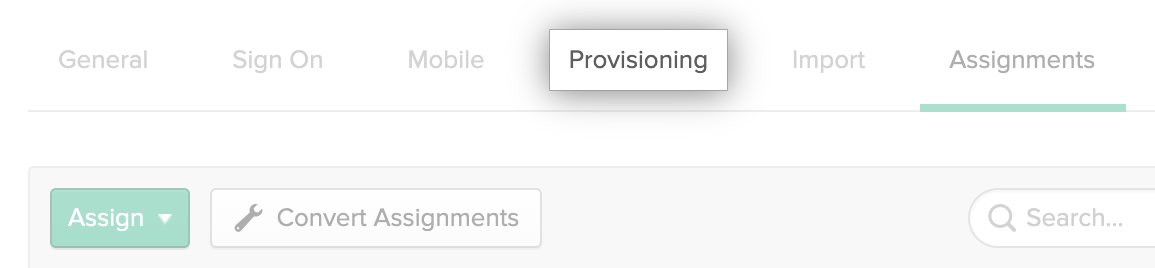
In the list of applications, click the label for the application you created for the organization that uses GitHub Enterprise Cloud.
-
Under the name of the application, click Provisioning.
-
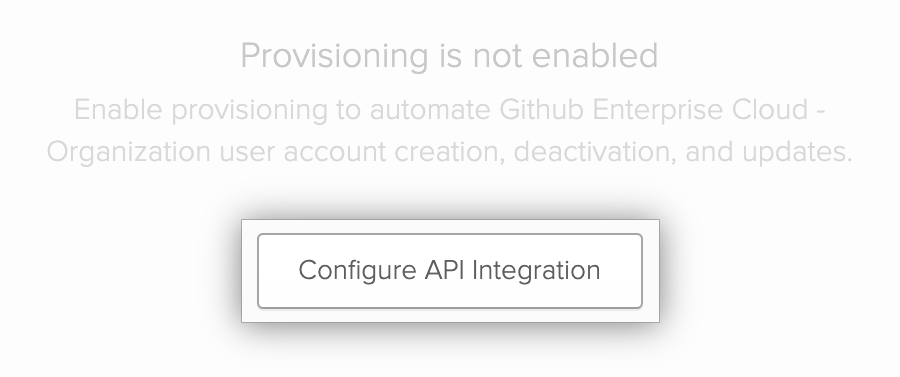
Click Configure API Integration.
-
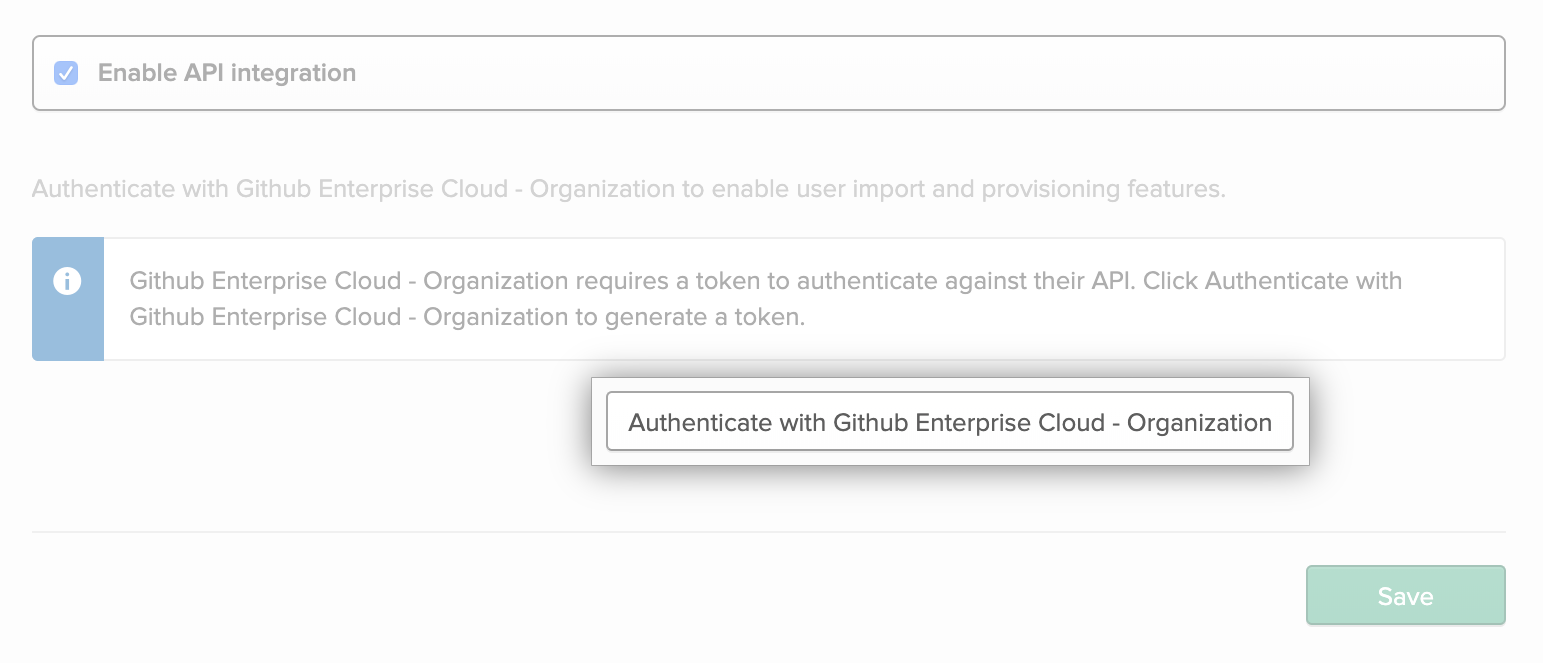
Select Enable API integration.

-
Click Authenticate with Github Enterprise Cloud - Organization.
-
To the right of your organization's name, click Grant.

Note: If you don't see your organization in the list, go to
https://github.com/orgs/ORGANIZATION-NAME/ssoin your browser and authenticate with your organization via SAML SSO using your administrator account on the IdP. For example, if your organization's name isocto-org, the URL would behttps://github.com/orgs/octo-org/sso. For more information, see "About authentication with SAML single sign-on." -
Click Authorize OktaOAN.

-
Click Save.

-
To the right of "Provisioning to App", click Edit.

-
To the right of "Create Users", select Enable.

-
To the right of "Update User Attributes", select Enable.

-
To the right of "Deactivate Users", select Enable.

-
Click Save.

Further reading
- "Configuring SAML single sign-on for your enterprise account using Okta"
- "Managing team synchronization for your organization"
- Understanding SAML in the Okta documentation
- Understanding SCIM in the Okta documentation