Changing your profile picture
Your profile picture helps identify you across GitHub in pull requests, comments, contributions pages, and graphs.
When you sign up for an account, GitHub provides you with a randomly generated "identicon". Your identicon generates from a hash of your user ID, so there's no way to control its color or pattern. You can replace your identicon with an image that represents you.
Tip: Your profile picture should be a PNG, JPG, or GIF file under 1 MB in size. For the best quality rendering, we recommend keeping the image at about 500 by 500 pixels.
Setting a profile picture
- In the upper-right corner of any page, click your profile photo, then click Settings.
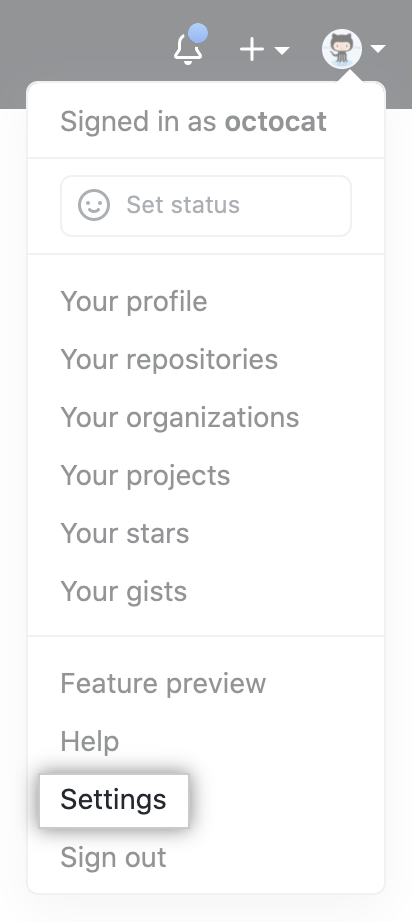
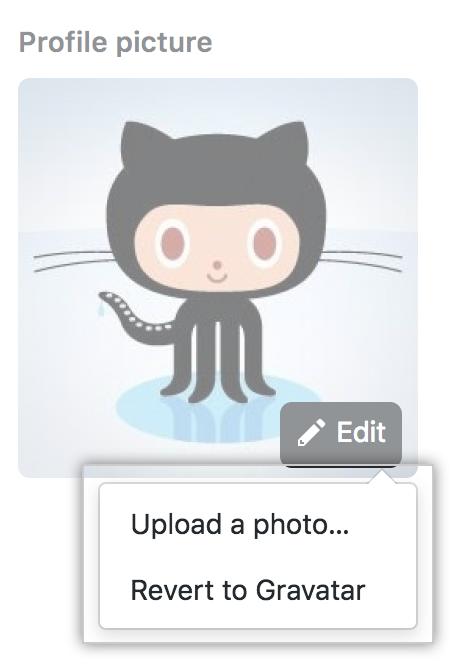
- Under Profile Picture, click Edit.

- Click Upload a photo....
- Crop your picture. When you're done, click Set new profile picture.

Resetting your profile picture to the identicon
- In the upper-right corner of any page, click your profile photo, then click Settings.
- Under Profile Picture, click Edit.
- To revert to your identicon, click Remove photo. If your email address is associated with a Gravatar, you cannot revert to your identicon. Click Revert to Gravatar instead.
Changing your profile name
You can change the name that is displayed on your profile. This name may also be displayed next to comments you make on private repositories owned by an organization. For more information, see "Managing the display of member names in your organization."
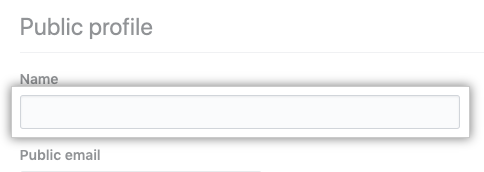
- In the upper-right corner of any page, click your profile photo, then click Settings.
- Under "Name", type the name you want to be displayed on your profile.
Adding a bio to your profile
Add a bio to your profile to share information about yourself with other GitHub users. With the help of @mentions and emoji, you can include information about where you currently or have previously worked, what type of work you do, or even what kind of coffee you drink.
For a longer-form and more prominent way of displaying customized information about yourself, you can also use a profile README. For more information on the profile README, see "Managing your profile README."
Note: If you have the activity overview section enabled for your profile and you @mention an organization you're a member of in your profile bio, then that organization will be featured first in your activity overview. For more information, see "Showing an overview of your activity on your profile."
-
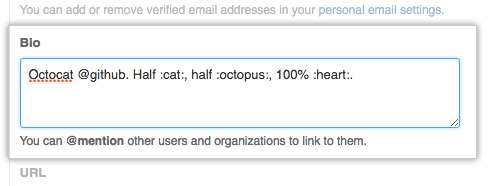
In the upper-right corner of any page, click your profile photo, then click Settings.
-
Under Bio, add the content that you want displayed on your profile. The bio field is limited to 160 characters.
Tip: When you @mention an organization, only those that you're a member of will autocomplete. You can still @mention organizations that you're not a member of, like a previous employer, but the organization name won't autocomplete for you.
-
Click Update profile.

Setting a status
You can set a status to display information about your current availability on GitHub. Your status will show:
- on your GitHub profile page.
- when people hover over your username or avatar on GitHub.
- on a team page for a team where you're a team member. For more information, see "About teams."
- on the organization dashboard in an organization where you're a member. For more information, see "About your organization dashboard."
When you set your status, you can also let people know that you have limited availability on GitHub.


If you select the "Busy" option, when people @mention your username, assign you an issue or pull request, or request a pull request review from you, a note next to your username will show that you're busy.
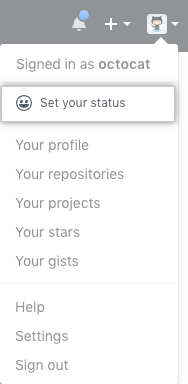
- In the top right corner of GitHub, click your profile photo, then click Set your status or, if you already have a status set, click your current status.
- To add custom text to your status, click in the text field and type a status message.
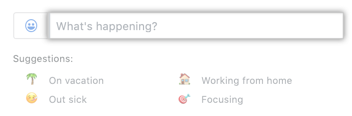
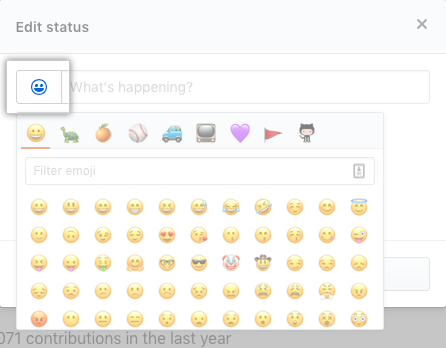
- Optionally, to set an emoji status, click the smiley icon and select an emoji from the list.
- Optionally, if you'd like to share that you have limited availability, select "Busy."

- Use the Clear status drop-down menu, and select when you want your status to expire. If you don't select a status expiration, you will keep your status until you clear or edit your status.

- Use the drop-down menu and click the organization you want your status visible to. If you don't select an organization, your status will be public.

- Click Set status.

Displaying badges on your profile
When you participate in certain programs, GitHub automatically displays a badge on your profile.
| Badge | Program | Description |
|---|---|---|
| Arctic Code Vault Contributor | If you authored any commit(s) on the default branch of a repository that was archived in the 2020 Arctic Vault program, you'll get an Arctic Code Vault Contributor badge on your profile. For more information on the program, see GitHub Archive Program. | |
| Developer Program Member | If you're a registered member of the GitHub Developer Program, building an app with the GitHub API, you'll get a Developer Program Member badge on your profile. For more information on the GitHub Developer Program, see GitHub Developer. | |
| GitHub Sponsor | If you sponsored an open source contributor through GitHub Sponsors you'll get a GitHub Sponsor badge on your profile. For more information, see "Sponsoring open source contributors." | |
| Pro | If you use GitHub Pro you'll get a PRO badge on your profile. For more information about GitHub Pro, see "GitHub's products." |
Disabling badges on your profile
You can disable some of the badges for GitHub programs you're participating in, including the PRO and Arctic Code Vault badges.
- In the upper-right corner of any page, click your profile photo, then click Settings.
- Under "Profile settings", deselect the badge you want you disable.
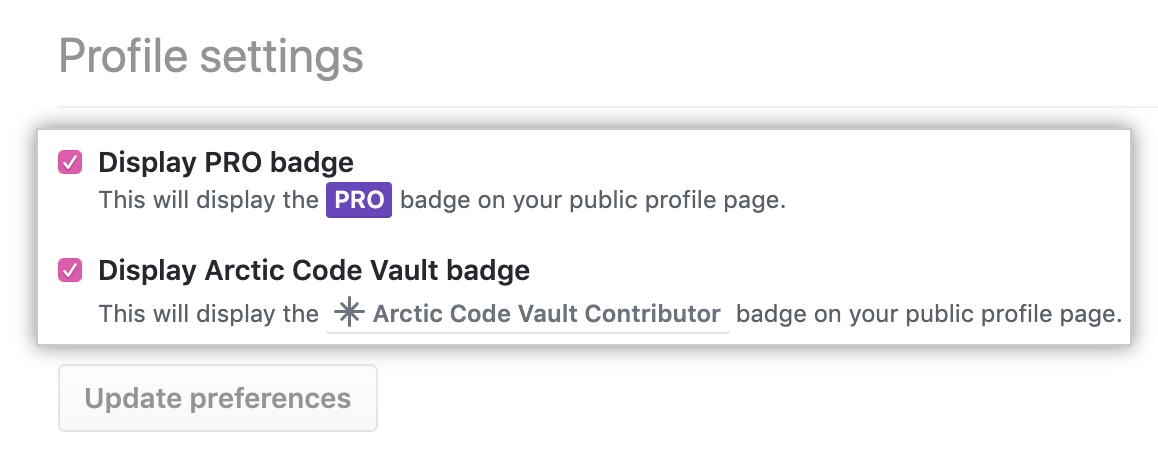
- Click Update preferences.